12 Recycled Tin Can Garden Ideas That Look Surprisingly Cute
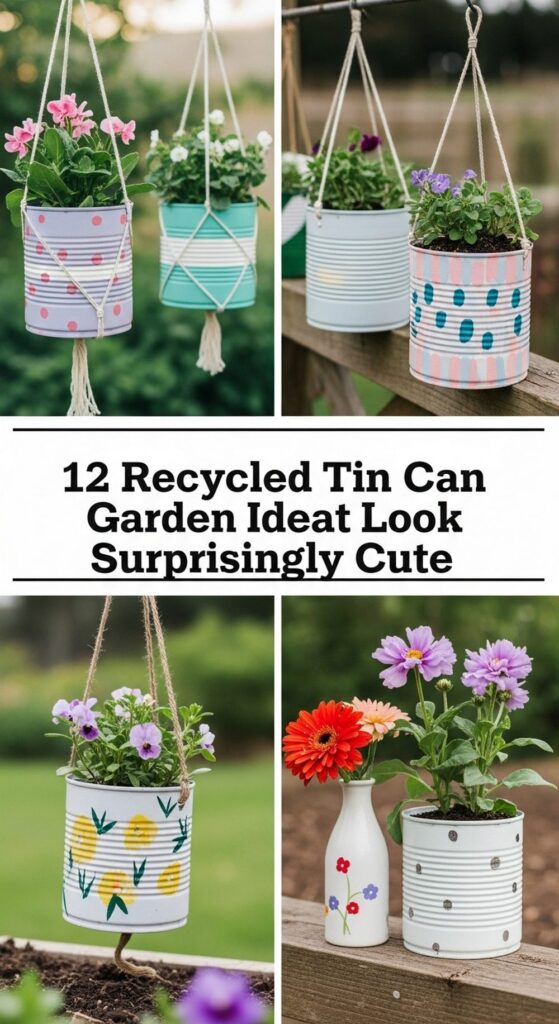
If you’ve been tossing tin cans straight into the recycling bin, your garden is about to get a charming little upgrade. Those humble cans can become some of the cutest decor pieces in your outdoor space, from hanging lanterns to fairy-sized planters.
This post is perfect for home gardeners, renters, and small-space owners who love budget-friendly DIY projects. You’ll find simple, adorable ways to turn plain metal cans into colorful planters, lanterns, bird feeders, and more. Each idea is easy to personalize with paint, twine, and plants you already love, helping you create a garden that feels more welcoming, playful, and uniquely yours without spending much at all.
Quick List
- Rail-Hanging Herb Tin Cans
- Clustered Pastel Flower Can Corner
- Hanging Tin Can Lantern String
- Tin Can Wind Chime With Beads
- Succulent Tin Can Table Trio
- Tin Can Vertical Fence Garden
- Cutwork Tin Can Candle Holders
- Tin Can Bird Feeder Perch
- Crate Of Colorful Veggie Tin Cans
- Vintage-Label Kitchen Garden Cans
- Tin Can Fairy House Planters
- Tin Can Tool Caddy Planter
1. Rail-Hanging Herb Tin Cans
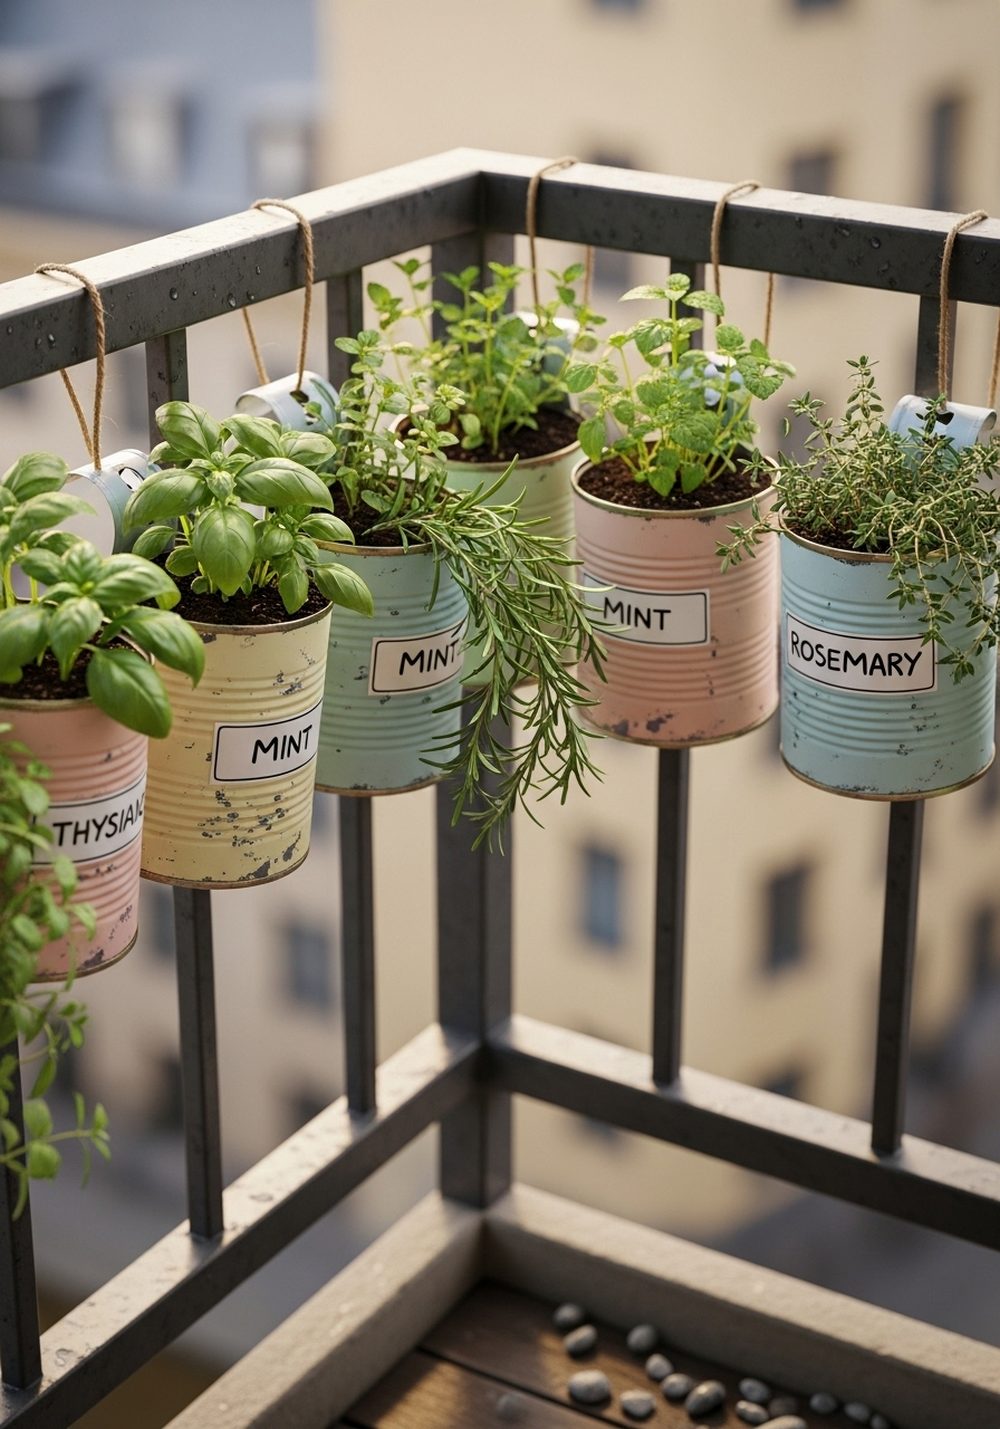
Turn your balcony or deck rail into a mini herb bar with tin cans hung along the edge. Clean your cans, punch two holes near the top, and thread through sturdy wire or jute to hook over the railing. Fill with potting mix and herbs like basil, mint, and thyme for an instant green border that smells amazing every time you step outside. Soft pastel paint and a few drips or brush marks keep the look sweet and handmade.
- Best For: Small balconies, rental railings, and narrow decks.
- Budget Tip: Reuse soup or bean cans and leftover paint; buy one multipack of herbs to split.
- Styling Idea: Use a single color family (all blues or all neutrals) for a calm, cohesive look.
- Practical Note: Add a few drainage holes in the bottom of each can and water gently to avoid runoff.
- Care & Maintenance: Trim herbs regularly for bushier growth and replace tired plants seasonally.
2. Clustered Pastel Flower Can Corner
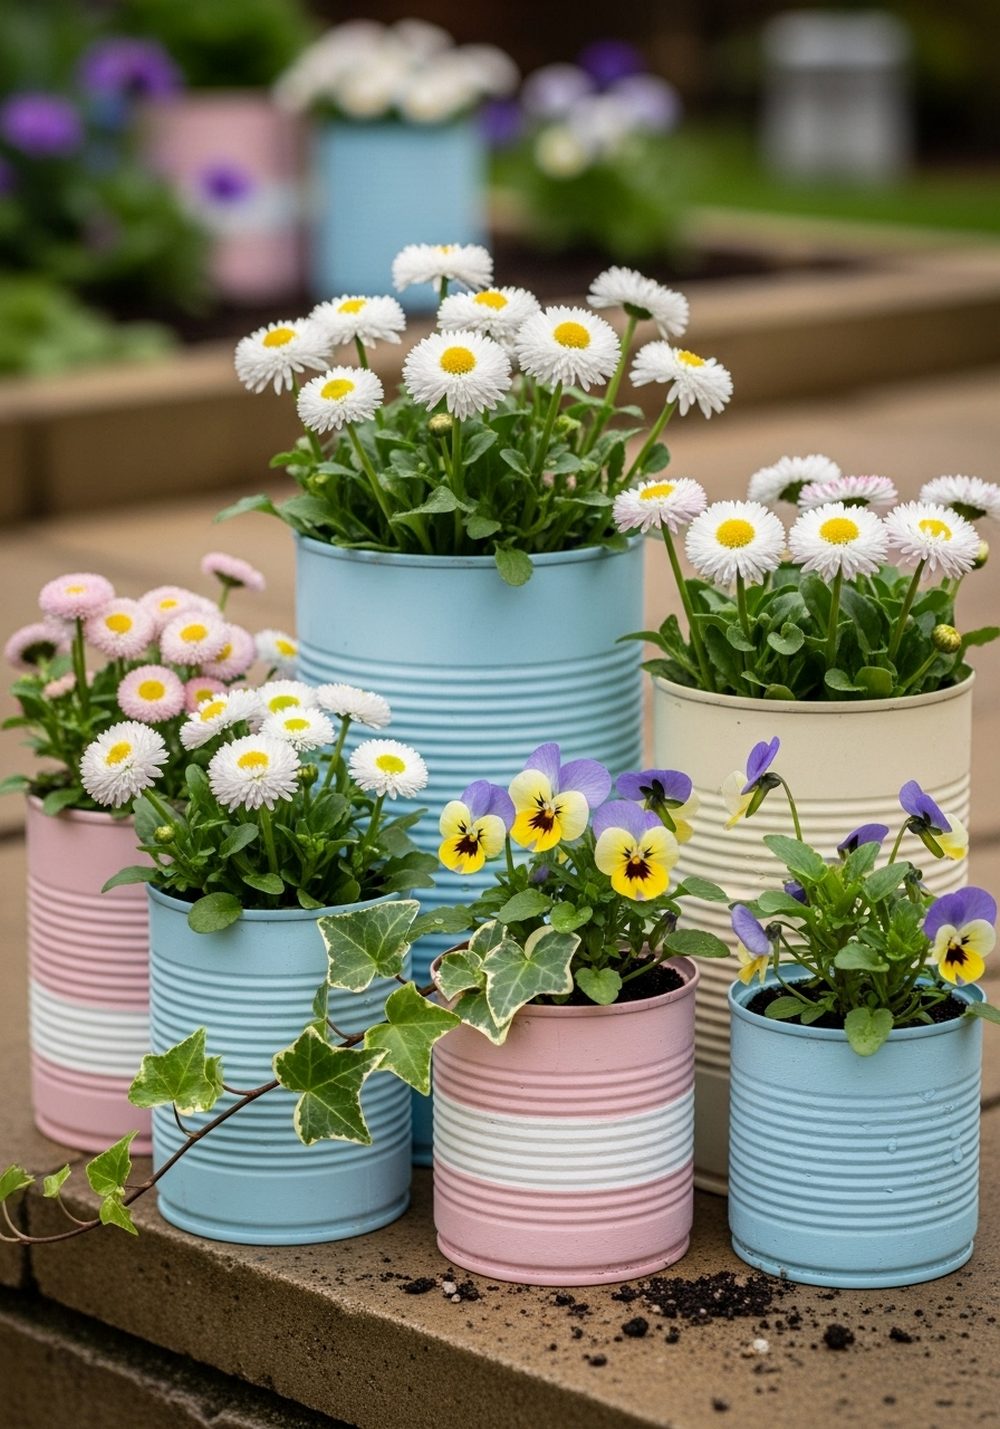
Gather a group of painted tin cans and turn an unused corner or step into a pretty little flower display. Paint each can in chalky pastel shades, then plant with cheerful blooms like violas, daisies, or mini petunias. Cluster them in different heights on a step, crate, or low stool so the flowers spill and mingle together. The result looks like a tiny cottage garden squeezed into a single, soft-colored corner.
- Best For: Patio or doorstep corners that need a pop of color.
- Budget Tip: Use tester pots of paint and seasonal sale flowers or multipacks.
- Styling Idea: Keep the palette soft—mint, blush, lavender, cream—for a gentle, “cute” aesthetic.
- Practical Note: Group cans in a shallow tray to catch excess water and protect surfaces.
- Extra Idea: Wrap a few cans with lace or ribbon scraps to mix textures.
3. Hanging Tin Can Lantern String
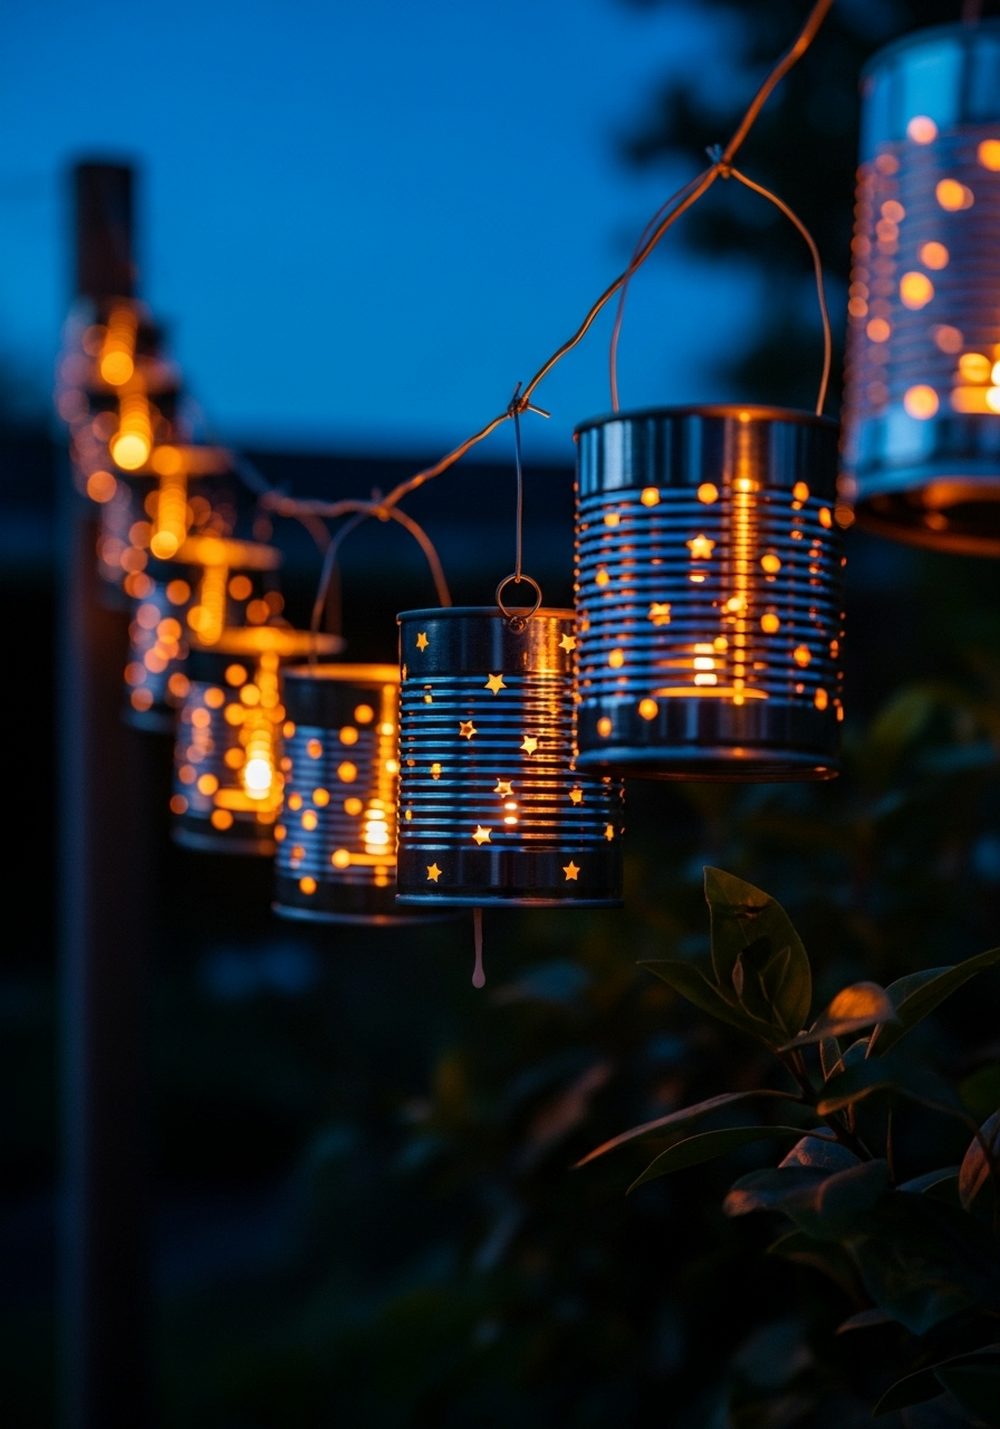
Create a magical glow after dark by turning tin cans into lanterns and stringing them across your seating area. Punch simple patterns—stars, hearts, or dots—into the sides using a nail and hammer, then thread wire through the tops to hang from a sturdy line or branch. Add tealights or battery candles for a safe, warm shimmer that dances against the metal and surrounding foliage.
- Best For: Evening patios, pergolas, and small garden parties.
- Budget Tip: Use battery-operated tealights you can reuse, and decorate cans with spare paint only if you want.
- Styling Idea: Mix bare metal cans with a few painted in soft whites or golds for a charming mismatched look.
- Practical Note: Keep the string high and secure so it’s out of the way of heads and pets.
- Care & Maintenance: Store the cans under cover when not in use to prevent rusting too fast.
4. Tin Can Wind Chime With Beads
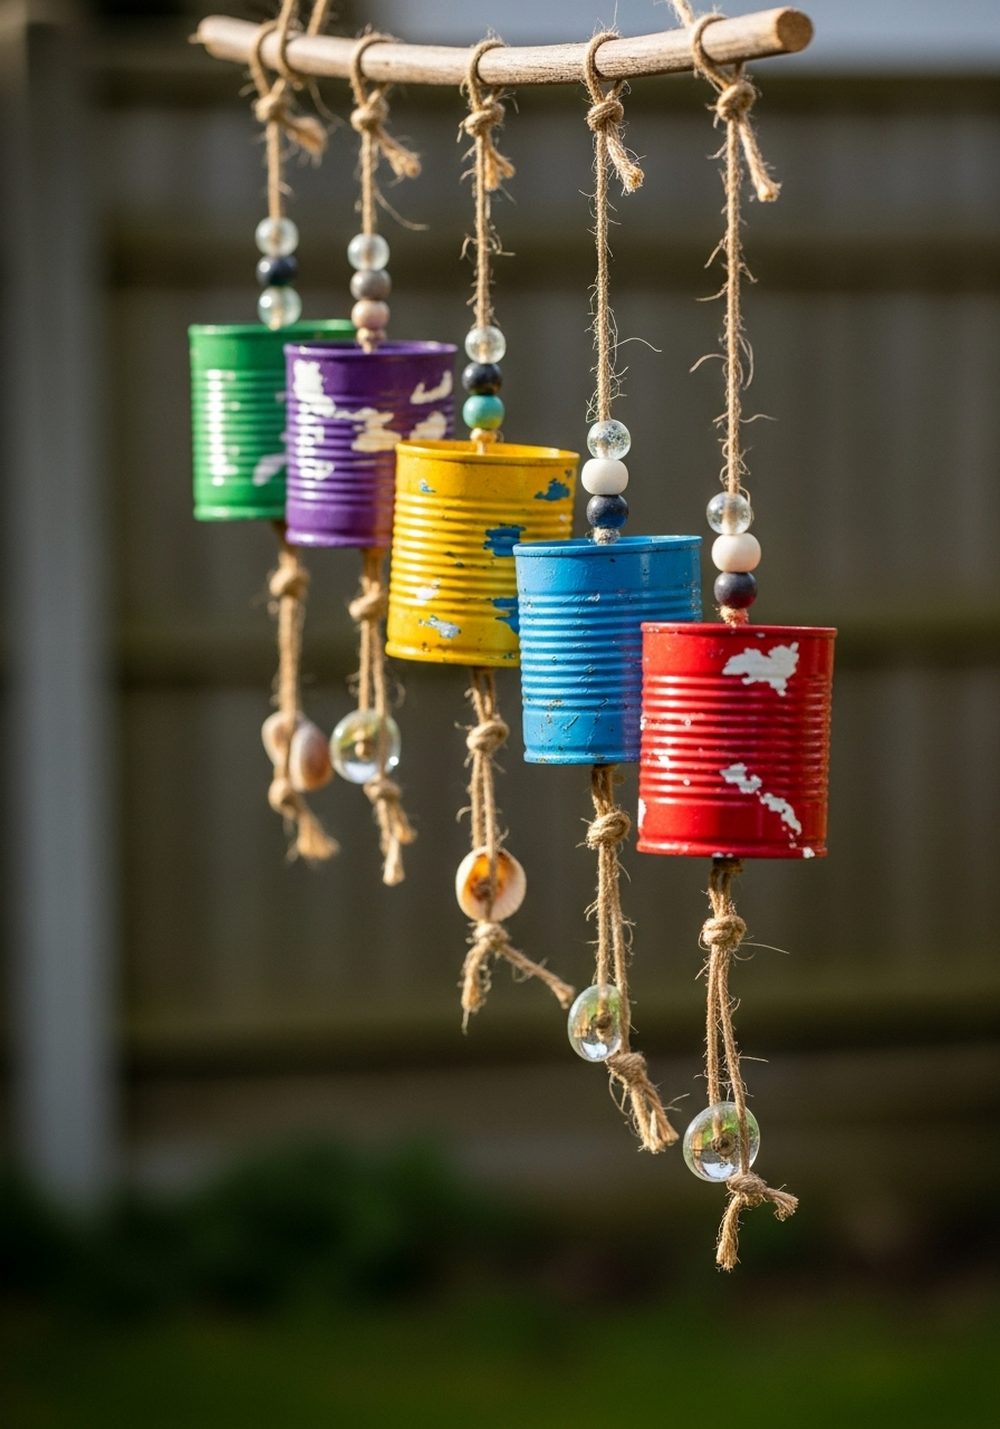
A tin can wind chime adds gentle sound and color to your garden. Paint several small cans in bright shades, then hang them from a length of driftwood or a wooden dowel using jute or fishing line. Thread glass beads, shells, or small metal pieces along the cords to catch the light and add a soft tinkle when the breeze blows. It’s playful, a little boho, and easy to customize with whatever scraps you have.
- Best For: Hanging from porches, overhangs, or sturdy tree branches.
- Budget Tip: Use beads from old jewelry and stick to one small can per string for fewer materials.
- Styling Idea: Choose three main colors and repeat them so the piece feels intentional, not chaotic.
- Practical Note: Check knots and ties regularly to keep the chime secure in windy weather.
- Extra Idea: Add one string of shells or wooden beads for a softer, coastal feel.
5. Succulent Tin Can Table Trio
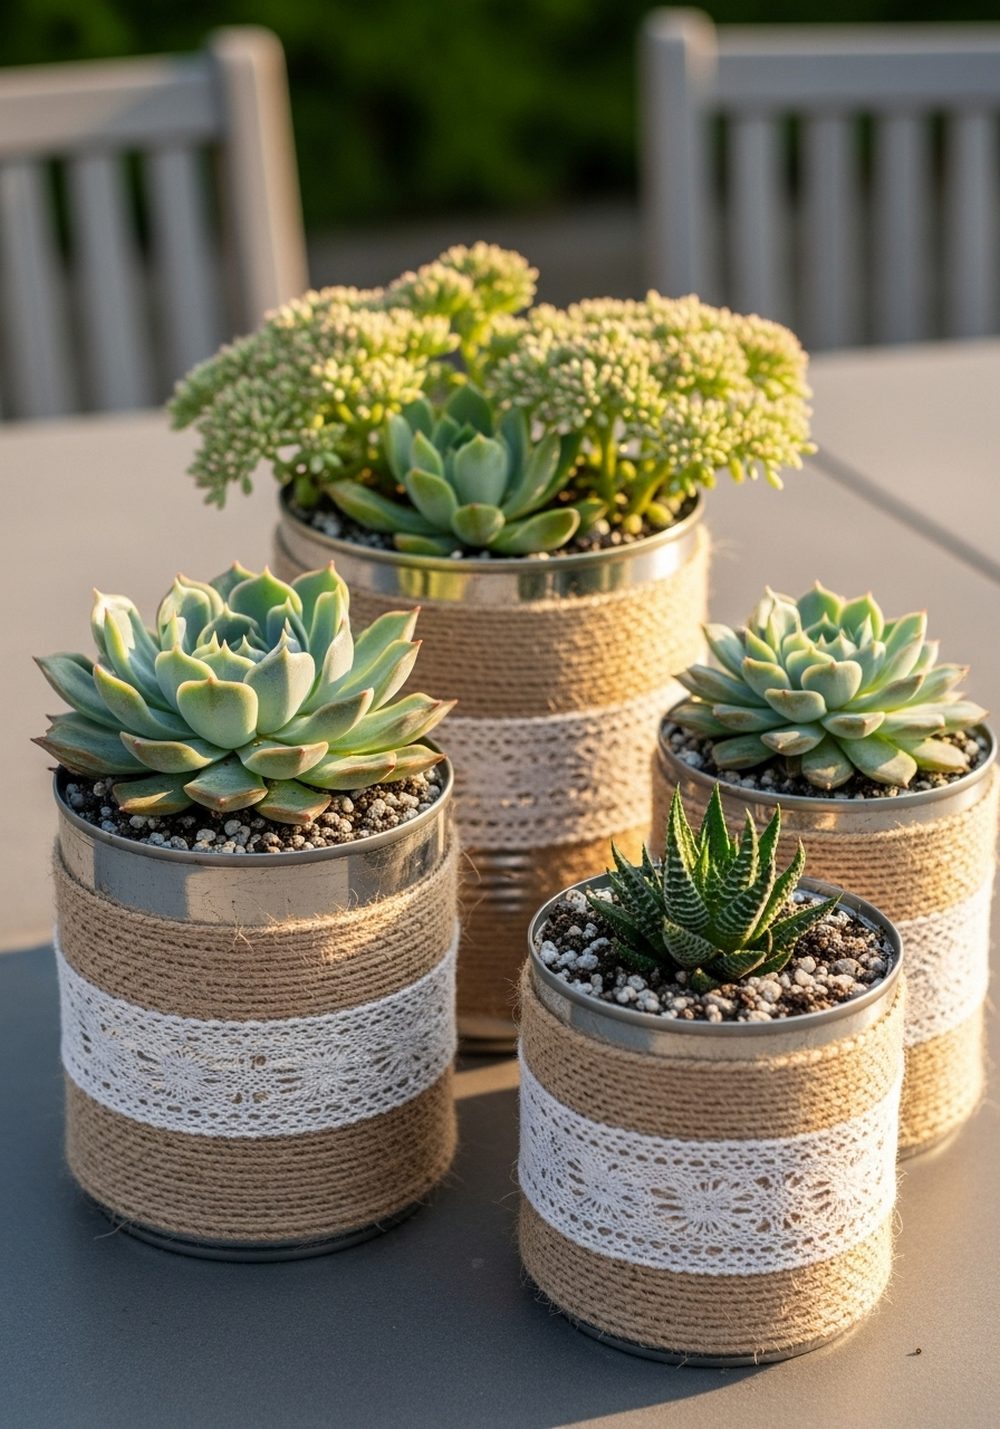
For a low-maintenance, cute centerpiece, group three tin cans as mini succulent planters on your outdoor table. Wrap the cans in jute, lace, or a strip of burlap, then plant tidy succulents like echeveria, sedum, or jade cuttings. Their sculptural shapes and muted greens look lovely against the simple metal and fabric textures. This setup works just as well on a tiny balcony café table as it does on a larger patio dining set.
- Best For: Tabletops, window ledges, and narrow shelves.
- Budget Tip: Propagate succulents from existing plants or buy a mixed tray to split across cans.
- Styling Idea: Keep everything neutral—burlap, cream lace, plain metal—for a calm, natural look.
- Practical Note: Use gritty, free-draining soil and drill multiple drainage holes in each can.
- Care & Maintenance: Water sparingly and turn the cans occasionally so plants grow evenly.
6. Tin Can Vertical Fence Garden
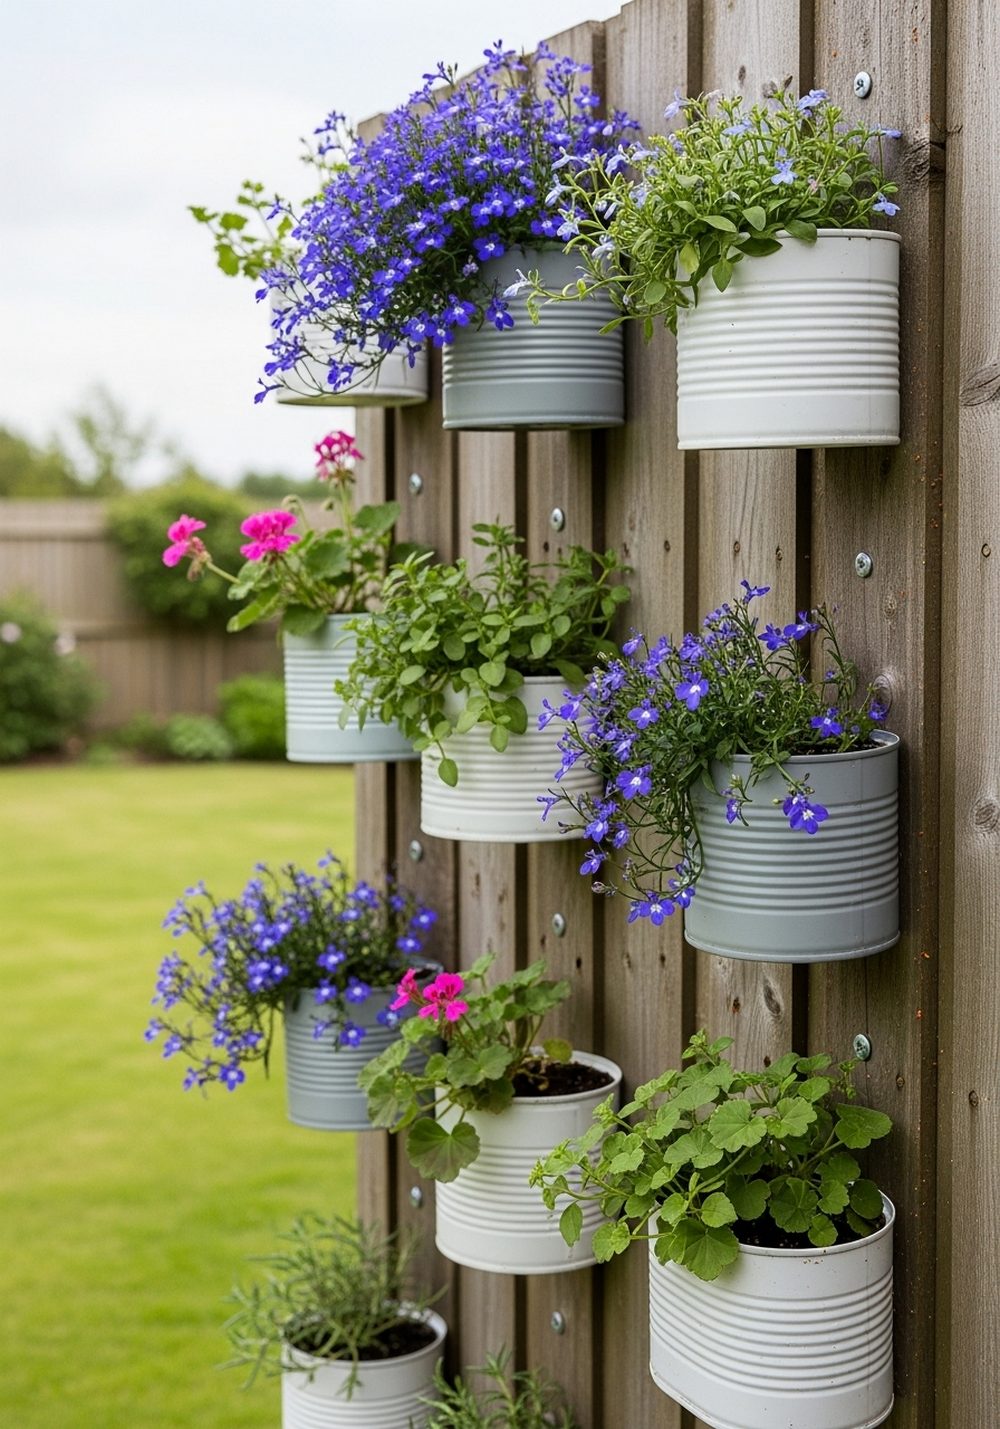
Turn a plain fence into a vertical garden wall by attaching tin cans in staggered rows. Paint the cans a simple color (white, grey, or black) to make the plants stand out, then screw them securely to the fence through the backs. Fill with trailing flowers, herbs, or small ferns, and enjoy a living patchwork that makes use of otherwise wasted vertical space. It’s compact, eye-catching, and very renter-friendly if you can add a removable panel.
- Best For: Narrow side yards, overlooked fences, and small patios.
- Budget Tip: Start with just one vertical “column” of cans and expand as you collect more.
- Styling Idea: Use all one can color and mix plant textures—trailing, upright, fluffy—for visual interest.
- Practical Note: Make sure each can has drainage holes and place thirstier plants lower down.
- Care & Maintenance: Check watering frequently, as cans can dry out faster than ground beds.
7. Cutwork Tin Can Candle Holders
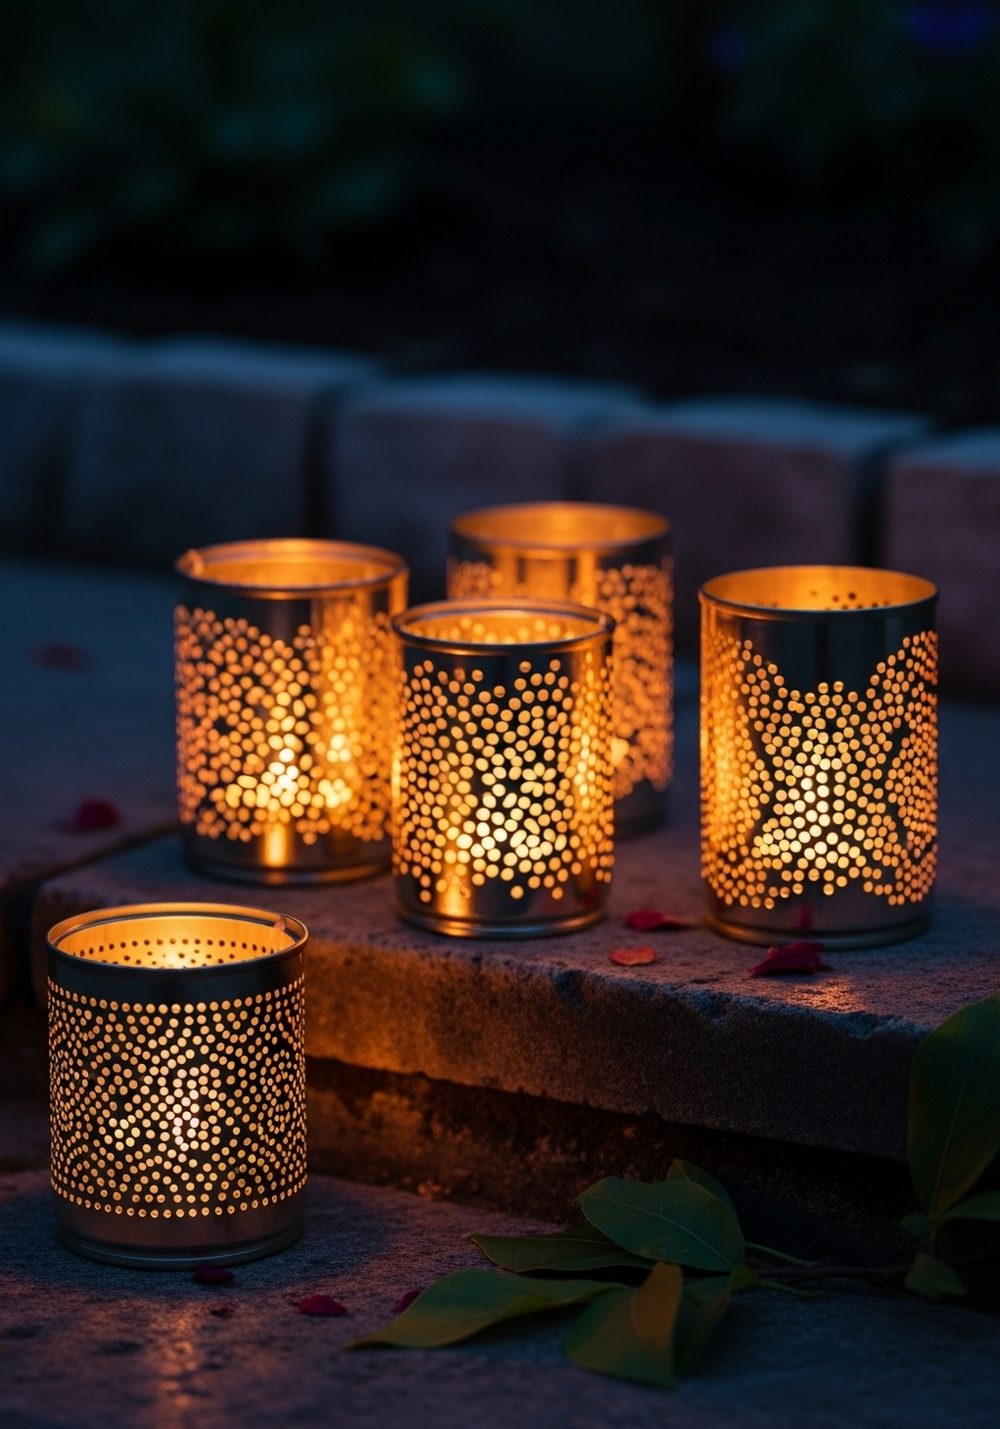
Cutwork candle holders look far fancier than their recycled roots. Fill your cans with water and freeze them to make punching easier, then use a hammer and nail to tap out delicate patterns—rows of dots, starbursts, or lacy bands. Once the ice melts, dry and paint the cans if you like, then place tealights inside. At night, the patterns glow softly across steps, tables, or along a pathway, creating instant charm.
- Best For: Evening paths, stair edges, and cozy seating corners.
- Budget Tip: Use leftover paint and simple tealights; the cans do most of the styling work.
- Styling Idea: Paint all holders in soft white or cream for a romantic, candlelit feel.
- Practical Note: Place cans on stable, heat-resistant surfaces and keep away from flammable plants.
- Care & Maintenance: Tap out melted wax occasionally and repaint if rust starts to show.
8. Tin Can Bird Feeder Perch
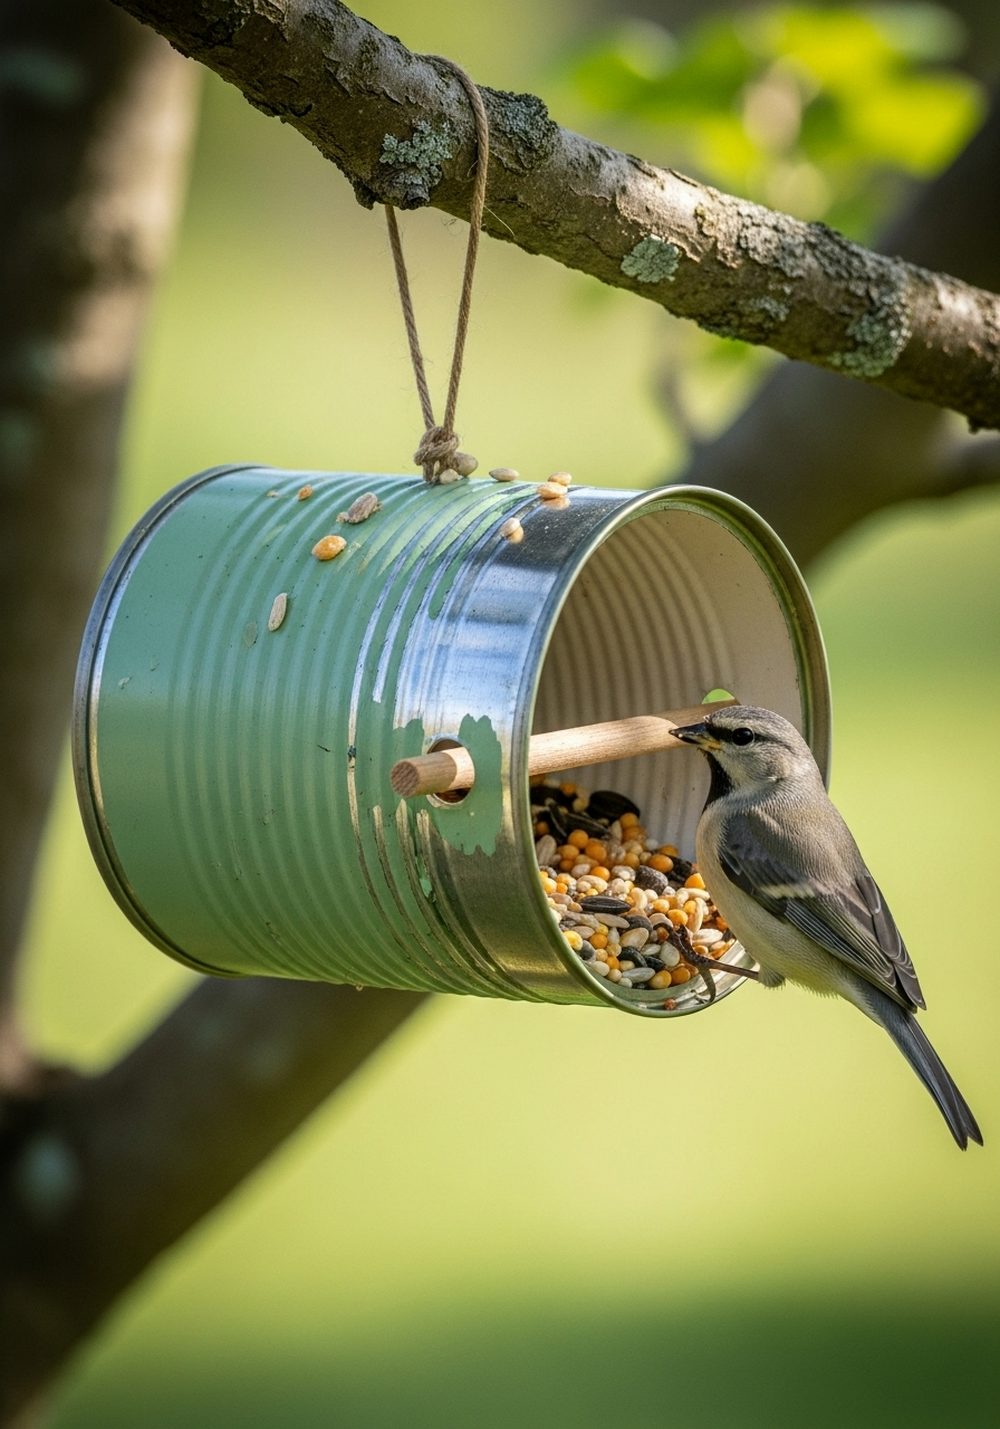
Welcome birds into your garden with a sweet tin can feeder. Lay the can on its side, paint it a soft, natural shade, and thread a small dowel or stick through the open end as a perch. Fill the can with birdseed and suspend it from a branch or hook using sturdy twine. The curved metal frames the bird beautifully while the perch makes it easy and safe for them to feed.
- Best For: Trees, pergolas, or balcony hooks with a bit of height.
- Budget Tip: Use foraged sticks and basic birdseed blends to keep costs low.
- Styling Idea: Stick to greens and browns so the feeder blends calmly into the garden.
- Practical Note: Hang the feeder away from windows and busy paths to keep birds relaxed.
- Care & Maintenance: Clean the can regularly and refresh seed to keep it dry and safe.
9. Crate Of Colorful Veggie Tin Cans
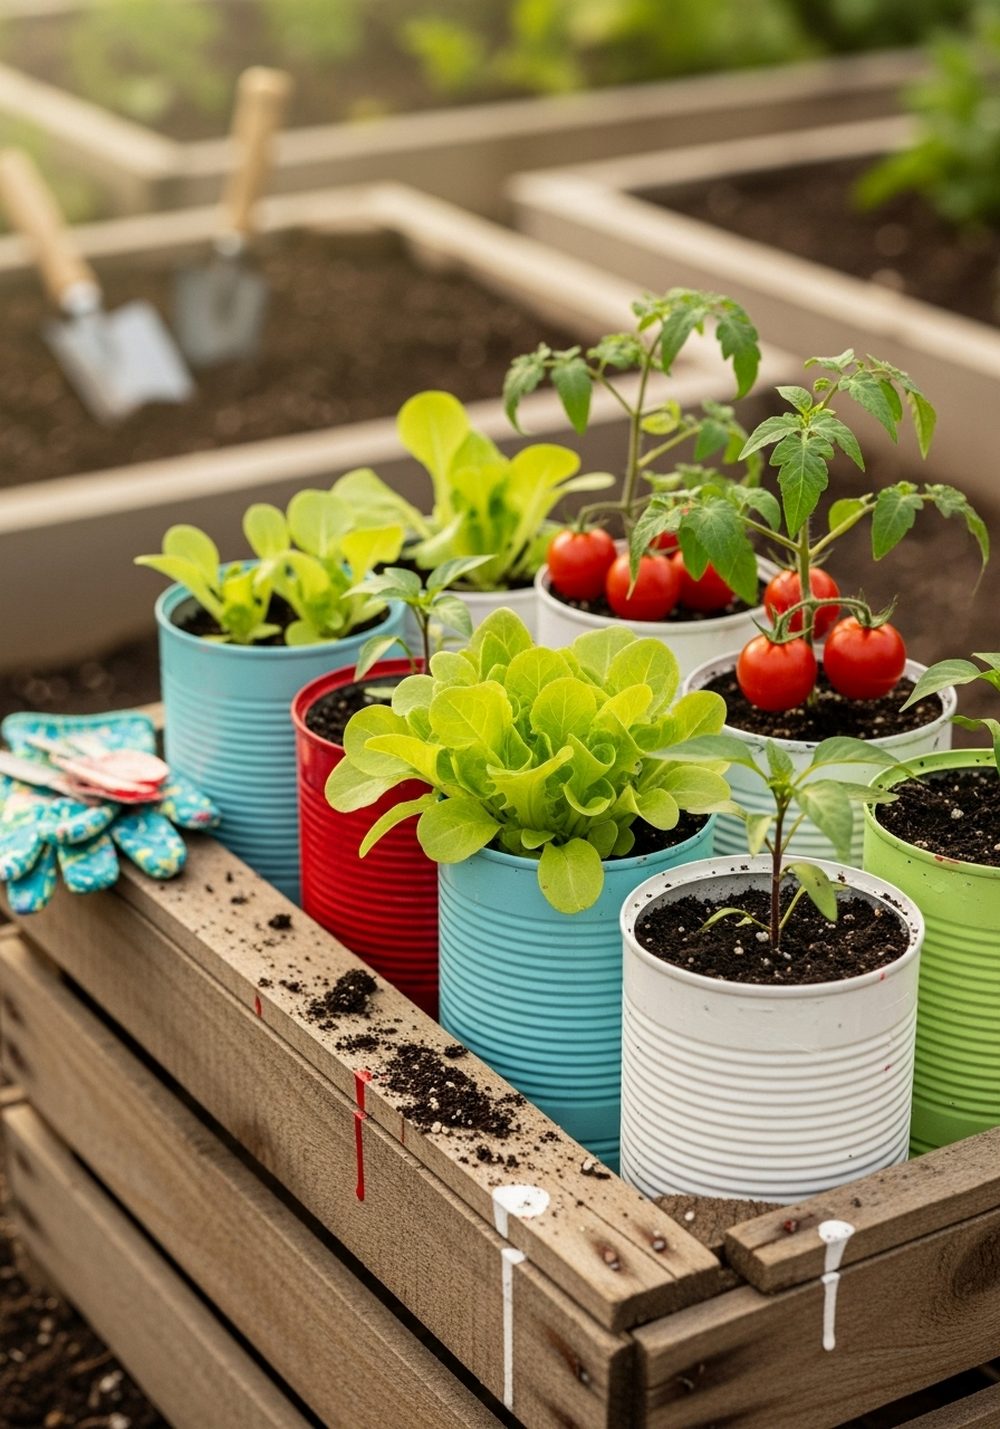
Make a portable mini veg patch by lining a wooden crate with brightly painted tin cans. Each can becomes a mini planter for lettuces, chillies, cherry tomato seedlings, or herbs. The crate keeps everything tidy and easy to move, while the colors make it look like a cheerful market stall. It’s especially handy if you rent or have a tiny patio, as you can slide the whole crate into the sun or under shelter as needed.
- Best For: Small patios, balconies, and rented spaces.
- Budget Tip: Use a second-hand crate and start with easy crops like lettuce and herbs.
- Styling Idea: Choose bright, happy colors—red, yellow, turquoise—to emphasize the “cute” vegetable garden vibe.
- Practical Note: Drill drainage holes in the crate bottom or use a liner tray to protect surfaces.
- Care & Maintenance: Water consistently and feed lightly, as cans hold limited nutrients.
10. Vintage-Label Kitchen Garden Cans
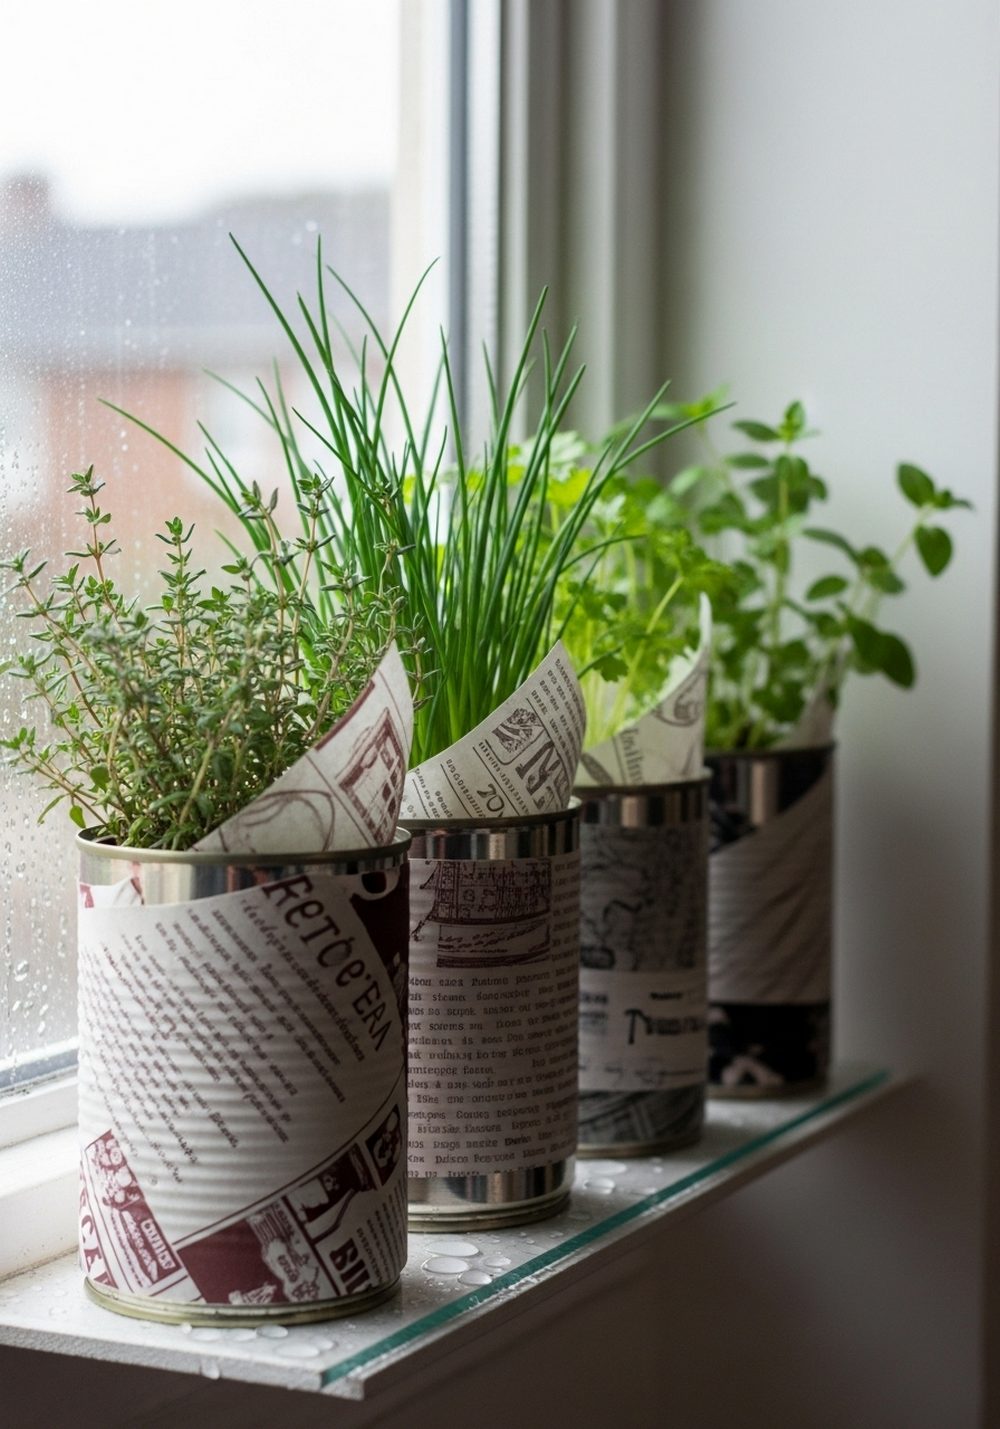
Bring a nostalgic feel to your herb garden by wrapping tin cans in vintage-style papers or patterned scrapbook sheets. Plant each can with a classic kitchen herb—thyme, chives, parsley, oregano—and line them up on a windowsill, balcony shelf, or potting bench. The combination of old-fashioned patterns and fresh green leaves looks charming and homely, like a tiny market display you can snip from whenever you cook.
- Best For: Kitchen windows, balcony rails, and narrow ledges.
- Budget Tip: Print or reuse decorative paper and seal lightly with clear tape or decoupage glue.
- Styling Idea: Choose muted, slightly faded patterns for a true vintage, cottage look.
- Practical Note: Keep the bottom of the cans bare metal so moisture doesn’t damage the paper.
- Care & Maintenance: Rotate cans regularly and trim herbs often to keep them compact.
11. Tin Can Fairy House Planters
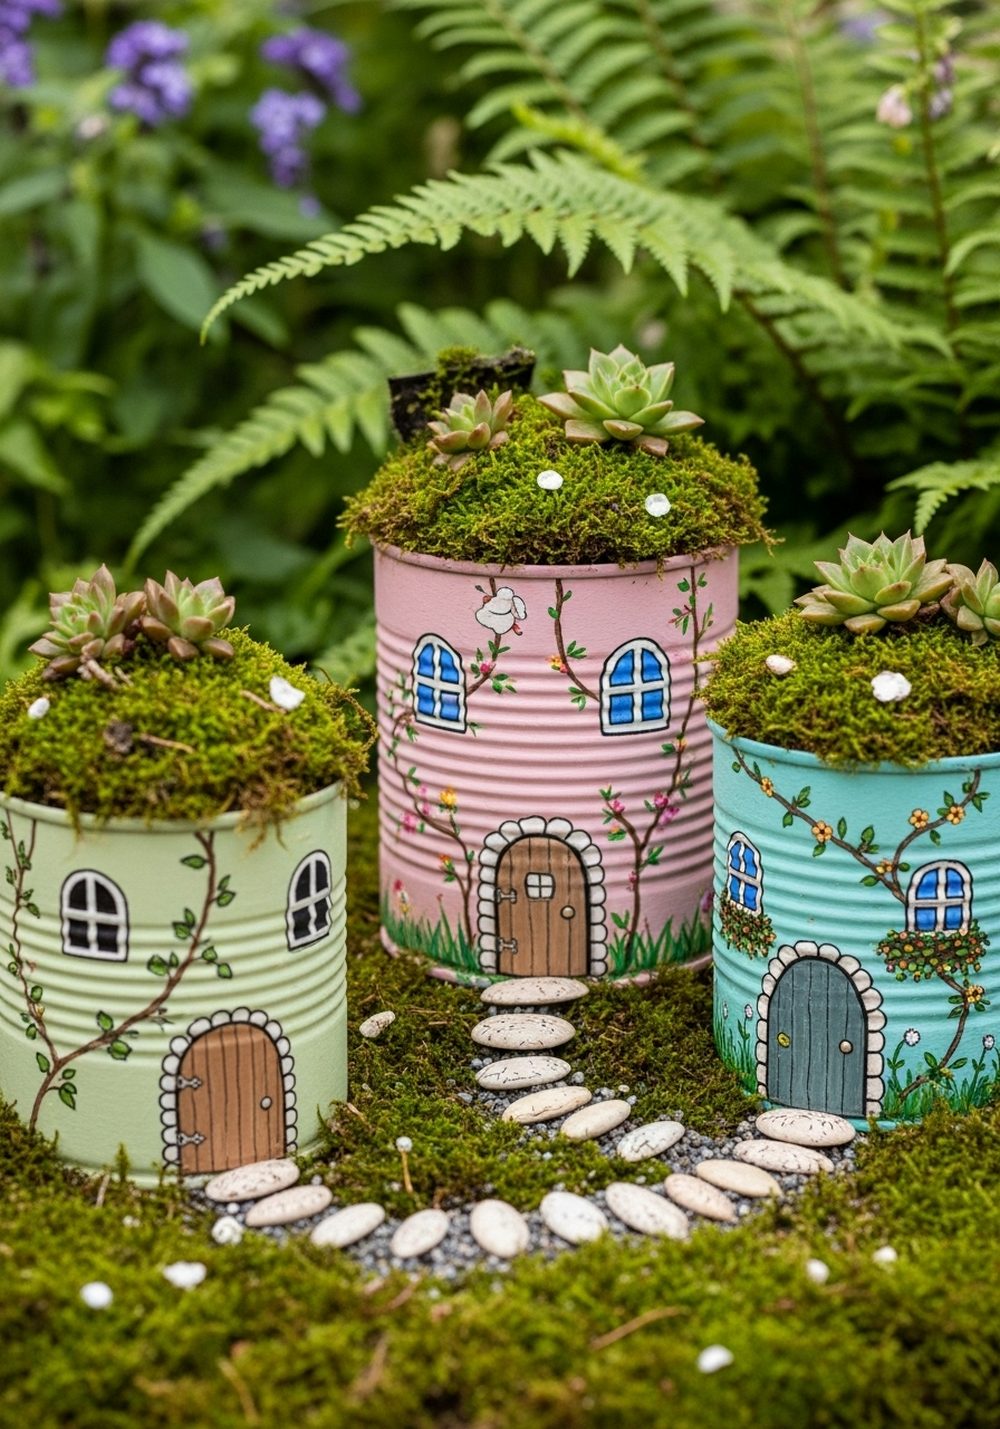
Turn your tin cans into tiny fairy houses and tuck them among your plants. Paint each can in soft pastel colours, then add simple windows, doors, and climbing vines with a small brush or permanent marker. Top with moss, tiny succulents, or pebbles to become “roofs” and miniature landscapes. Nestle them at the base of shrubs or in a dedicated fairy corner to give your garden a sweet, storybook feel kids and adults will love.
- Best For: Family gardens, shaded corners, and under shrubs.
- Budget Tip: Use leftover craft supplies, tiny stones, and moss you already have.
- Styling Idea: Keep the palette gentle—pale pink, duck-egg blue, buttery yellow—for maximum cuteness.
- Practical Note: Use waterproof markers or outdoor paint to help details last longer.
- Extra Idea: Add a little path of pebbles leading to each fairy door.
12. Tin Can Tool Caddy Planter
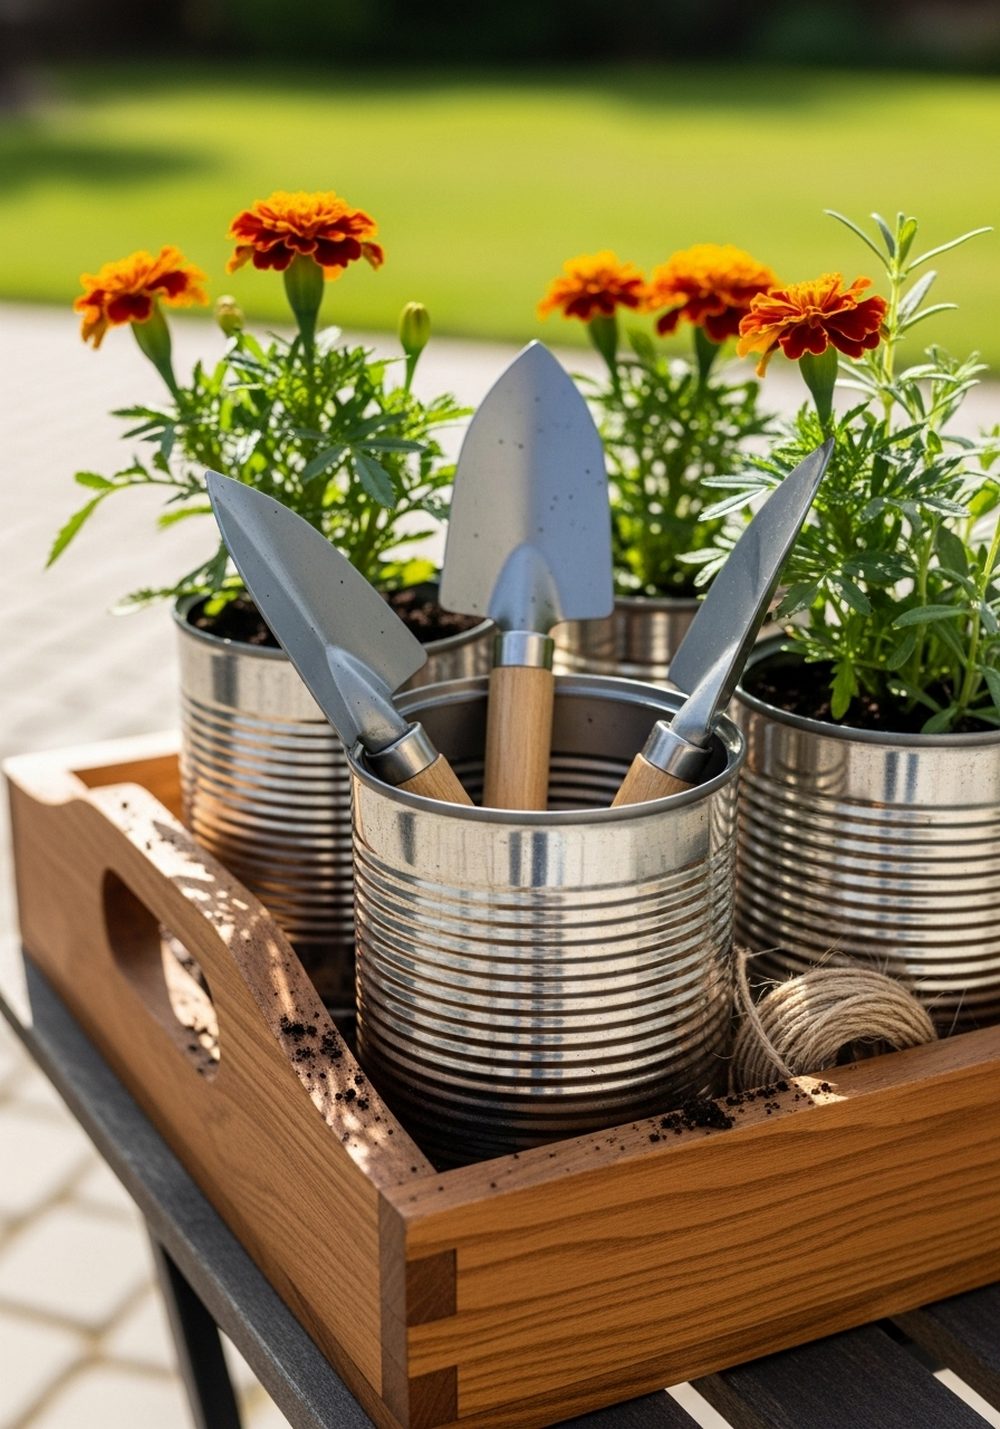
Combine storage and decor by turning a wooden tray or crate into a tool caddy filled with tin cans. Use some cans for trowels, pruners, and string, and plant others with bright marigolds or herbs. The mix of tools and greenery looks charmingly rustic and makes it easy to grab what you need. Set it on a potting table or by the back door for a cheerful, practical accent that feels like a working cottage garden.
- Best For: Busy gardeners who like everything in one place.
- Budget Tip: Repurpose any shallow box or tray and gradually add cans as you collect them.
- Styling Idea: Keep cans mostly metal with just a few painted accents for a simple, farmhouse look.
- Practical Note: Group the heaviest, tool-filled cans in the center so the caddy carries evenly.
- Care & Maintenance: Rinse soil off tools before dropping them in to keep the whole setup neat.
Conclusion
Recycled tin cans might be some of the simplest items in your home, but in the garden they can become lanterns, tiny cottages, herb pots, and more. With a bit of paint, twine, and imagination, you can add color, character, and charm to even the smallest outdoor space. Start with one cute idea—a hanging lantern, a fairy house, or a crate of veggie cans—and let your collection grow as you save more tins and dream up new ways to use them.
FAQs
Q1. How can I decorate my garden with tin cans on a very small budget?
Start by saving cans from your own kitchen and cleaning them well. A single tin of paint or a few tester pots can decorate many cans, and you can use inexpensive plants like herbs, violas, or succulents from multipacks. Focus on one small display—like a pastel can cluster or herb rail—then add more pieces as you collect extra cans.
Q2. Are tin can garden projects suitable for renters?
Yes, they’re perfect for renters because they’re portable and mostly non-permanent. Use hanging rails, removable hooks, or freestanding crates instead of screwing cans directly into walls if you’re worried about damage. When you move, simply pick up your crates, caddies, or hanging strings and take your mini garden with you.
Q3. Will tin cans rust quickly outdoors, and how can I protect them?
Tin cans will eventually rust, especially in wet climates, but you can slow this down. Paint the outside with outdoor or metal paint, and avoid letting them sit in puddles of water. Drainage holes in the bottom help prevent constant dampness. If a can gets too rusty, just recycle it and replace it with another saved from your kitchen.
Q4. What are the easiest tin can ideas for beginners?
The simplest projects are basic planters: clean a can, make drainage holes, add soil, and plant herbs or flowers. Clustered pastel flower cans, succulent trios, and vintage-label herb cans are all beginner-friendly. You don’t need advanced tools—just a hammer, nail, and maybe a small brush for simple paint details.
Q5. Are tin can decor pieces safe to use around plants and wildlife?
They can be, as long as you smooth any sharp edges and use them sensibly. Always check rims and punched holes for sharp bits and file or fold them if needed, especially for bird feeders and child-friendly areas. Avoid using cans that stored harsh chemicals; stick to food cans, and rinse them thoroughly before planting.
Q6. How do I mix tin can decor with my existing garden style?
Think about color and mood. For a cottage garden, choose pastels, lace wraps, and fairy house designs. For a modern space, keep cans plain metal or matte black and plant structured grasses or succulents. Repeating the same color palette or type of plant helps all your different tin can projects look intentional and cohesive.