10 Tin Can Fence Planters For A Cheap And Creative Garden Upgrade

Tin cans are one of the easiest ways to turn a plain fence into a vertical garden without spending much. With a bit of paint, a drill, and some basic hardware, you can turn recycling into a bright feature wall packed with herbs, flowers, or trailing plants. These 10 ideas work for small yards, balconies, and rental spaces where ground space is tight and every inch matters. Most projects suit beginners and use simple tools you may already own. Before you start, wash your cans, remove sharp edges, and drill a few drainage holes in the base. Then grab outdoor paint, potting mix, and your favorite plants. Mix colors, heights, and patterns to create a fence that looks personal, not pricey.
Quick List
- Rainbow Row Tin Can Fence
- Herb Ladder Tin Can Rail
- Chalkboard Label Planters
- Rustic Jute-Wrapped Cans
- Hanging Macramé Tin Planters
- Stencil Art Tin Can Garden
- Vertical Succulent Wall Cans
- Kids’ Painted Bug Garden Cans
- Modern Black-and-White Tin Row
- Kitchen Scrap Regrow Wall
1. Rainbow Row Tin Can Fence

A rainbow row of tin cans instantly turns a dull fence into a happy, colorful backdrop. Each can gets its own bright shade, so even simple green plants look bold and cheerful. This idea is great if your garden feels a bit grey or if you want a fun photo-ready corner without buying fancy pots. It works especially well with trailing flowers, ivy, or compact bedding plants. You can repeat colors in patterns or let it be totally random. Pro tip: choose a small color palette if you want a more “grown-up” look and a full rainbow if you want playful, kid-friendly vibes.
How To Style
- Clean cans and sand any rough edges.
- Drill 3–4 drainage holes in each base.
- Paint each can a different outdoor-safe color; let dry.
- Drill holes near the rim and screw or wire to the fence.
- Fill with potting mix and plant flowers or trailers.
Best For
- Small yards needing a focal wall
- Rental fences (use removable hooks/wire)
- Sunny or part-sun fences
Tools & Products
- Clean tin cans
- Outdoor/acrylic paint and brushes
- Drill with metal bit
- Screws or garden wire/hooks
- All-purpose potting mix
2. Herb Ladder Tin Can Rail

Turn your fence into a vertical “herb ladder” with neat rows of labeled tin cans. This setup is perfect if you love to cook but have no room for a full garden bed. Each can holds a single herb, and the repeated layout makes everything look tidy and intentional. Place herbs you use most at eye level so you can snip and go. This idea makes an amazing little outdoor kitchen wall near your grill or back door. Pro tip: group thirsty herbs like basil together on one row so you remember to water them a bit more often.
How To Style
- Paint cans in one or two calm colors.
- Drill drainage holes in the base and mounting holes at the back.
- Attach horizontal strips of wood or metal rail to your fence.
- Screw cans onto the rails in tidy rows.
- Fill with potting mix and plant different herbs, then label.
Best For
- Food lovers with tiny spaces
- Sunny fences near the kitchen
- Balconies with railing-style fences
Tools & Products
- Tin cans
- Drill and screws
- Narrow wooden boards or metal rails
- Outdoor paint and marker/labels
- Herb-friendly potting mix
3. Chalkboard Label Planters

Chalkboard tin cans make it easy to switch up your planting without peeling off stickers or repainting names. A band of chalkboard paint around each can turns your fence into a flexible garden list. You can label plants, note sowing dates, or even add cute messages for guests. This style looks simple and modern, especially if you keep the rest of the can in a single color. It pairs nicely with herbs and leafy greens you might replant often. Pro tip: seal the area around the chalkboard band with clear spray so light rain doesn’t wash away your writing too quickly.
How To Style
- Clean, sand, and drill drainage holes in cans.
- Paint cans a base color and let dry.
- Tape a band around the middle and paint it with chalkboard paint.
- Attach cans to fence using screws, wire, or hooks.
- Fill with soil, plant, and label with chalk.
Best For
- Herb and salad gardens
- People who like to replant often
- Part-sun to sunny fences
Tools & Products
- Tin cans
- Base paint and chalkboard paint
- Painter’s tape and brushes
- Drill and mounting hardware
- Potting mix and chalk
4. Rustic Jute-Wrapped Cans

If you like a softer, rustic look, wrapping tin cans in jute gives them a warm, natural texture that blends into wooden fences. The twine hides any dents and makes cheap cans look more like boutique planters. This style works beautifully with white flowers, soft pinks, and herbs, creating a calm, cottage-garden feel. It’s also good if you’re nervous about bright paint or bold patterns. Pro tip: leave a small strip of metal at the top or bottom of each can exposed for a bit of shine and contrast, instead of wrapping the whole thing.
How To Style
- Clean cans and drill drainage holes.
- Add a line of strong craft glue near the base and start wrapping jute.
- Work your way up, gluing every few rows so the jute stays put.
- Drill small holes for screws or thread wire under the jute.
- Mount on the fence and plant with soft-colored blooms or herbs.
Best For
- Rustic, cottage, or farmhouse-style yards
- Wooden fences
- Part-sun spots
Tools & Products
- Tin cans
- Jute or sisal twine
- Strong craft or hot glue
- Drill and screws/wire
- Potting mix and plants
5. Hanging Macramé Tin Planters

Hanging tin cans in simple macramé holders adds movement and texture to a flat fence. The cords soften the metal and let you stagger heights without drilling as many holes into the wood. This idea looks especially pretty with trailing plants or small ferns that spill over the sides. You don’t need fancy knots; even a basic cradle made from simple ties does the trick. You can choose natural cord for a boho look or colored cord for a playful feel. Pro tip: keep cans smaller and plant lightweight varieties so they don’t pull on the fence or sag.
How To Style
- Prepare cans with drainage holes and optional paint.
- Cut several equal lengths of cord and knot together at one end.
- Pair strands and knot them to form a cradle that fits the can.
- Place the can in the cradle and knot the top to make a hanging loop.
- Hang from hooks on the fence and plant with light, trailing plants.
Best For
- Boho-style patios and balconies
- Fences where you want less drilling
- Light plants and smaller cans
Tools & Products
- Tin cans
- Cotton or synthetic cord
- Drill and fence hooks
- Scissors
- Potting mix and trailing plants
6. Stencil Art Tin Can Garden

Stencil art cans let you add pattern without having to freehand anything. You can repeat leaves, flowers, or geometric shapes across all your cans to tie everything together. This is a nice option if your fence is already painted and you want the planters to feel like part of the design. Pick one base color and one stencil color for a clean look, or mix a few accent shades. Pro tip: use a small sponge or almost-dry brush with the stencil so the paint doesn’t bleed under the edges and blur the pattern.
How To Style
- Clean, sand, and drill drainage holes in cans.
- Paint each can a solid base color and let dry fully.
- Tape stencil onto the can and dab paint over it lightly.
- Let the pattern dry and seal with clear spray if needed.
- Attach cans to the fence and plant with simple green foliage to show off the design.
Best For
- Modern or patterned garden spaces
- Fences you want to coordinate with existing decor
- Sunny or part-sun walls
Tools & Products
- Tin cans
- Base and stencil paints
- Stencils, tape, and small sponge/brush
- Clear sealer (optional)
- Drill, screws/wire, potting mix
7. Vertical Succulent Wall Cans

Succulents and tin cans are a great match for narrow fences because they stay small and need less water. A cluster of shallow cans filled with different succulents creates a living texture wall with interesting shapes and colors. You can mix upright plants with trailing varieties for extra depth. This setup is low-maintenance once established, making it ideal for busy people or hot climates. Pro tip: add a layer of small stones or coarse grit at the bottom of each can so water drains quickly and roots don’t sit in soggy soil.
How To Style
- Choose shallow or cut-down cans and drill extra drainage holes.
- Paint or leave the cans bare, depending on your style.
- Attach cans in a tight grid on a sunny fence section.
- Fill with a cactus/succulent potting mix.
- Plant a mix of succulents, leaving some space for them to grow.
Best For
- Sunny, hot fences
- Low-maintenance gardeners
- Small patios or balcony walls
Tools & Products
- Tin cans (full or shortened)
- Drill and mounting hardware
- Cactus/succulent potting mix
- Small stones or grit
- Assorted succulents
8. Kids’ Painted Bug Garden Cans

Let kids decorate the cans as bees, ladybirds, and other cute bugs, then line them up on the fence for a playful garden corner. This project doubles as a craft day and a gardening lesson, and the results look cheerful even if the painting is a bit messy. Use bright, simple designs like stripes, spots, and big eyes. Fill them with easy-care plants so the cans stay happy even if watering is inconsistent. Pro tip: protect kids’ artwork with a clear outdoor sealer once the paint is dry so their creations last through the season.
How To Style
- Clean cans, sand edges, and drill drainage holes.
- Prime and let kids paint bug designs with outdoor or acrylic paint.
- Once dry, add a coat of clear sealer.
- Attach cans to the fence at kid-friendly height.
- Fill with hardy flowers or herbs and let kids help plant and water.
Best For
- Families with young children
- Play areas and school gardens
- Part-sun fences
Tools & Products
- Tin cans
- Kid-safe paints and brushes
- Clear outdoor sealer
- Drill and screws/wire
- Potting mix and tough plants
9. Modern Black-and-White Tin Row
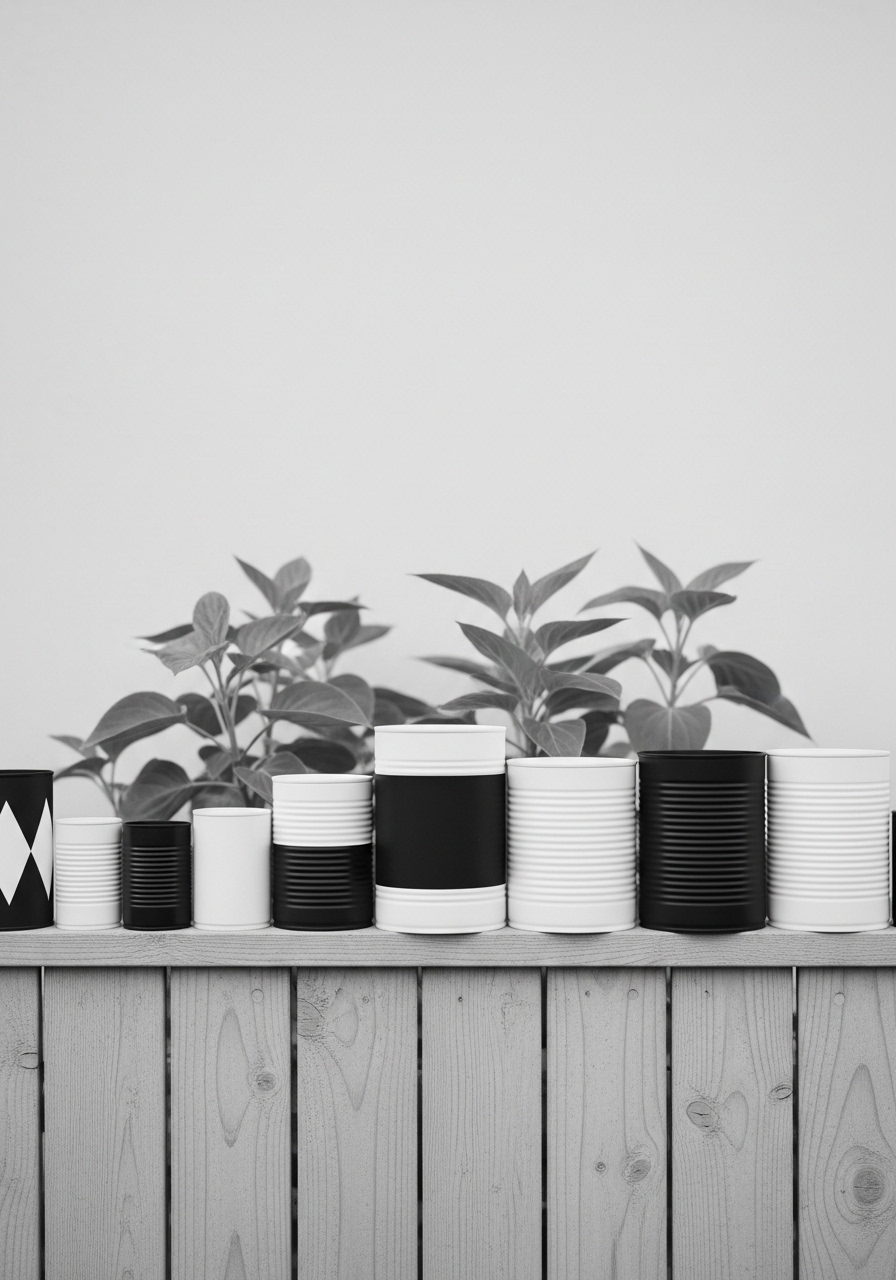
If you prefer a clean, modern look, a row of black-and-white tin cans feels stylish and grown-up. You can paint some cans solid black, some white, and add simple stripes or dots to a few for interest. The limited palette makes even mixed plants look organized instead of busy. This works well against light fences or brick walls where color might clash. Pro tip: use matte or satin finishes instead of high gloss if you want a more subtle, design-led look that doesn’t reflect too much sunlight.
How To Style
- Prepare cans with sanding, cleaning, and drainage holes.
- Paint some cans black, some white; add patterns with tape and contrasting paint.
- Let everything dry fully before handling.
- Line cans up at the same height or in a gentle stagger along the fence.
- Plant with simple greens, grasses, or white-flowering plants.
Best For
- Modern, minimal gardens
- Brick or pale fences
- People who like a tidy, coordinated look
Tools & Products
- Tin cans
- Black and white outdoor paint
- Painter’s tape and brushes
- Drill and mounting hardware
- Potting mix and plants
10. Kitchen Scrap Regrow Wall

Use your tin can fence as a mini “regrow” wall for kitchen scraps like spring onions, lettuce stumps, or herb cuttings. This idea is budget-friendly and cuts down on waste while keeping fresh greens within easy reach. The cans don’t need to be fancy; simple labels and a neat layout make the whole wall look intentional. It’s fun to watch scraps sprout back to life and a good way to involve kids in low-risk gardening experiments. Pro tip: group faster-regrowing plants together so you can harvest and replant those cans more often than slower growers.
How To Style
- Prepare cans with drainage holes and optional paint.
- Attach them in one or two rows on a sunny fence near your kitchen door.
- Fill with light potting mix.
- Plant kitchen scraps or cuttings according to their needs.
- Water gently and harvest new growth as it appears.
Best For
- Eco-conscious gardeners
- Small spaces near the kitchen
- Sunny or bright light spots
Tools & Products
- Tin cans
- Drill and screws/hooks
- All-purpose potting mix
- Plant labels or marker
- Kitchen scraps and cuttings
Conclusion
Tin can fence planters prove you don’t need expensive pots or a big yard to grow something beautiful. With a few basic tools and a bit of creativity, you can turn recycling into a bright feature that suits your style, whether that’s playful, rustic, or minimal. Start with just a handful of cans, then add more rows or patterns as you figure out what works in your space and climate. Your fence can grow and change along with your garden.
Call To Action
Pick one idea from this list, gather a few cans from your recycling, and set up your first small row on the fence this week—once you see how easy it is, you can build out the rest of your vertical garden over time.
FAQs
1. Do tin can planters rust too quickly outside?
Yes, tin cans can rust over time, especially in wet climates, but they usually last at least a season or two. You can slow rust by using outdoor paint and avoiding leaving cans sitting in standing water. If they do rust through, just swap the can and keep your mounting hardware.
2. How do I stop tin cans from damaging my fence?
Use screws in existing posts, removable hooks, or wire loops instead of drilling lots of new holes. You can also add a small washer or spacer so the cans don’t rub directly on the wood. For rentals, look for over-the-fence hangers or tie cans to an added trellis panel instead.
3. What plants work best in tin can fence planters?
Compact herbs, small flowers, succulents, and trailing plants do best because the cans are shallow. Avoid very thirsty or deep-rooted plants, as they will dry out fast or outgrow the container. Check the light on your fence and choose plants that match those conditions.
4. How do I handle drainage in tin cans?
Always drill several holes in the bottom of each can so extra water can escape. If you’re worried about drips on a deck, add a thin layer of small stones at the base and water lightly but often. Avoid blocking the holes with saucers, as that can cause roots to rot.
5. Can I leave my tin can planters out over winter?
In mild climates you can often leave them out, though paint may fade and metal can age faster. In colder areas, it’s better to empty and store the cans or move them to a sheltered spot. You can also treat them as seasonal decor and refresh the design each spring.