10 Painted Lid Mosaic Path Ideas To Make Your Garden Pop
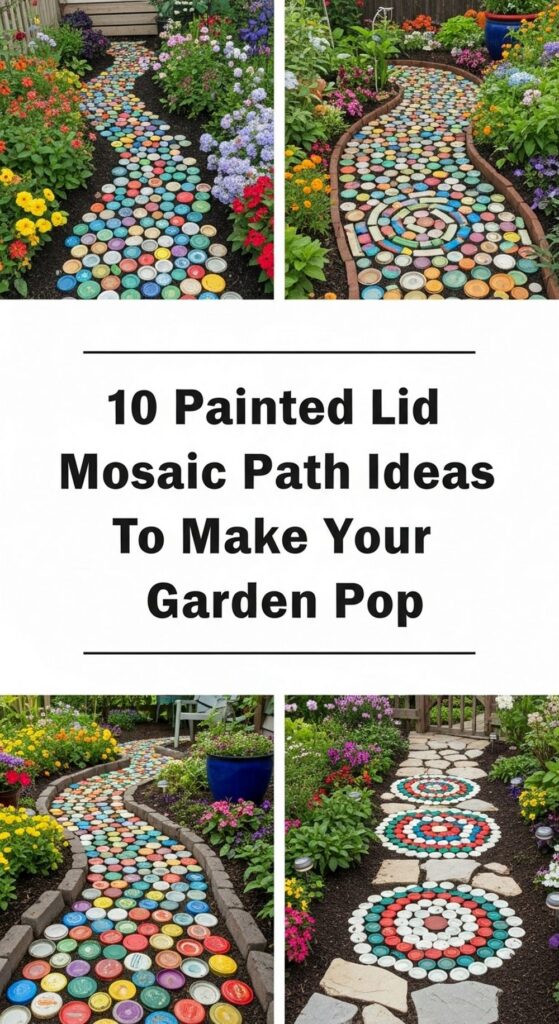
If you’ve been tossing metal lids into the recycling bin, your garden path is about to get a whole lot more exciting. Painted lid mosaics are a brilliant way to add color, pattern, and personality using something you probably already have at home.
In this guide, you’ll find ten creative ways to turn simple jar and bottle lids into bold borders, stepping stones, and playful accents that make every walk through your garden feel special. These ideas are budget-friendly, renter-friendly, and easy to adapt to any size space—from narrow side yards to full garden walkways.
Quick List
- Rainbow Painted Lid Mosaic Pathway
- Sunburst Lid Stepping-Stone Circles
- Painted Lid “River” Meandering Through Gravel
- Floral Mandala Lid Mosaic At The Garden Gate
- Kids’ Name Trail With Lettered Lids
- Chic Monochrome Lid Border For Modern Paths
- Glow-In-The-Dark Painted Lid Night Path
- Herb Marker Lid Mosaic Beside The Path
- Rustic Patchwork Lid Entrance Patio
- Storybook Trail Of Patterned Lids And Symbols
1. Rainbow Painted Lid Mosaic Pathway

Turn an ordinary garden path into a joyful rainbow with a full mosaic made from painted metal lids. Collect lids in different sizes, paint them in bright rainbow shades, and seal them with outdoor varnish. Arrange them tightly together over a compacted sand or mortar base so they form a smooth, walkable surface. The mix of colors looks incredible against green plants, gravel, or dark soil and instantly makes your path the star of the garden.
- Budget Tip: Use leftover wall paint and spray paint instead of buying new craft paints.
- Styling Idea: Keep the surroundings simple—plain gravel or dark mulch—to let the rainbow really pop.
- Practical Note: Aim for a level surface so there are no tripping edges between the lids.
- Care & Maintenance: Rinse occasionally and touch up any worn paint once a year.
2. Sunburst Lid Stepping-Stone Circles
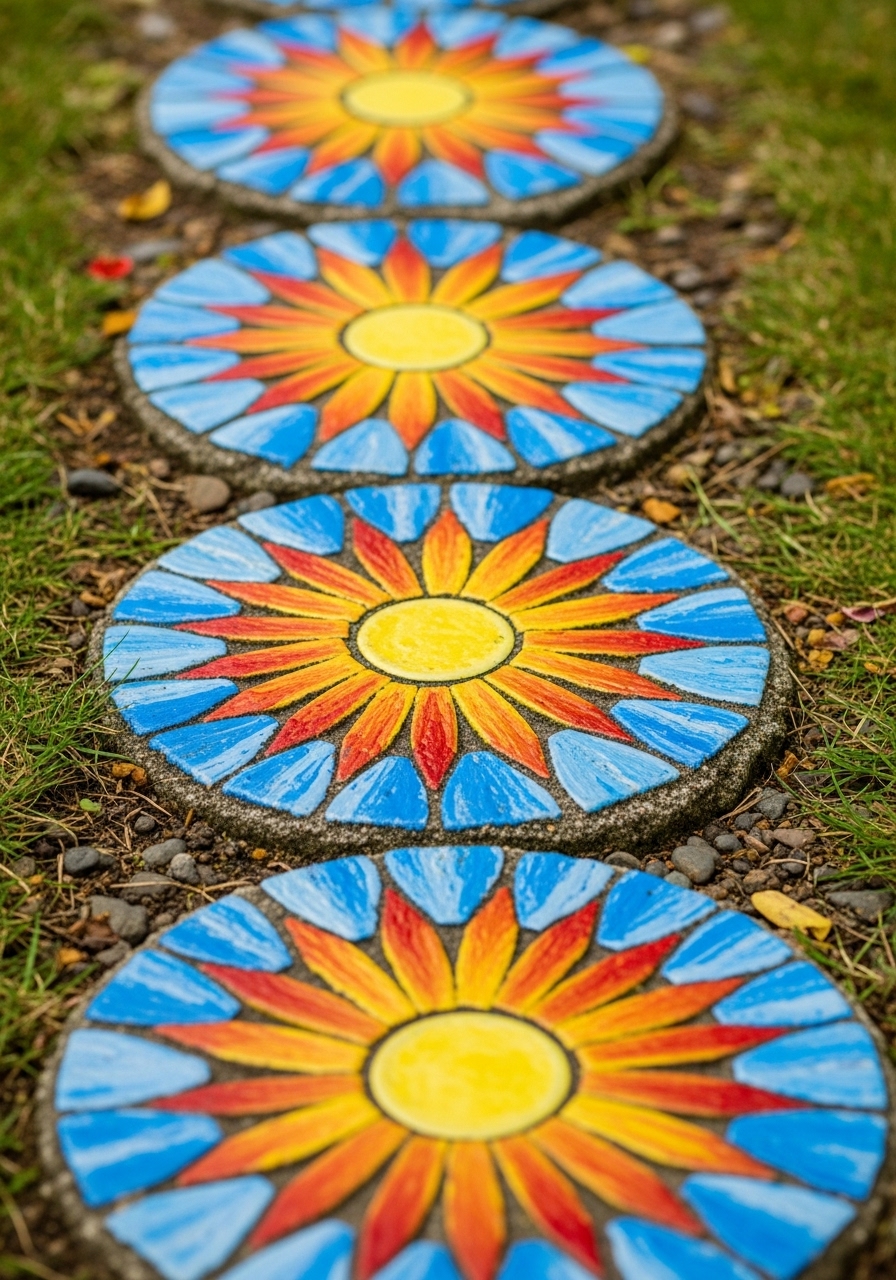
Stepping stones are an easy way to bring mosaics into the garden, and sunburst patterns work beautifully with round lids. Fill shallow molds or old plastic plant saucers with concrete, then press painted lids into the surface in expanding circles of color. Once cured, set the stones along your path to create a series of glowing “mini suns” that guide the way. The circular shapes break up straight lines and add a playful, artistic touch.
- Budget Tip: Make your own stepping stones using basic concrete mix and recycled containers as molds.
- Styling Idea: Use warm tones (yellow, orange, red) for the centers and cooler blues at the edges for extra contrast.
- Best For: Paths that cross lawns, gravel, or ground cover plants.
- Practical Note: Leave small gaps between stones so grass or ground cover can grow and soften the look.
3. Painted Lid “River” Meandering Through Gravel
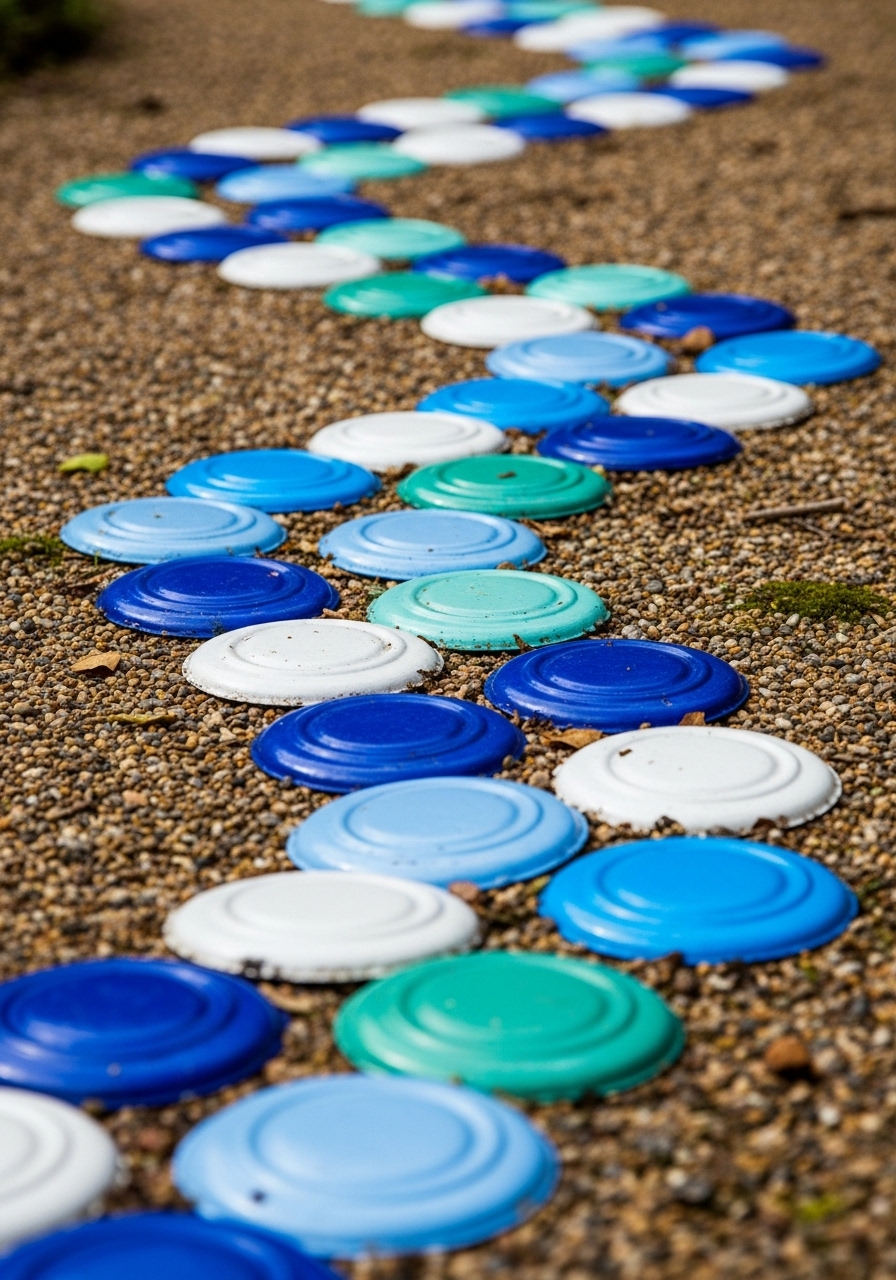
If you have a simple gravel or pebble path, create a “river” of painted lids that flows through it. Paint your lids in watery blues, greens, and whites, then lay them in a gently curving line down the middle or slightly off-center. Nestle them into the gravel so they sit just above the surface, like smooth stepping stones in a stream. The effect is subtle but striking, especially when sunlight bounces off the glossy lids.
- Budget Tip: Use a mix of jar lids, bottle caps, and tin can lids to avoid buying anything new.
- Styling Idea: Keep the surrounding gravel neutral—grey or beige—so the “water” colors stand out.
- Practical Note: Press lids firmly into compacted gravel so they don’t wobble underfoot.
- Extra Idea: Add a few larger stones along the “bank” to reinforce the river feeling.
4. Floral Mandala Lid Mosaic At The Garden Gate
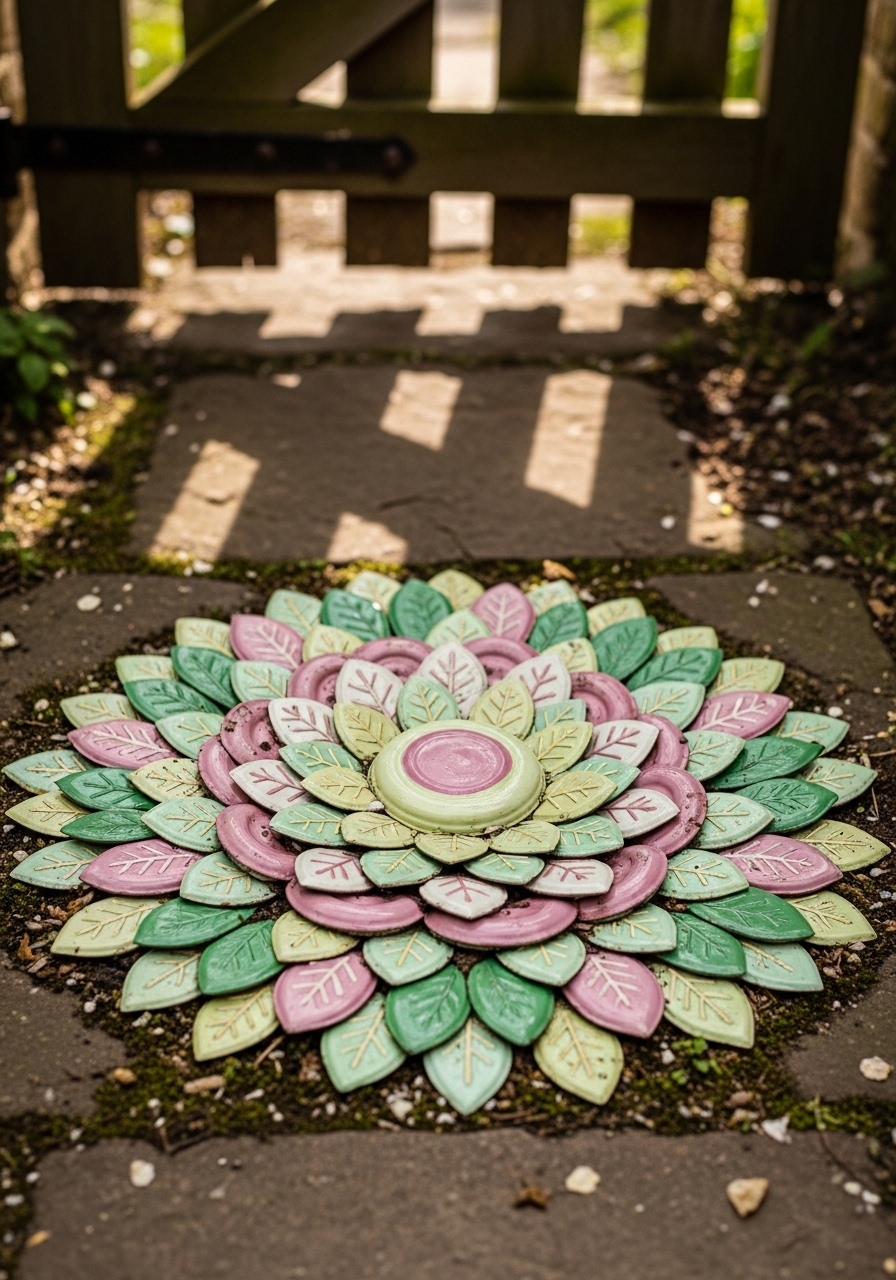
Welcome visitors with a floral mandala made from painted lids right at the start of your garden path. Use soft, garden-inspired colors—pinks, greens, creams, and yellows—and arrange the lids in petal-like rings radiating from the center. Set the design into a small concrete pad or a defined circle of mortar. This little burst of pattern by your gate or first step acts like a friendly invitation and sets the tone for the rest of the garden.
- Budget Tip: Limit your color palette to four or five shades so you can reuse paint across many lids.
- Styling Idea: Echo the mandala colors in nearby pots or flowers for a coordinated look.
- Best For: Entry points, gate areas, or the start of a main path.
- Care & Maintenance: Sweep off dirt and leaves so the design stays crisp and visible.
5. Kids’ Name Trail With Lettered Lids
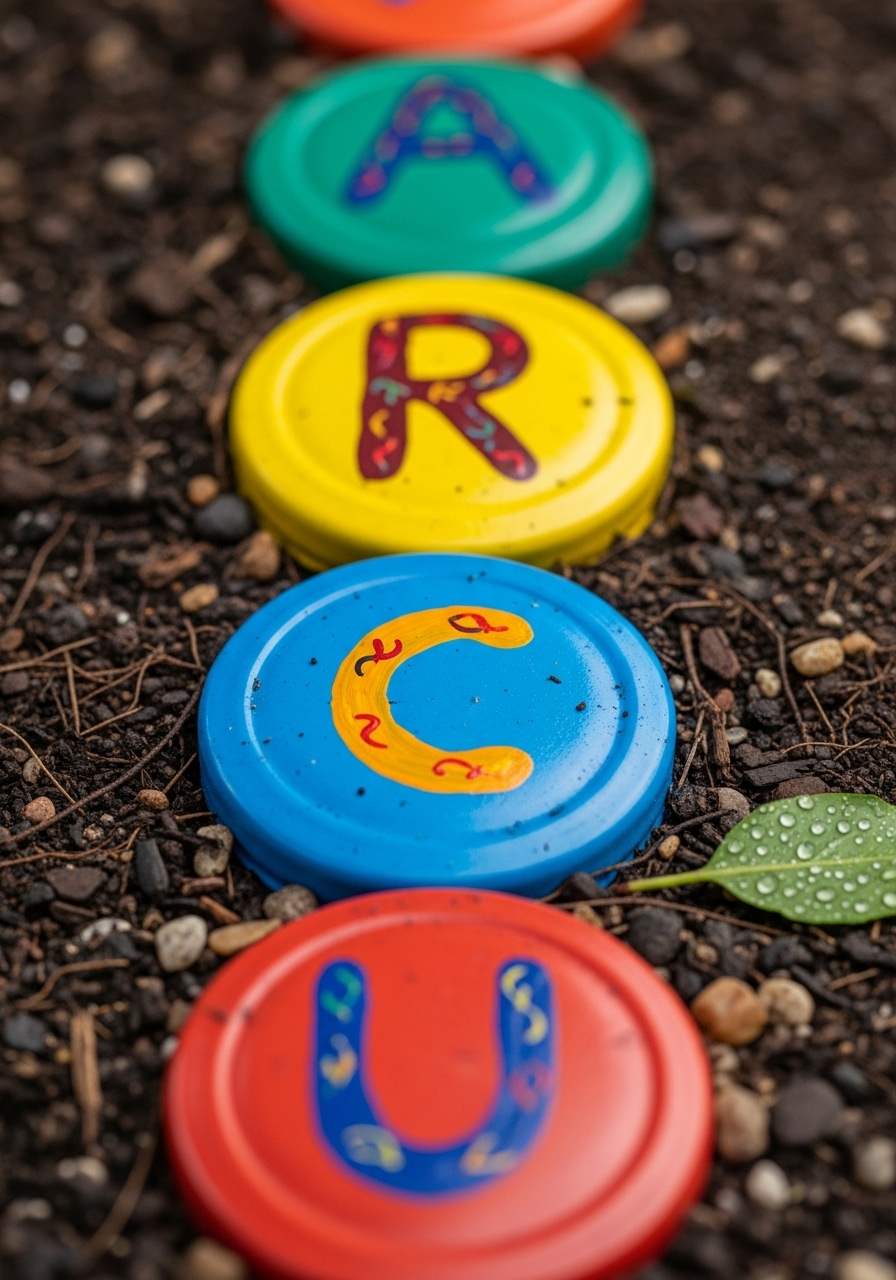
Get children involved by turning your path edge into a trail of names and words spelled out with painted lids. Paint each lid a solid bright color, then add bold letters on top using white or black paint markers. Line the lids along the edge of your path, either pressed into soil or set in a shallow strip of mortar. Kids will love spotting their names and sounding out words as they walk, and the colorful line looks cheerful from the house too.
- Budget Tip: Use cardboard or scrap wood as painting boards so kids can decorate many lids at once.
- Styling Idea: Stick to simple, primary colors for a playful, toy-like look.
- Practical Note: Keep the letters large and clear so they’re easy to read from standing height.
- Extra Idea: Add a few lids with symbols (hearts, stars, smiley faces) between the words.
6. Chic Monochrome Lid Border For Modern Paths
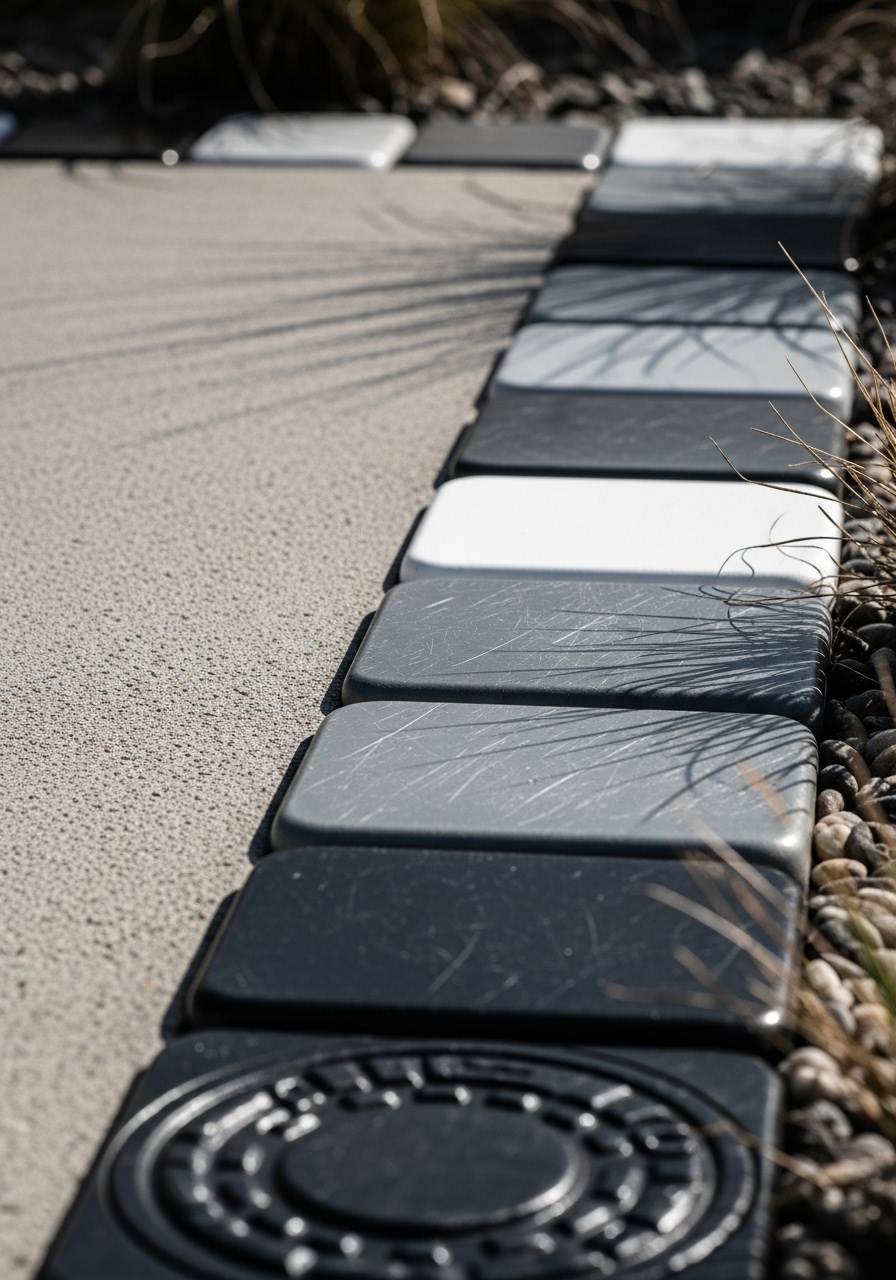
If you prefer a sleek, modern garden style, a monochrome lid border is the way to go. Paint lids in shades of white, grey, and black, then lay them in repeating rows along both sides of your path. The simple palette creates a graphic, almost tiled effect that pairs beautifully with straight lines, concrete pavers, and architectural plants. It’s bold but not busy, and it frames the path like a custom design feature.
- Budget Tip: Mix leftover white and black paint to create custom greys instead of buying more.
- Styling Idea: Combine this border with minimalist planters and ornamental grasses for a contemporary feel.
- Practical Note: Use a sand or mortar bed to keep the lids firmly in place and perfectly aligned.
- Care & Maintenance: Wipe or hose down occasionally to keep the monochrome look crisp and clean.
7. Glow-In-The-Dark Painted Lid Night Path
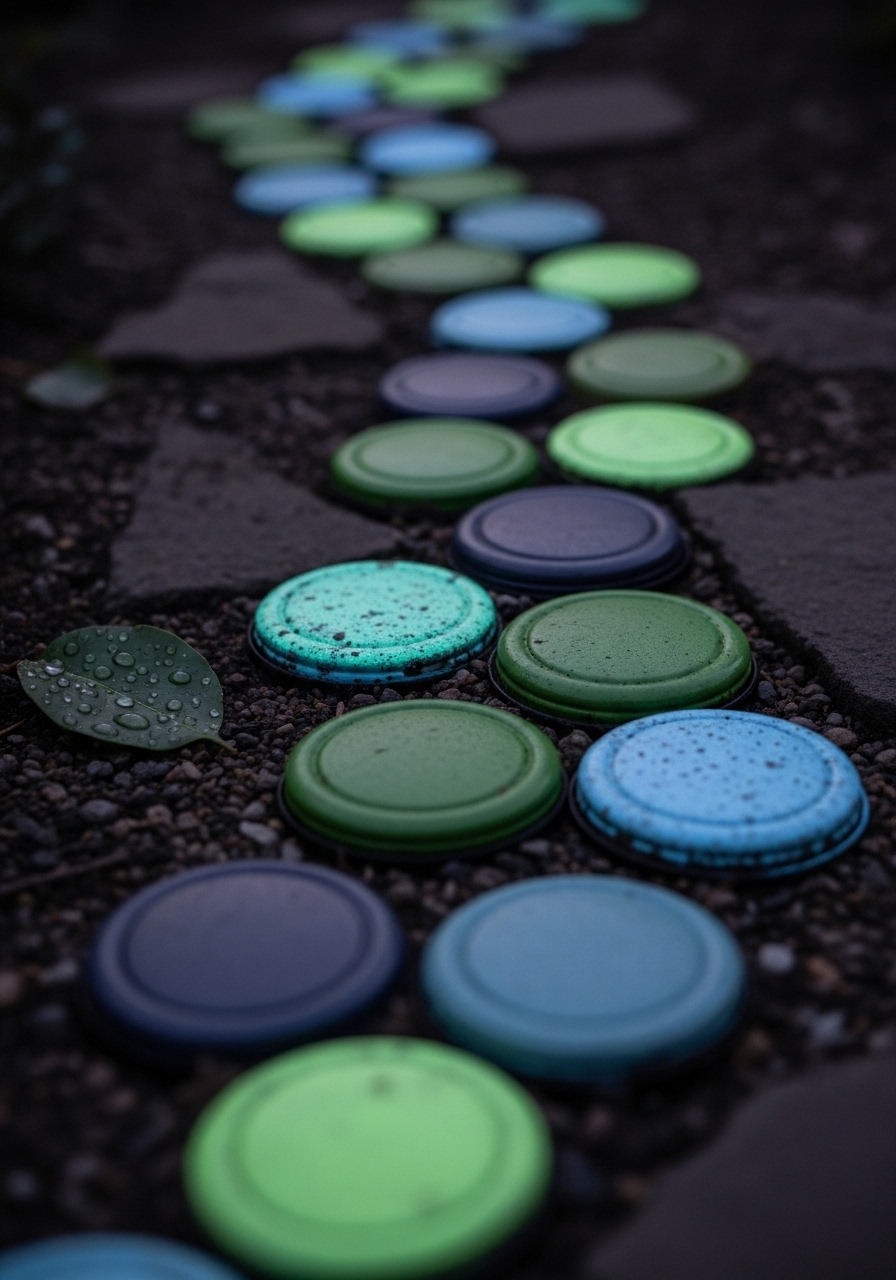
Make your garden magical after dark with a path lined or dotted with glow-in-the-dark lids. Use special glow paints over a base coat of white, then arrange the lids along the edges of your path or embed them in stepping stones. By day, they look like pale decorative dots; by night, they softly shine and outline the way. It’s a fun, low-energy alternative to lighting, especially for shorter paths or children’s play areas.
- Budget Tip: Only paint every second or third lid with glow paint to stretch materials further.
- Styling Idea: Use cool glow shades like blue and green for a calm, moonlit feeling.
- Practical Note: Place them where they can “charge” in sunlight during the day.
- Care & Maintenance: Reapply glow paint as needed if the effect fades over time.
8. Herb Marker Lid Mosaic Beside The Path
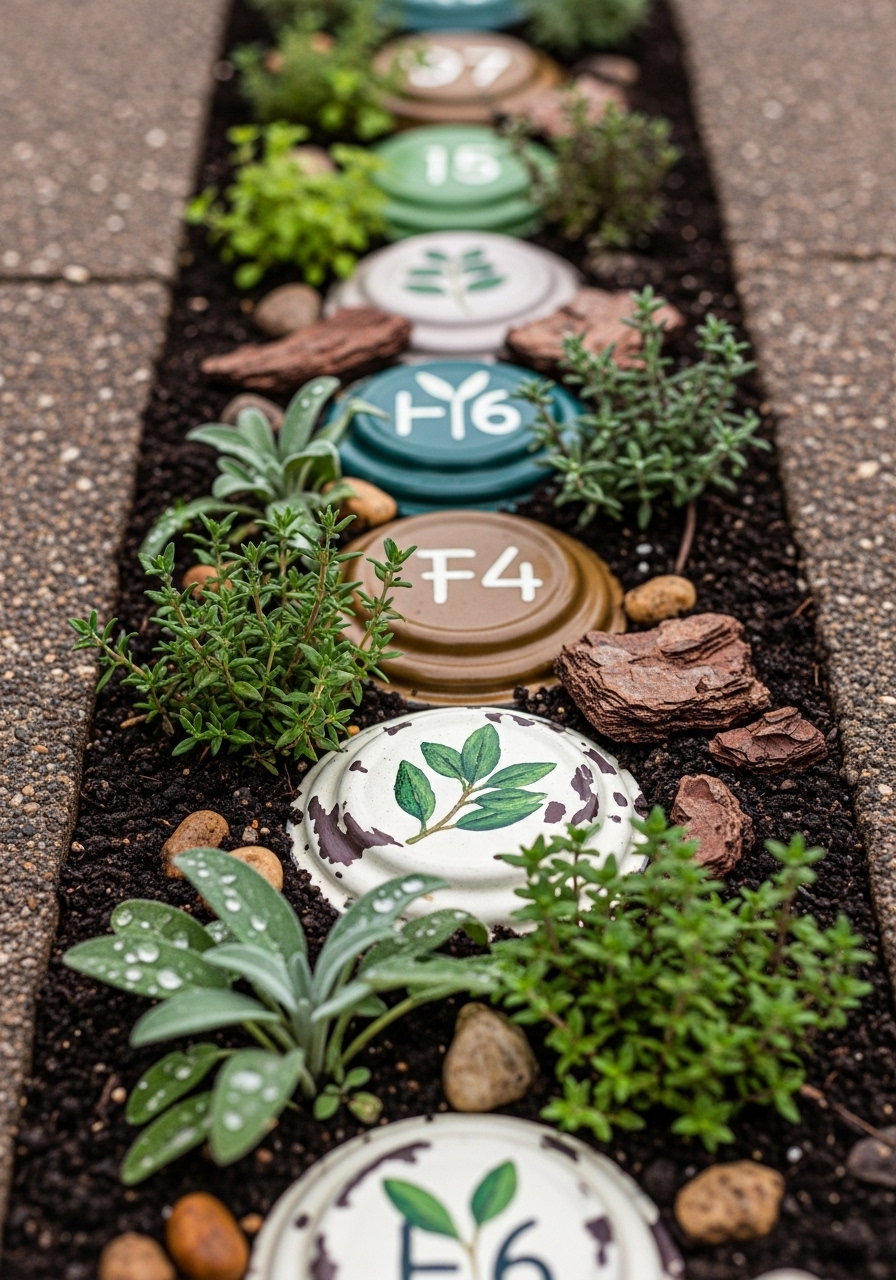
Turn the side of your garden path into a charming herb strip, marked with a tidy mosaic of painted lids. Paint each lid in earthy tones and add a simple symbol—leaf, sprig, or first letter—for each herb. Set the lids into the soil or a narrow mortar strip in front of small clumps of thyme, rosemary, mint, and more. The result is both practical and decorative, making your herb area look thoughtfully designed rather than random.
- Budget Tip: Skip detailed lettering and use simple icons to save time and paint.
- Styling Idea: Keep the palette soft and natural so the greenery remains the main star.
- Practical Note: Place lids just far enough from stems so they don’t interfere with watering or growth.
- Care & Maintenance: Clean off soil splashes and repaint symbols if they become hard to see.
9. Rustic Patchwork Lid Entrance Patio
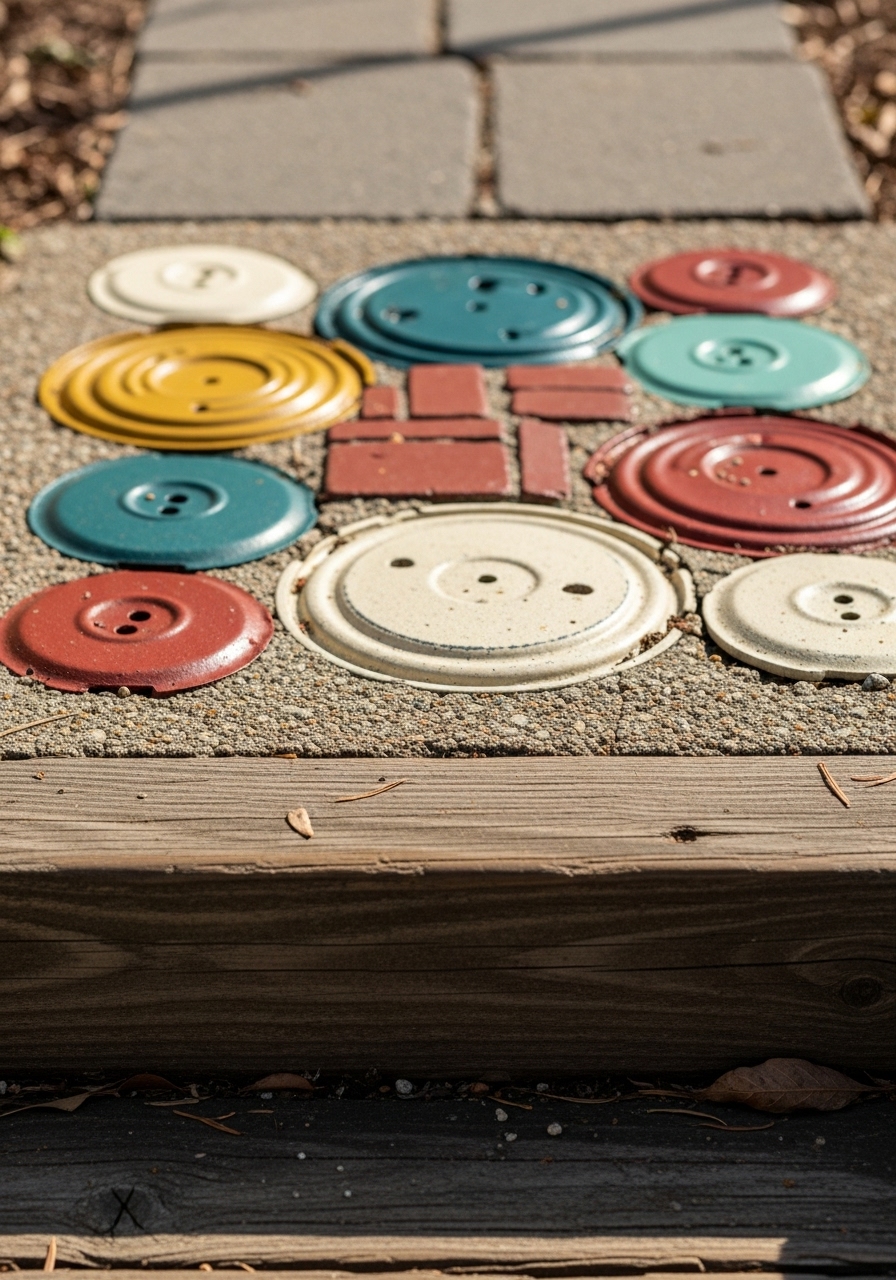
At the start of your path, create a small “patchwork rug” effect using a dense panel of painted lids. Choose warm, rustic shades—mustard, teal, terracotta, cream—and lay them out in patchwork-style clusters before setting them into concrete or mortar. This looks especially good next to wooden steps, brick walls, or a cottage-style porch. It feels like a handmade doormat that never wears out and instantly gives your entrance cozy, creative character.
- Budget Tip: Mix a few bare, unpainted lids into the pattern for a country, distressed look.
- Styling Idea: Coordinate with mismatched vintage pots, lanterns, or a wooden bench nearby.
- Best For: Porch steps, back doors, or the start of a main patio path.
- Care & Maintenance: Brush off mud and leaves so the “patchwork” stays visible and inviting.
10. Storybook Trail Of Patterned Lids And Symbols
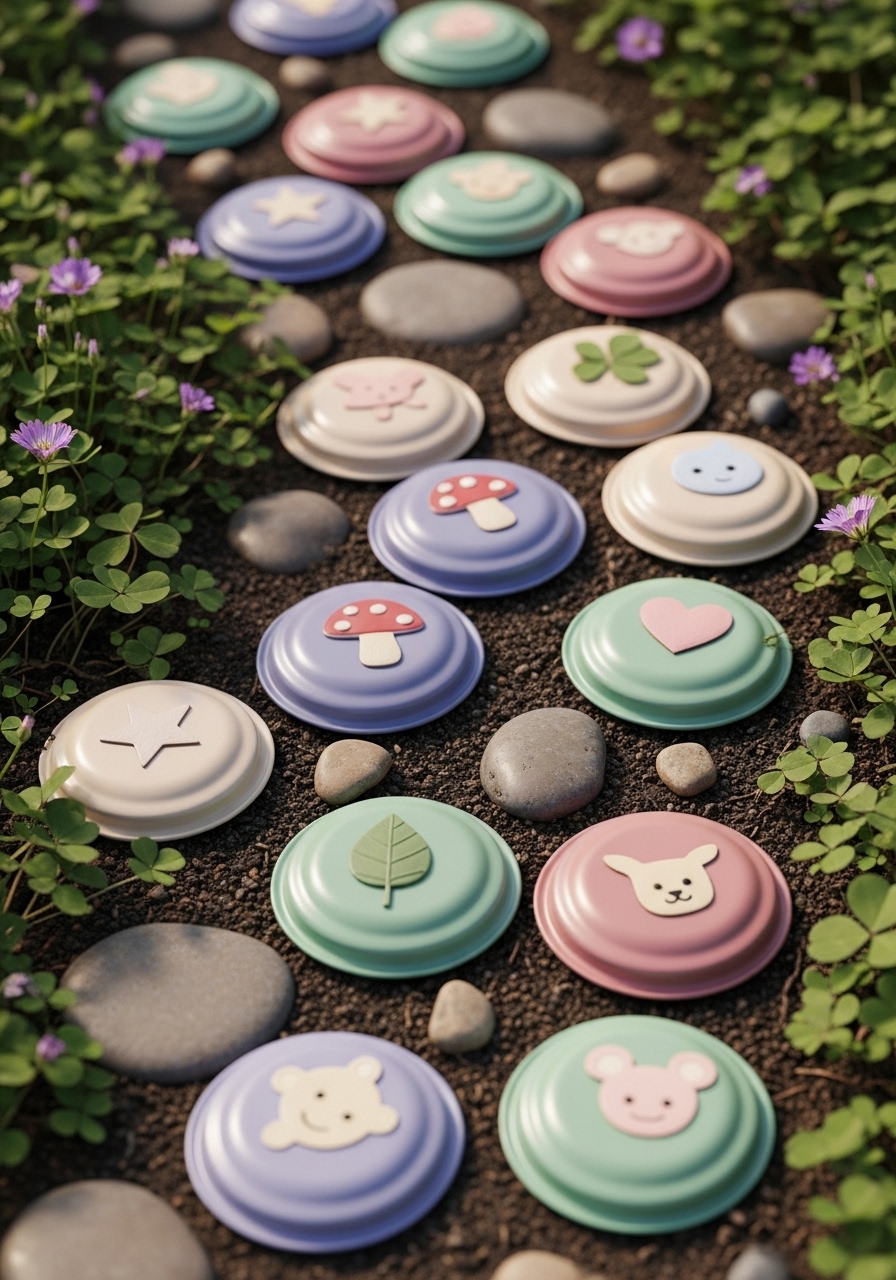
Turn your garden path into a quiet storybook adventure with lids painted in simple scenes and symbols. Add stars, tiny mushrooms, hearts, leaves, or basic animal shapes, and set the lids in a gentle pattern along the sides or within stepping stones. Children (and adults) can follow the images as a visual story, spotting new details with each walk. Against gravel, bark, or lawn, the little illustrations feel whimsical without being overwhelming.
- Budget Tip: Use a fine brush and just a few paint colors to keep supplies minimal.
- Styling Idea: Pair this trail with fairy lights, log slices, or small wooden signs for extra charm.
- Practical Note: Keep designs bold and simple so they’re recognizable even from standing height.
- Extra Idea: Create themed “chapters” along the path—forest creatures in one section, stars and moons in another.
Conclusion
Painted lid mosaics prove that you don’t need expensive materials to make a garden path unforgettable. With a little imagination, color, and a pile of recycled lids, you can create borders, stepping stones, and playful trails that feel totally unique to your space. Start with one small section—a border, a mandala, or a stepping stone—and see how it transforms the mood. Once you get hooked, you can keep adding pieces until your whole garden path pops with personality.
FAQs
Q1. How can I create a painted lid mosaic path on a very small budget?
Start by collecting lids from your own kitchen, friends, and family so you don’t buy any. Use leftover interior or exterior paint as a base and seal everything with a clear outdoor varnish. Focus on a small feature area—like a border or a stepping-stone set—instead of the whole path at once, and expand gradually as you get more lids.
Q2. Are painted lid mosaics suitable for renters who might move?
Yes, just keep your mosaics portable. Create lid designs on stepping stones, pavers, or wooden boards that sit on top of gravel or soil instead of being cemented in permanently. When you move, you can simply lift them up and take your artwork to your next garden or balcony.
Q3. Will painted lids hold up in bad weather?
They can do well outdoors if you prepare them properly. Clean and dry each lid, add a good primer, then paint and finish with a few coats of clear outdoor sealer. Place them where they can drain easily rather than in constantly soggy spots. If a lid rusts or flakes over time, it’s easy to repaint or replace.
Q4. Can I use these ideas on a balcony or tiny patio?
Absolutely. Try a small “mosaic mat” of lids on a concrete stepping stone, or line the edge of a narrow path area with a single row of painted lids in pots or troughs. You can also create portable panels of glued lids on outdoor-safe boards and lay them where you’d like a pop of color.
Q5. Are painted lid paths safe to walk on?
They can be, as long as you install them thoughtfully. Embed lids in concrete, mortar, or compacted sand so they’re level with the surface and don’t wobble. Avoid very glossy finishes on steep slopes to reduce slipperiness, and keep paths swept of mud, leaves, and standing water.
Q6. What’s the easiest painted lid mosaic idea for beginners?
Start with a simple border. Paint all your lids in just two or three colors, then press them into a shallow trench of sand or mortar along one side of your existing path. It’s a small, manageable project that lets you practice painting, sealing, and arranging without reworking the whole walkway.