12 Fun Upcycled Garden Projects Kids Will Love Creating

If you’ve got kids who love to dig, paint, and make a happy mess, the garden is the perfect place to channel that energy. With a few everyday household items, you can turn your outdoor space into a creative playground where little hands help bring the decor to life.
This post gathers simple, low-cost projects using things you probably already have: cans, bottles, jars, old toys, and more. Each idea doubles as a playful craft and a real piece of garden decor, so children feel proud every time they step outside. From rainbow planters to fairy villages, these upcycled projects help you grow a garden that’s greener, more personal, and full of kid-made charm.
Quick List
- Painted Tin Can Rainbow Planters
- Plastic Bottle Self-Watering Herb Planters
- Storybook Fairy Garden In A Broken Pot
- Colorful CD Garden Mobiles
- Pallet Bug Hotel With Natural Materials
- Rock Family Garden Markers
- Upcycled Toy Truck Planter
- Milk Carton Bird Feeders
- T-Shirt Wrapped Hanging Pots
- Mason Jar Solar Lantern Trail
- Old Boot Mini Flower Gardens
- DIY Wind Chimes From Keys And Cutlery
1. Painted Tin Can Rainbow Planters

Rinse out a few old food cans, smooth any sharp edges, and let the kids turn them into cheerful rainbow planters. A quick coat of white primer helps the colors pop; then offer bright paints, simple brushes, and maybe a few cotton buds for spots and tiny details. Once dry, punch drainage holes (grown-ups only), fill with soil, and add flowers or herbs. Lined along a step or shelf, the mix of paint textures, green foliage, and metal makes a fun, eye-catching display.
- Best For: Window sills, steps, balcony rails, or a kid’s “garden corner.”
- Budget Tip: Use leftover wall paint or cheap tester pots; cans are free from the recycling bin.
- Styling Idea: Choose a rainbow theme or let each child design their own “character” planter.
- Practical Note: Place on small saucers if you’re worried about rust stains or drips.
- Care & Maintenance: Repaint or touch up each spring as a quick refresh project.
2. Plastic Bottle Self-Watering Herb Planters
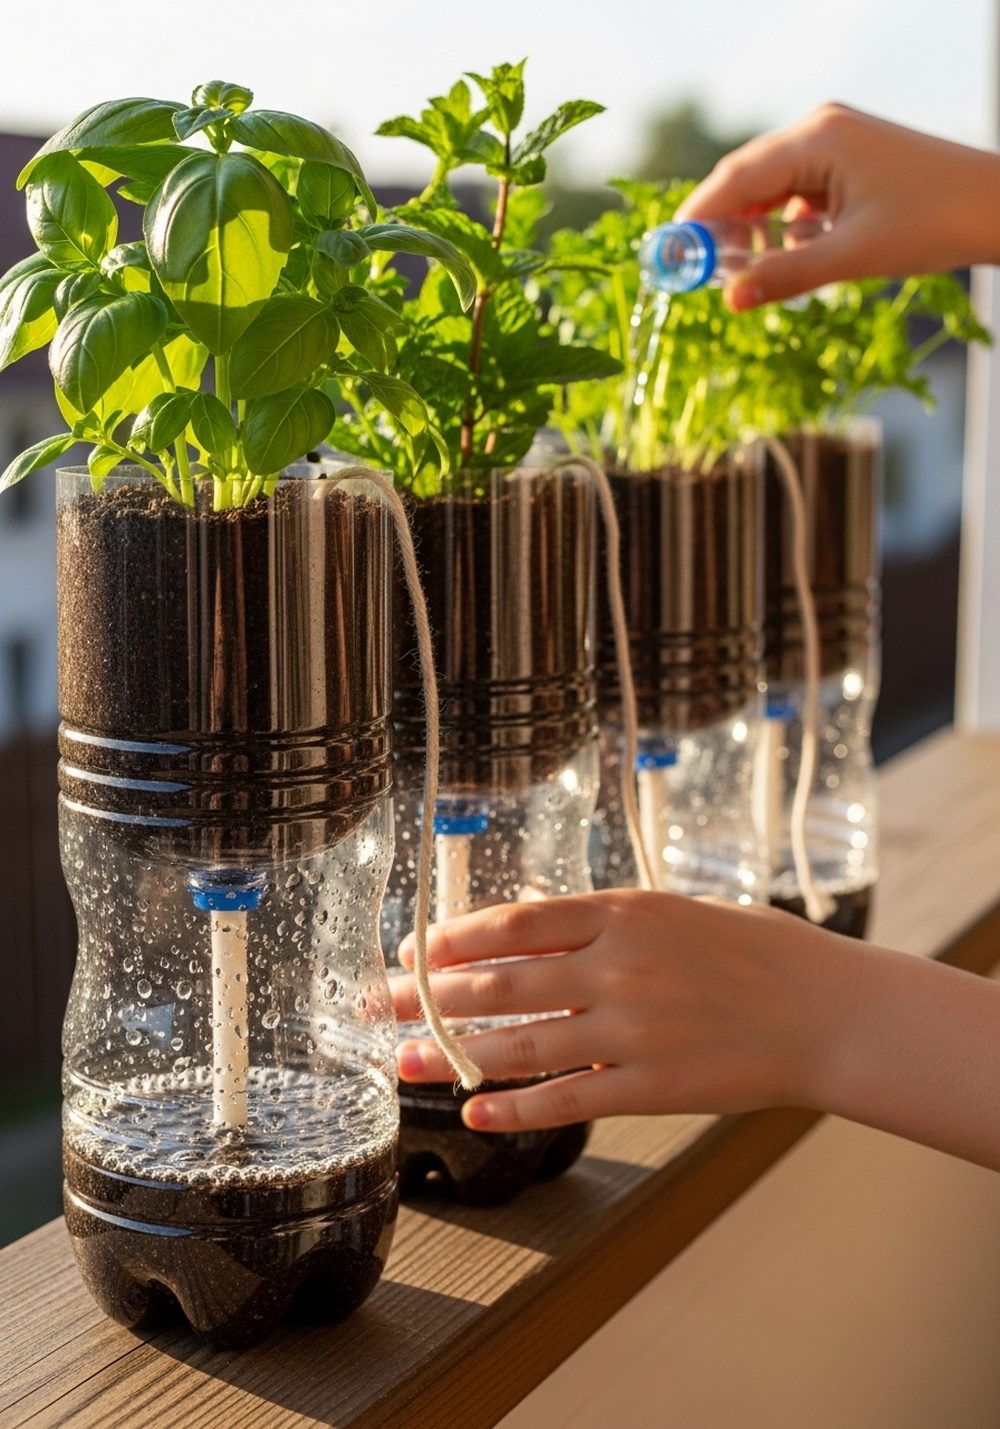
This clever project turns plastic bottles into little science experiments kids can tend themselves. Cut a bottle in half, flip the top part into the base, and thread a cotton wick through the cap so it dips into water below. Kids can scoop in soil, plant herb seeds or cuttings, and then decorate the outside with paint or markers. As the wick draws up water, kids watch their herbs thrive without daily watering. Line several along a railing or shelf for a bright, practical herb display.
- Best For: Sunny kitchen windows, balconies, or small patio tables.
- Budget Tip: Use any clear bottles you have; cotton string or old shoelaces make great wicks.
- Styling Idea: Decorate each planter with plant names or fun faces so kids can “adopt” their herb.
- Practical Note: Show children how to top up the base with water once or twice a week.
- Care & Maintenance: Rinse bottles and refresh soil every season to keep roots healthy.
3. Storybook Fairy Garden In A Broken Pot
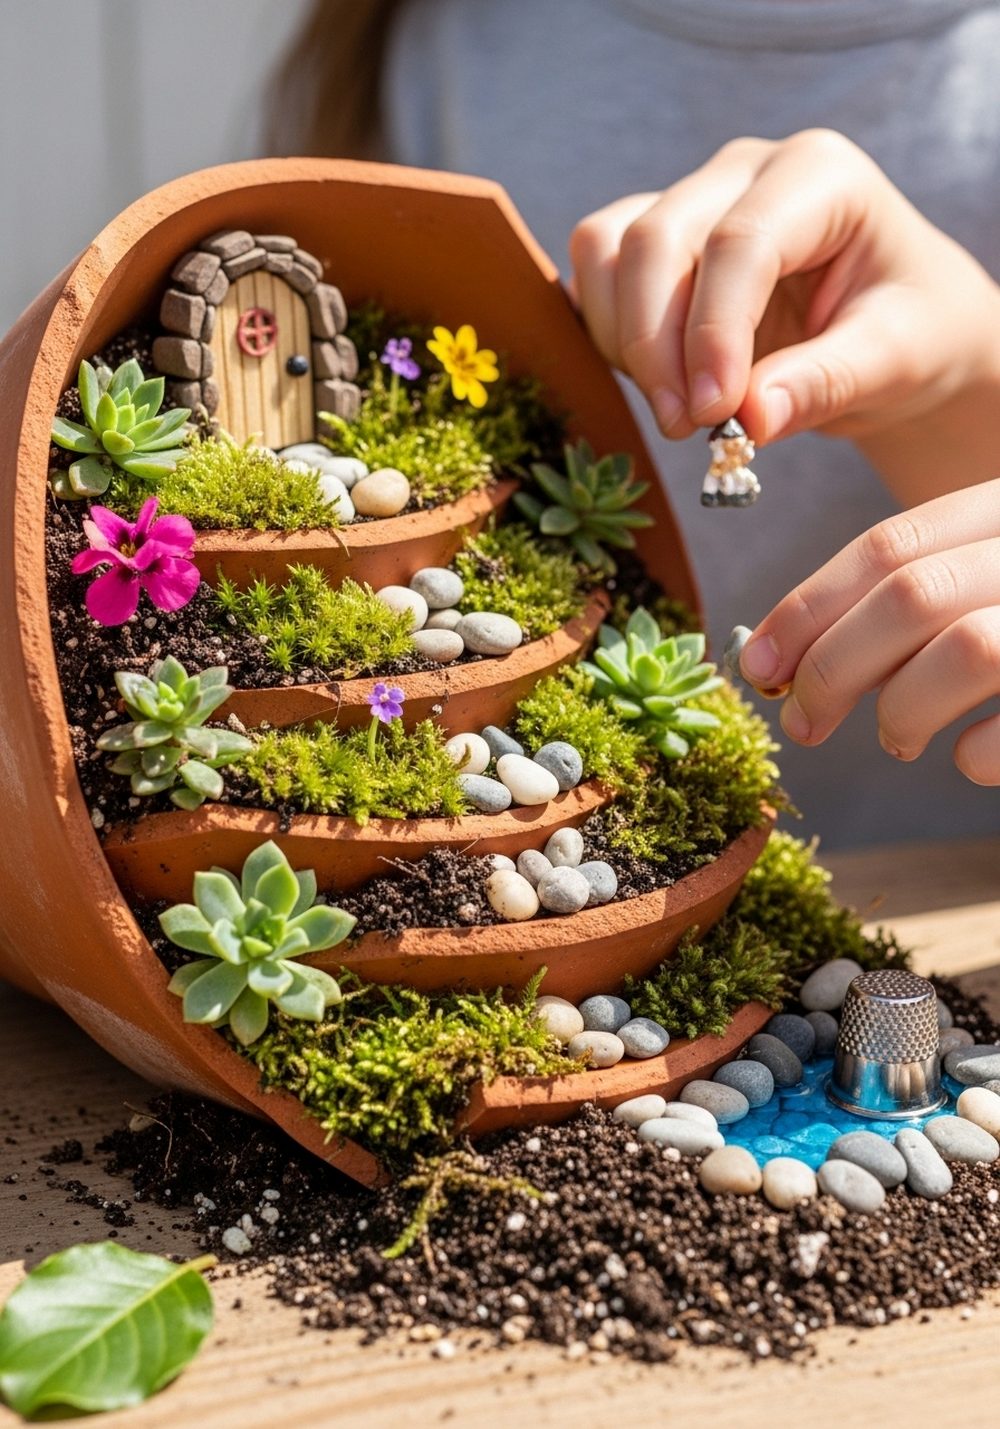
A cracked or broken terracotta pot is the perfect base for a tiny fairy world. Nestle the broken pieces into a shallow tray or larger pot, creating stepped levels. Kids can add soil, moss, mini succulents, and small flowers in each “terrace.” Craft a simple door from sticks, a pebble path, and maybe a bottle-cap pond. The result looks like a secret storybook village peeking out from the soil, and children will happily rearrange it as plants grow.
- Best For: Near a doorway or path where kids can peek in often.
- Budget Tip: Use found materials—pebbles, twigs, and moss from around the yard.
- Styling Idea: Choose soft greens and tiny flowers for a whimsical, woodland feel.
- Practical Note: Keep it slightly shaded so moss and small plants don’t dry out too quickly.
- Extra Idea: Hide a tiny “message stone” for children to find and move each week.
4. Colorful CD Garden Mobiles
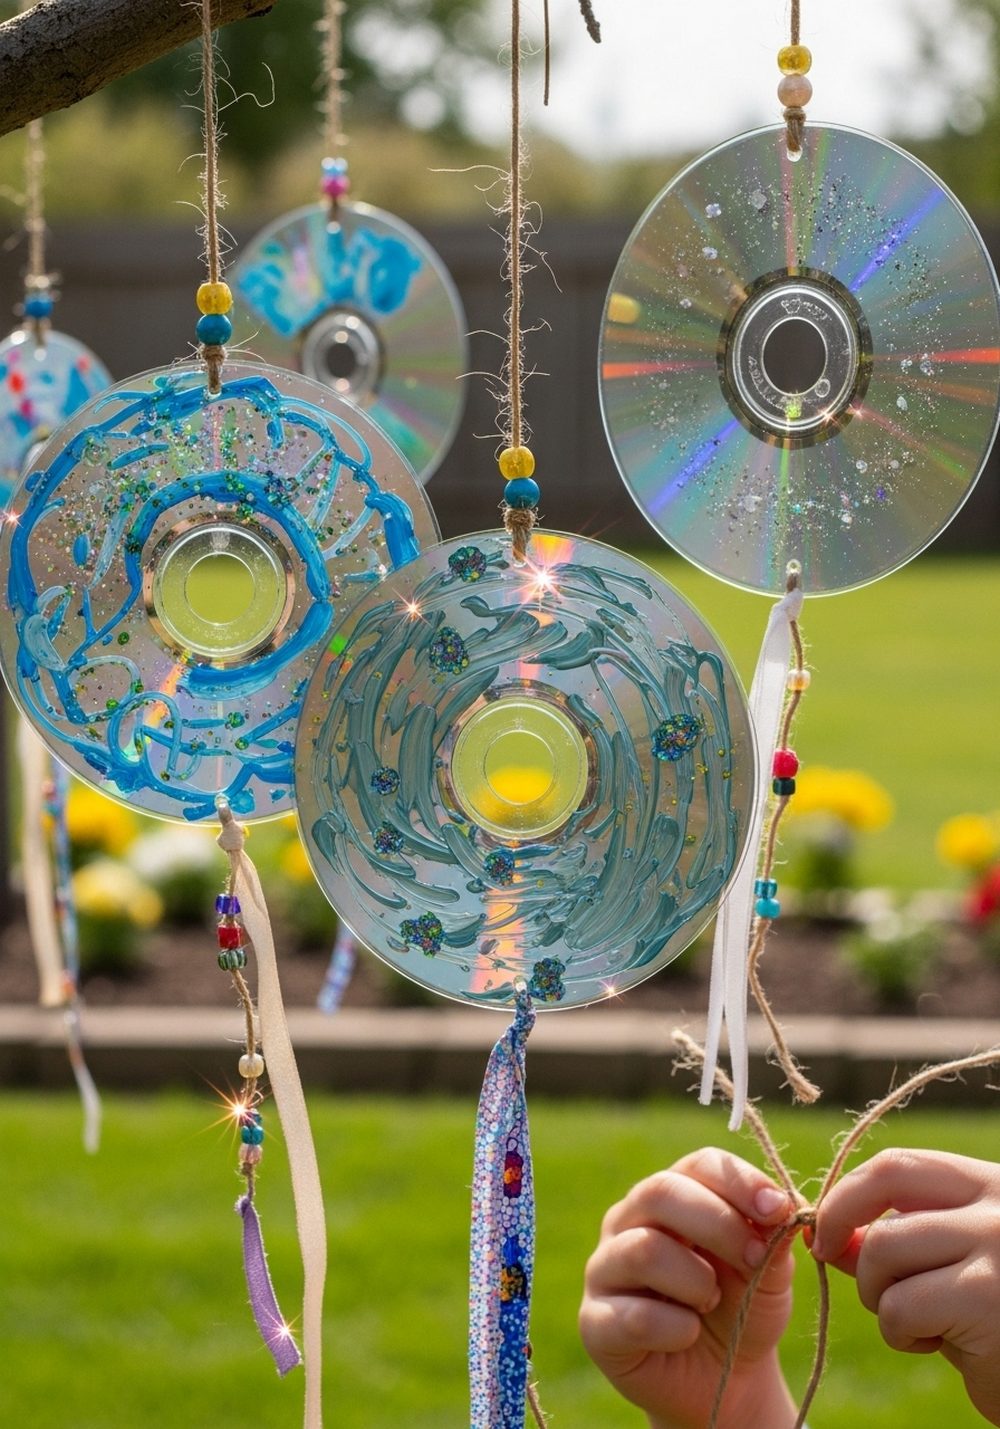
Give scratched or unwanted CDs a second life by turning them into spinning garden mobiles. Punch or drill small holes (adults only), then let kids paint the shiny side with swirls, dots, and shapes. Thread twine through the holes, add beads or ribbon scraps, and hang from a tree branch, pergola, or balcony rail. As the wind moves them, the painted colors mix with shimmering reflections, adding sparkle and movement to your garden.
- Best For: Trees, pergolas, or any spot where they can safely sway.
- Budget Tip: Old CDs and ribbon scraps are usually free; just add a roll of twine.
- Styling Idea: Choose a theme like galaxies, flowers, or sea creatures for a cohesive look.
- Practical Note: Hang them high enough that small children can’t tangle themselves in the strings.
- Care & Maintenance: Bring them in during strong storms to prevent tangling or snapping.
5. Pallet Bug Hotel With Natural Materials
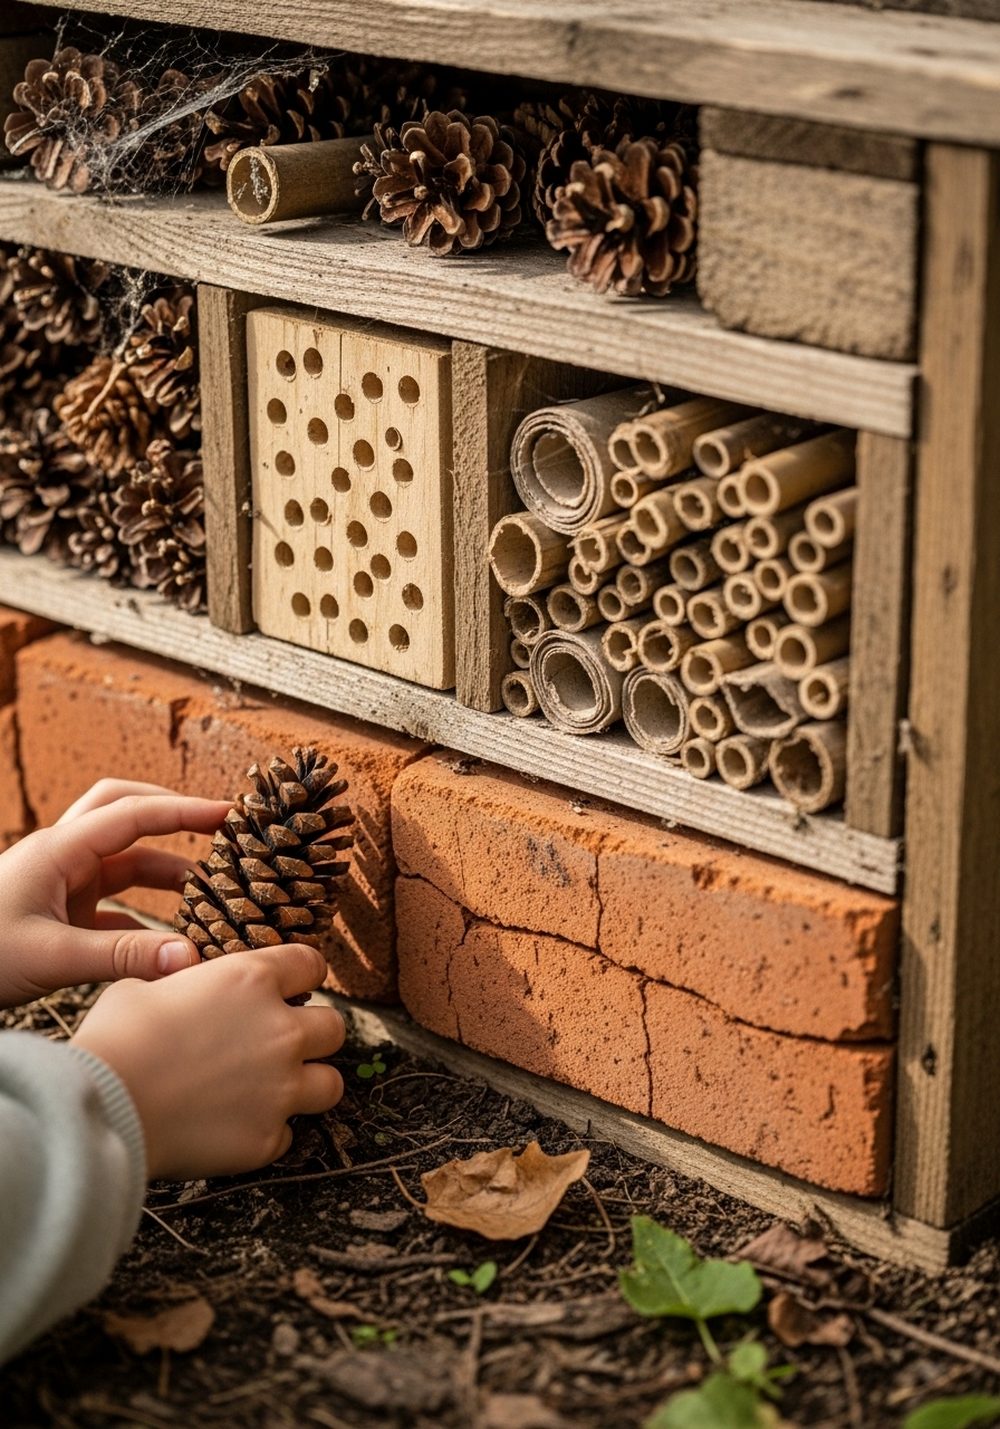
A simple wooden pallet can become a wildlife hotel where kids tuck in different “rooms” for helpful insects. Stand the pallet on its side, secure it well, then fill the gaps with bamboo canes, rolled cardboard, pinecones, bark, and dry leaves. Children love hunting for the stuffing materials and arranging them neatly. Over time, solitary bees, ladybirds, and other tiny guests will move in, giving kids a chance to peek and learn while adding rustic charm to a fence or wall.
- Best For: A quiet corner against a shed, fence, or wall.
- Budget Tip: Use only foraged natural materials and scrap wood; no need to buy fillers.
- Styling Idea: Paint the pallet in natural greens, browns, or a bright color frame kids choose.
- Practical Note: Place it off the ground and secure it firmly so it doesn’t tip.
- Care & Maintenance: Refresh materials once a year, leaving some sections undisturbed for overwintering insects.
6. Rock Family Garden Markers
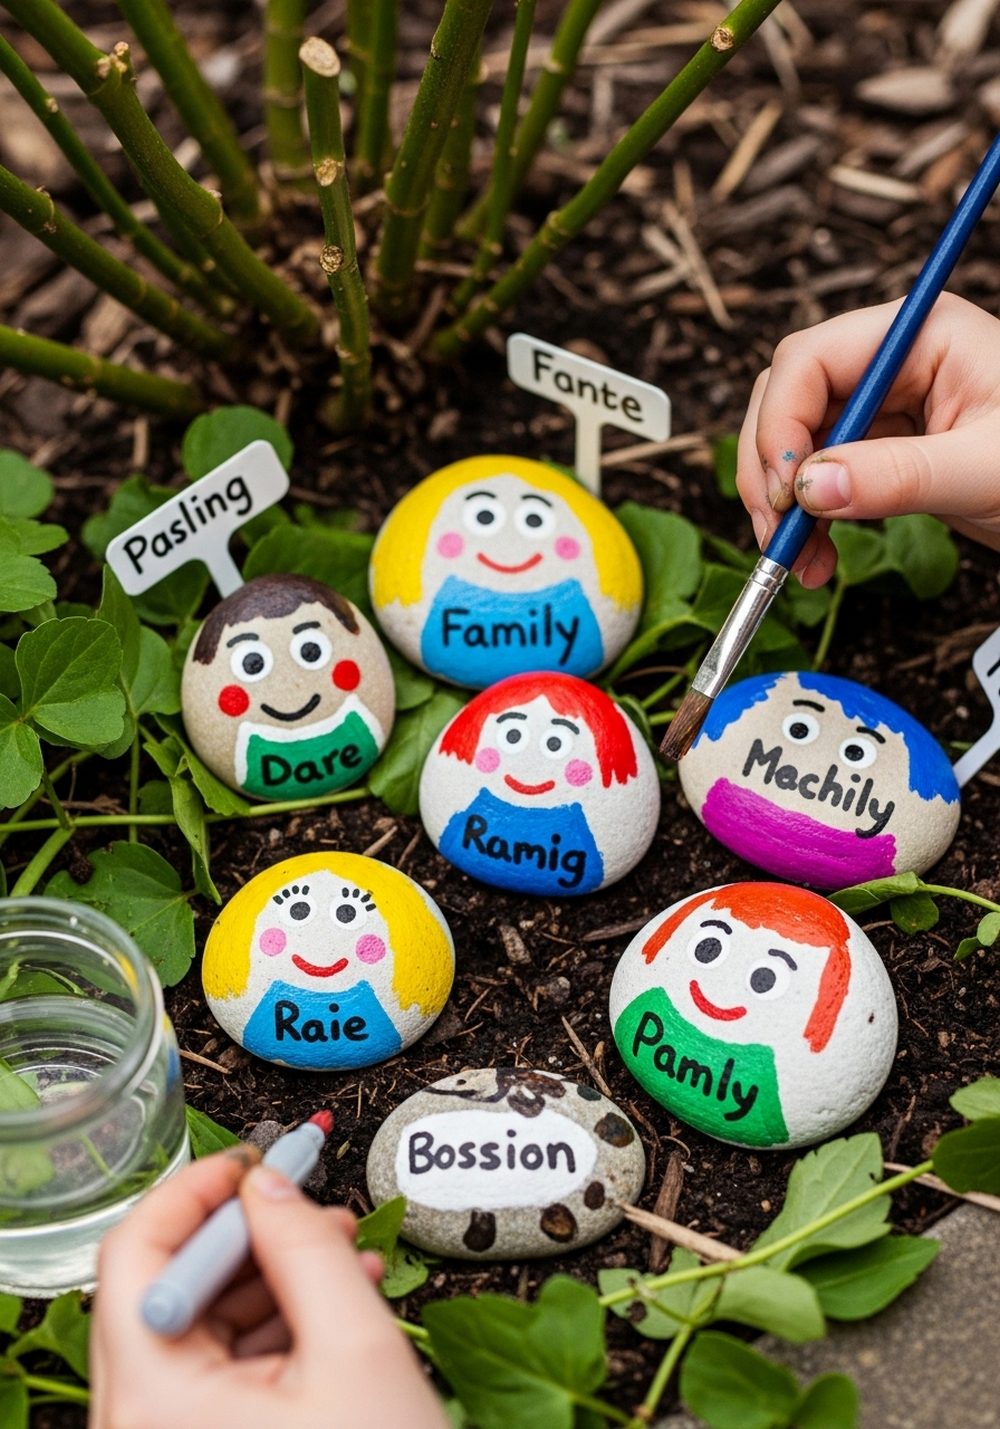
Collect smooth stones and let kids transform them into a rock “family” that also labels plants. Each rock can become a little character with painted faces or patterns, and plant names can be added in bold letters. Pop them at the base of herbs, flowers, or veggies so children can remember what’s growing where. The mix of painted color and natural stone looks charming against soil and leaves, and the rocks stay put through wind and rain.
- Best For: Vegetable beds, herb patches, and children’s raised beds.
- Budget Tip: Rocks are free; just use leftover craft paints and a waterproof marker.
- Styling Idea: Keep a limited color palette so the rocks look like a coordinated family.
- Practical Note: Seal with clear outdoor varnish to help the designs last longer.
- Extra Idea: Paint seasonal rocks—like pumpkins or ladybirds—to swap in throughout the year.
7. Upcycled Toy Truck Planter

Instead of tossing that old toy truck, turn it into a fun rolling planter. Kids can wash and decorate the truck, then help fill the bed with potting soil and tough little plants like marigolds or sedums. Rolling it along paths to “deliver” flowers or parking it in different garden spots becomes part of the fun. The bright colors of the plastic contrast nicely with greenery, and children feel a special bond with a toy that’s now part of the garden.
- Best For: Family gardens with paths, patios, or play areas.
- Budget Tip: Use toys you already own or find second-hand trucks for pennies.
- Styling Idea: Choose flowers that echo the truck’s colors for a playful, themed look.
- Practical Note: Drill drainage holes in the truck bed (grown-ups only) so roots don’t sit in water.
- Care & Maintenance: Refresh the soil and plants once a year, keeping the wheel area clear of mud.
8. Milk Carton Bird Feeders
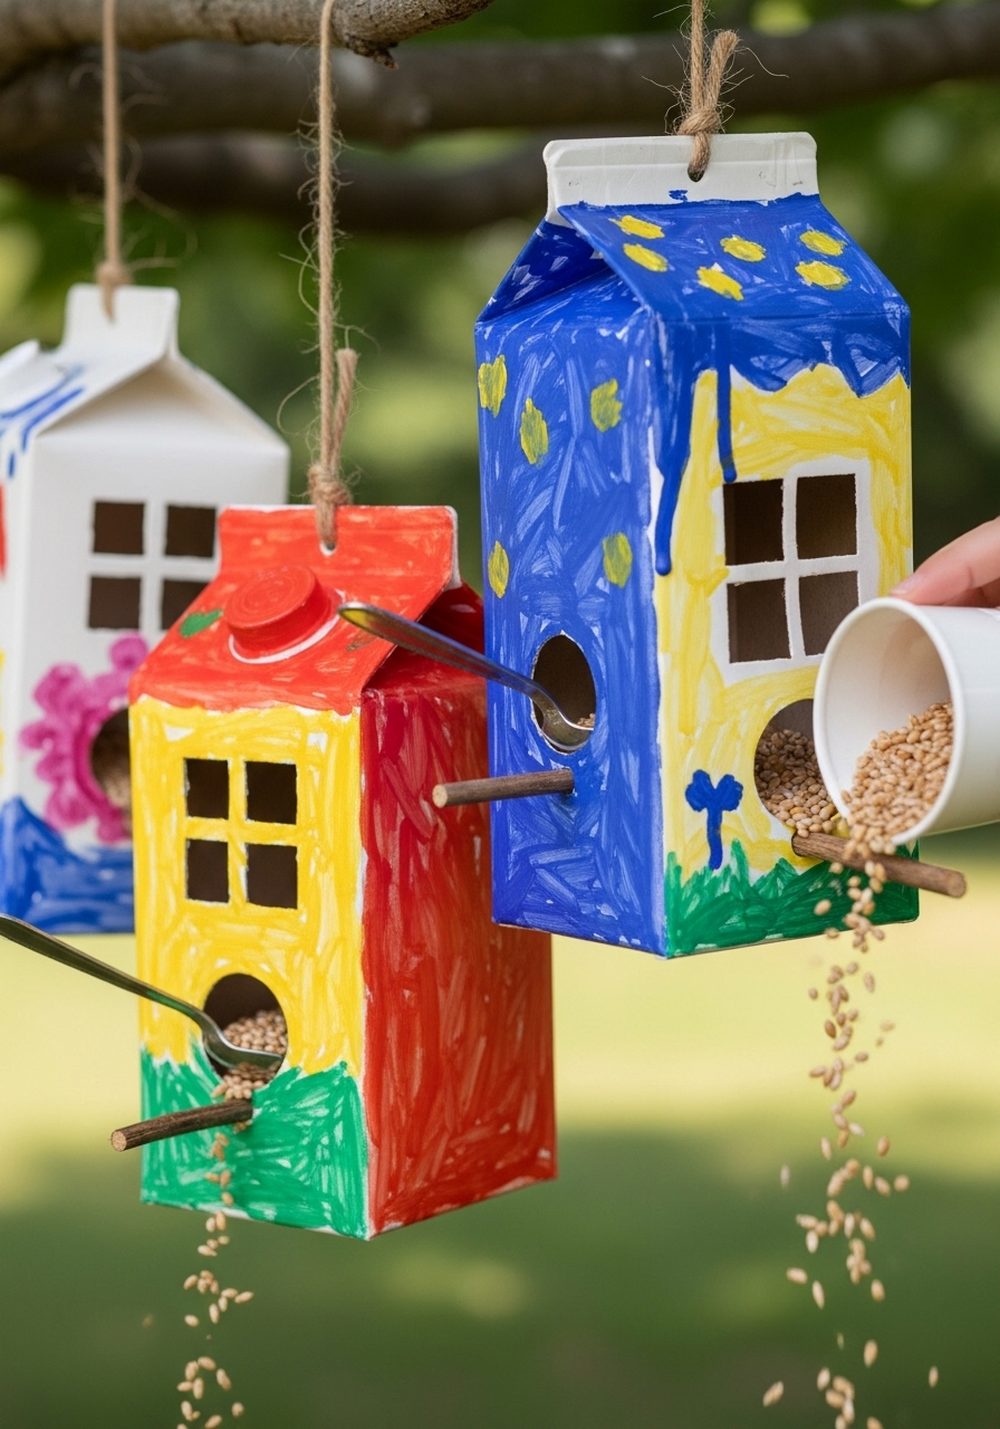
Rinsed milk or juice cartons make excellent kid-made bird feeders. Cut windows in the sides, poke a hole for a twig or spoon perch, then let kids paint or collage the outside. Thread twine through the top and hang them from a branch or hook. Children can help fill the feeders and watch visiting birds from a window or bench. The colorful cartons add a playful splash to the branches while giving kids a close-up view of wildlife.
- Best For: Trees near windows or a quiet sitting area.
- Budget Tip: Use cartons from your own recycling and simple bird seed mixes.
- Styling Idea: Paint feeders in soft nature tones or bright primary colors, depending on your garden style.
- Practical Note: Hang them away from areas where cats can easily reach.
- Care & Maintenance: Replace soggy or damaged cartons regularly and clean out old seed.
9. T-Shirt Wrapped Hanging Pots
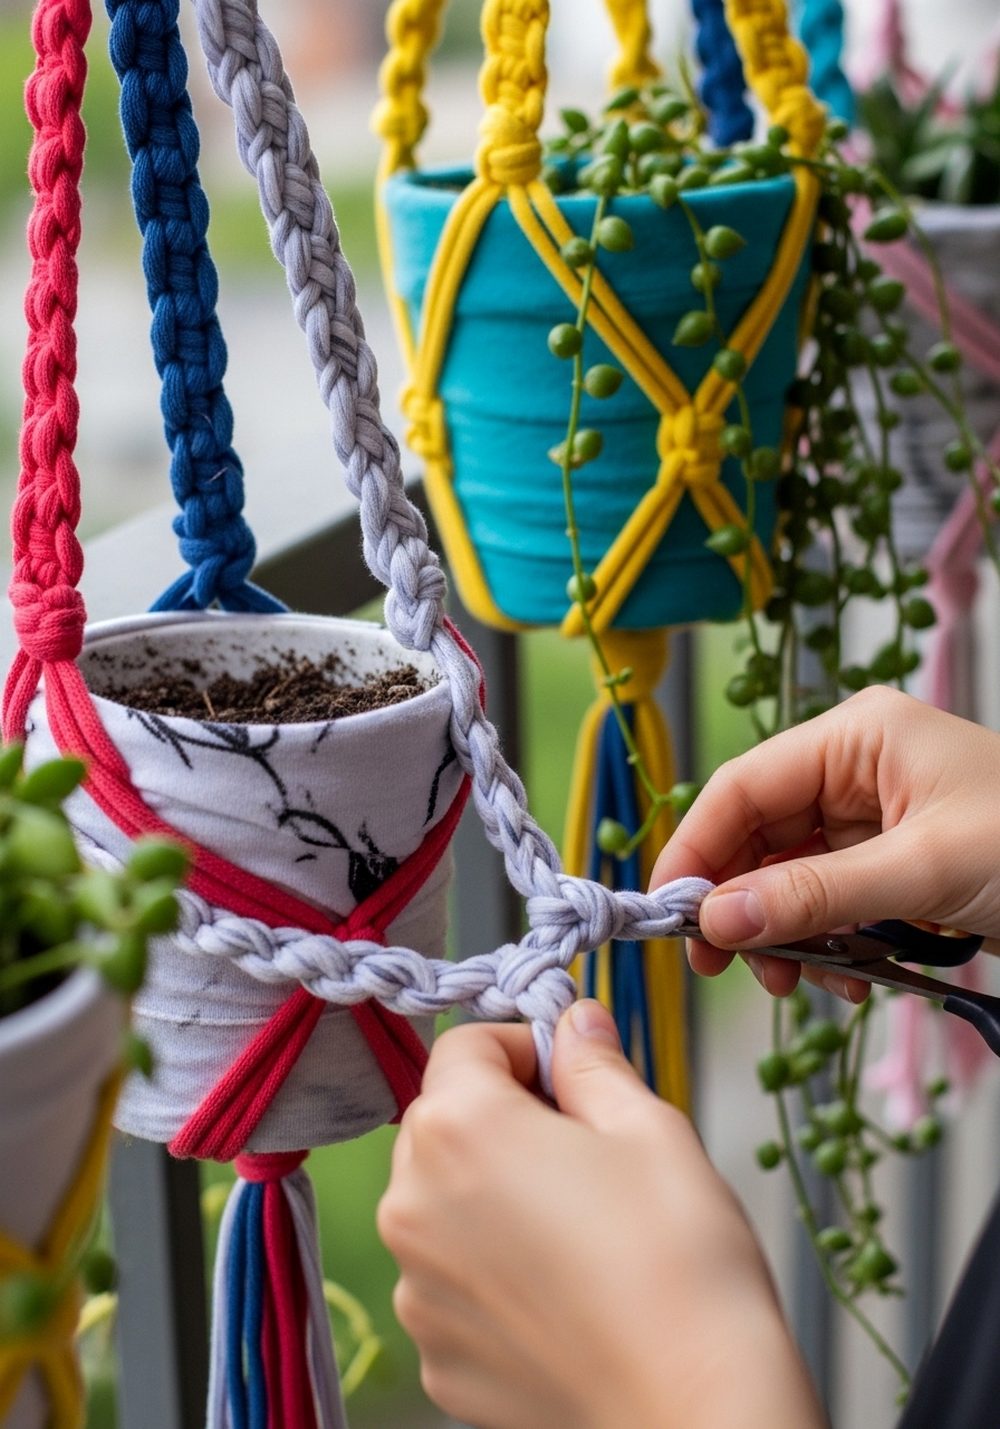
Turn worn-out T-shirts into soft, colorful hangers for small plant pots. Cut the shirts into long strips and help kids braid or knot them around pots, creating simple macramé-style holders. The stretchy fabric grips the pots snugly and adds texture and pattern. Hang the finished pieces from hooks, railings, or sturdy branches, and fill them with trailing herbs or flowers. The mix of fabric colors and greenery brings a cozy, homemade feel to any small space.
- Best For: Balconies, verandas, and under-covered porches.
- Budget Tip: Use old shirts and existing small pots; no special macramé cord needed.
- Styling Idea: Stick to one color family (blues, neutrals, or brights) for a relaxed, coordinated look.
- Practical Note: Show kids how to tie secure knots and place pots where they won’t bump into them.
- Care & Maintenance: Check fabric for wear, and bring hangers indoors during prolonged heavy rain.
10. Mason Jar Solar Lantern Trail
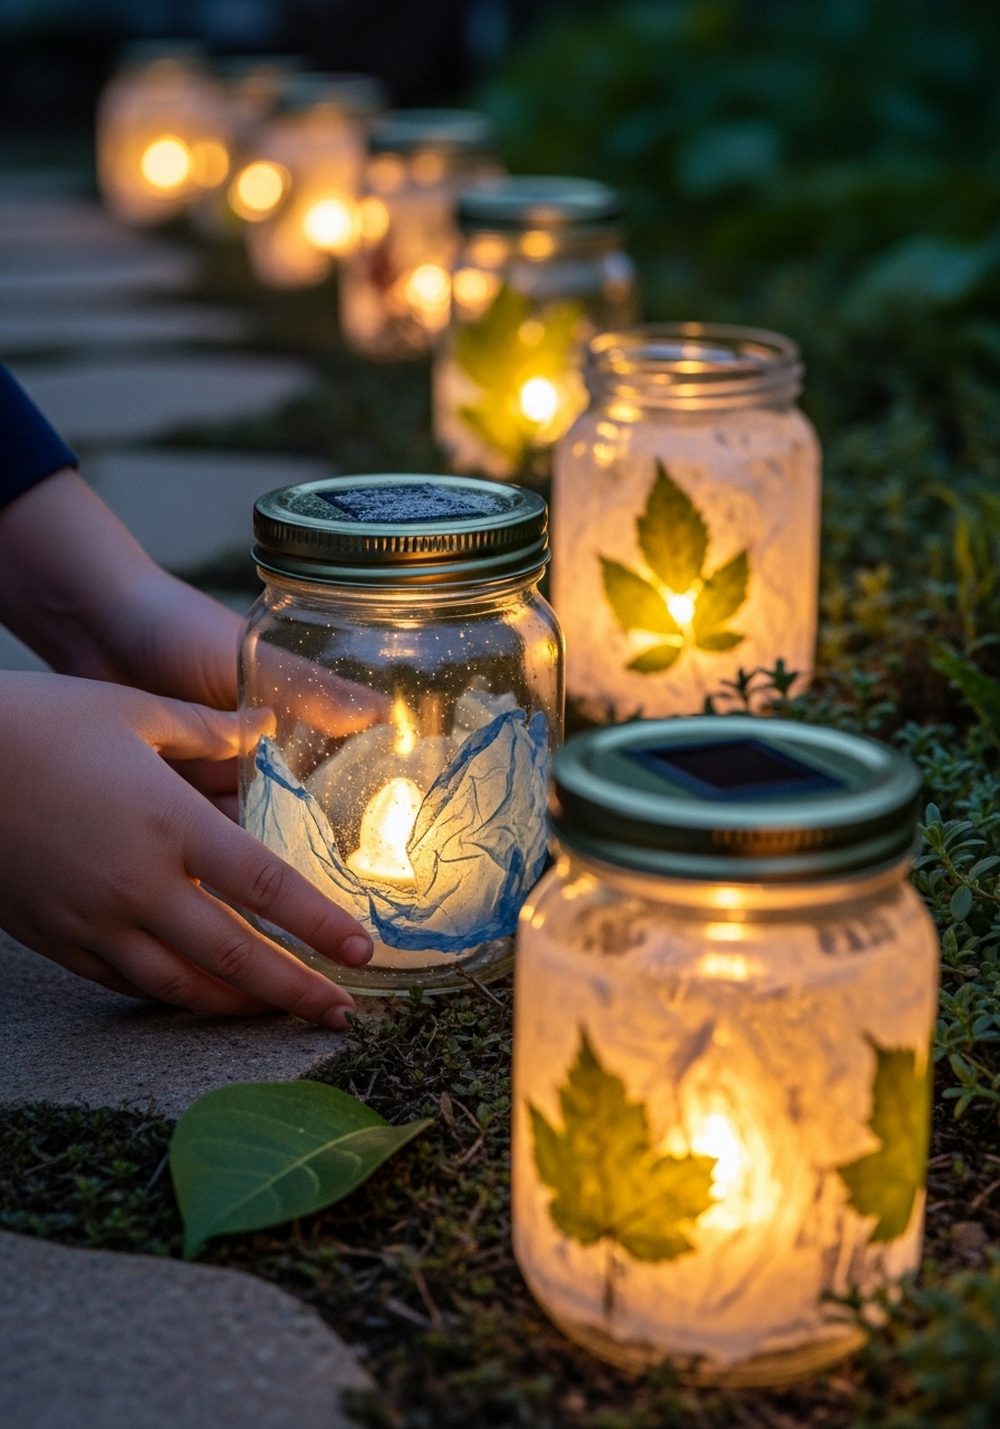
Gather empty jars in different shapes and help kids turn them into glowing lanterns. They can decorate the glass with tissue paper, pressed leaves, or glass paint. Pop a small solar light or battery tealight inside and line them along a path, step, or low wall. At dusk, the garden transforms into a magical trail of soft, colorful light. It’s a wonderful way to enjoy the space together on warm evenings and show off the children’s artwork.
- Best For: Garden paths, around patios, or framing a seating area.
- Budget Tip: Reuse food jars and pick inexpensive solar stakes to dismantle for the lights.
- Styling Idea: Use warm colors for a cozy glow or cool blues and greens for a calm, woodland mood.
- Practical Note: Ensure jars are placed where no one will trip over them in the dark.
- Care & Maintenance: Wipe jars occasionally and replace or recharge lights as needed.
11. Old Boot Mini Flower Gardens
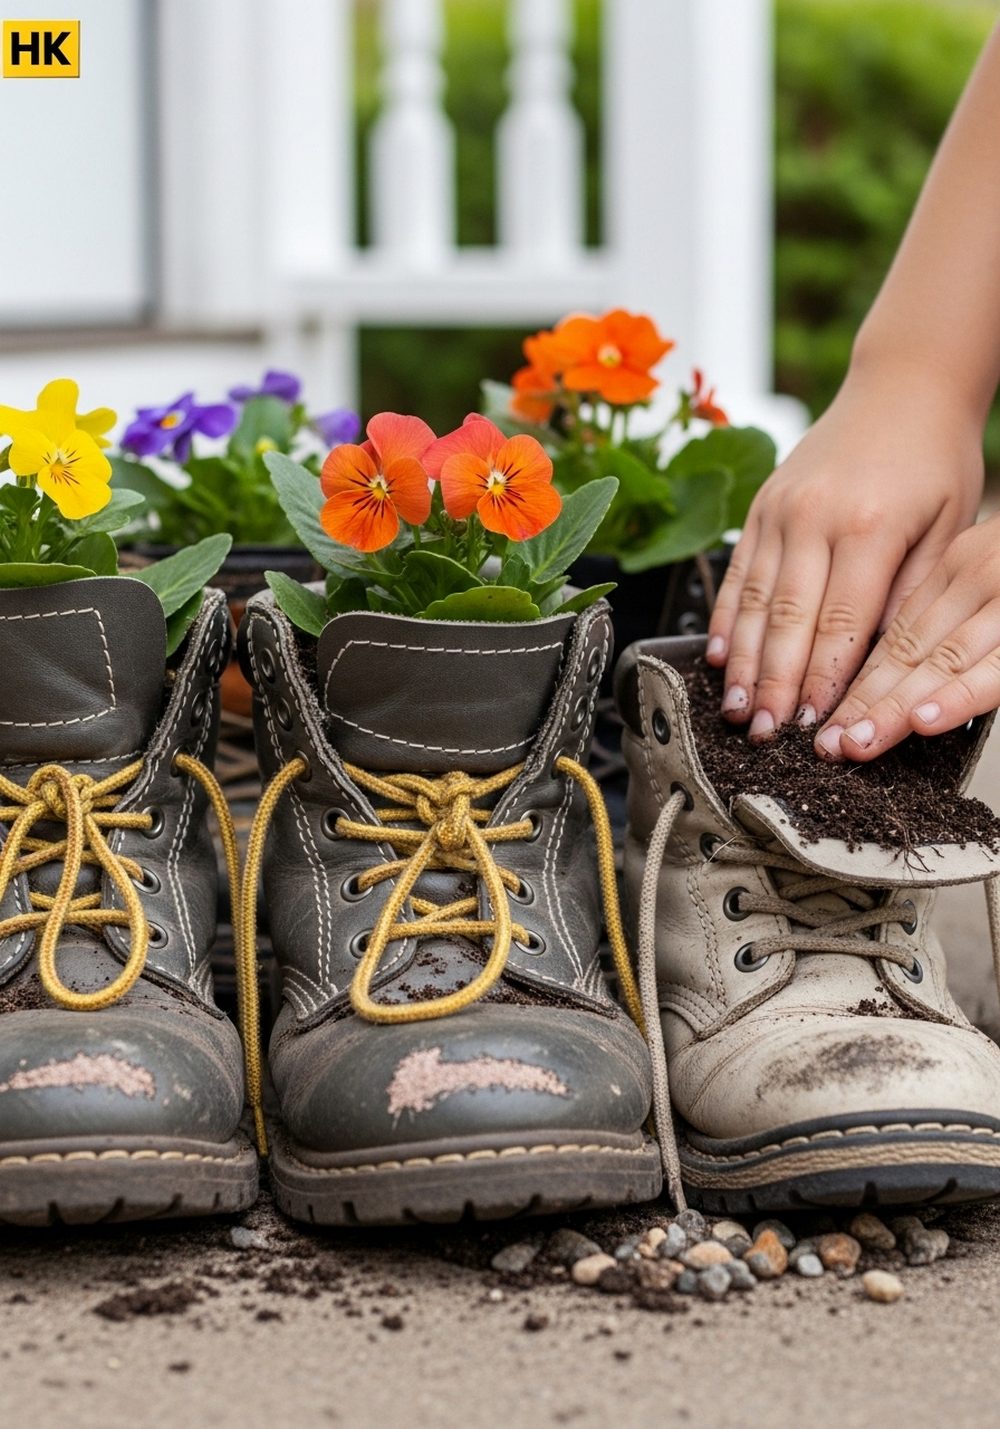
Those outgrown or holey boots can enjoy a second life stuffed with flowers. Kids can wash them, decorate with paint or fabric scraps, then help fill them with soil and hardy plants. Arrange the boots in a little “parade” by the doorway, on steps, or along a path. The contrast of worn leather or rubber with fresh blooms adds instant charm and gives children a fun memory every time they spot their old footwear.
- Best For: Entryways, porch steps, or along a garden edge.
- Budget Tip: Use family boots or wellies; add low-cost seasonal flowers for quick impact.
- Styling Idea: Group boots by color or size for a playful, storybook feel.
- Practical Note: Punch drainage holes in the soles (grown-ups only) and place on trays to protect surfaces.
- Care & Maintenance: Replace tired plants and remove any boots that start to crumble too much.
12. DIY Wind Chimes From Keys And Cutlery
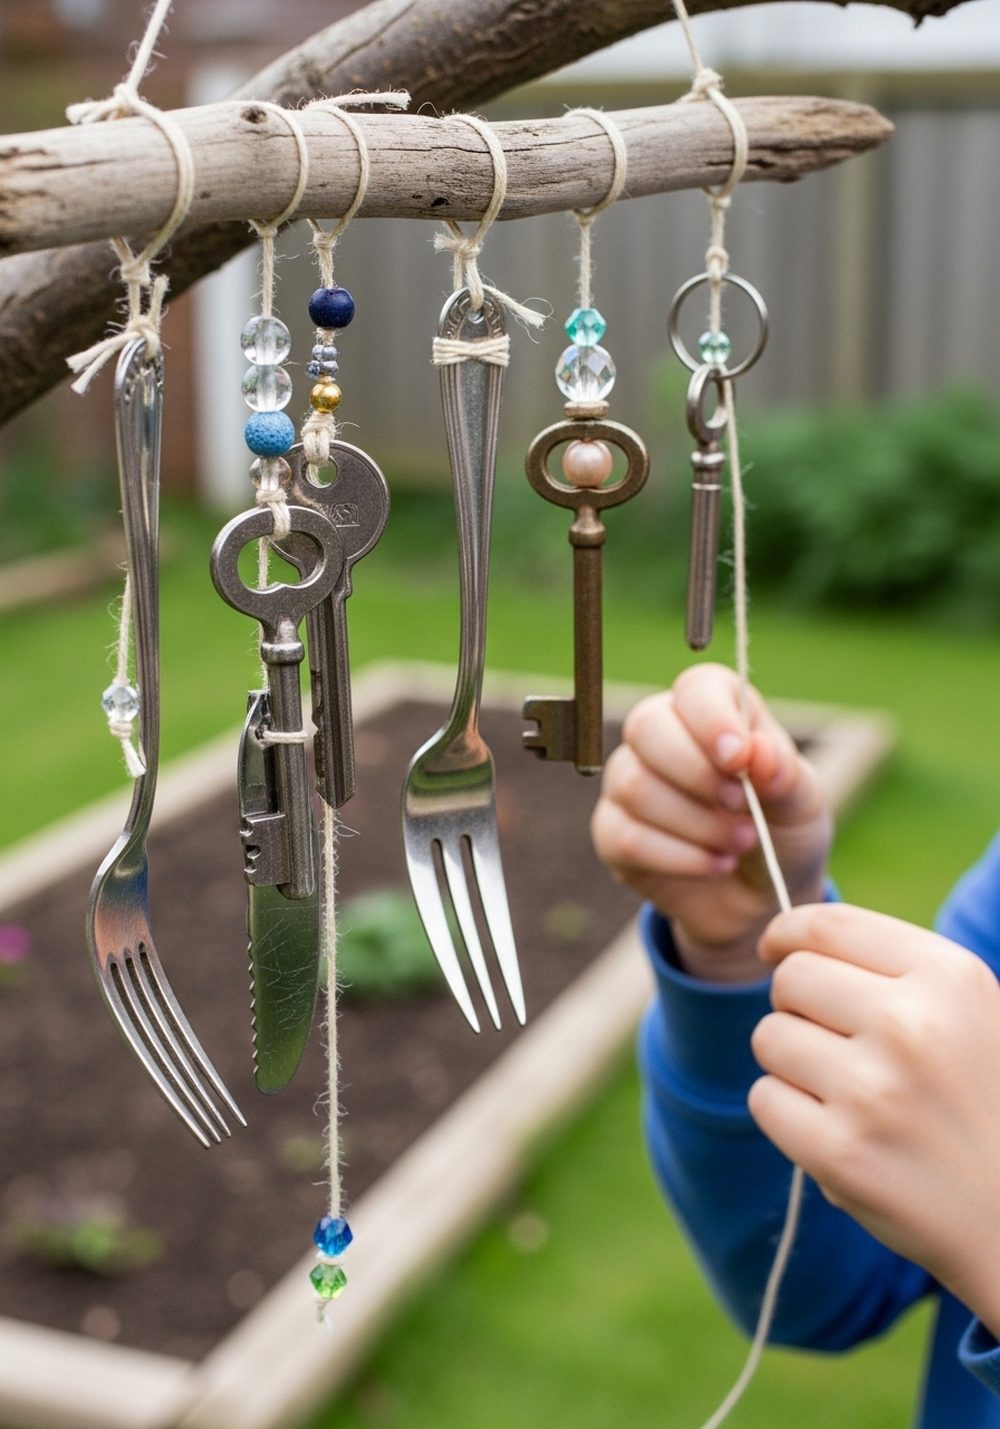
Raid the junk drawer for old keys, single cutlery pieces, and small metal odds and ends. Kids can help clean them, add beads, and tie them with string to a sturdy branch or hoop. When hung from a tree or pergola, they tinkle gently in the breeze, adding sound as well as visual interest. The mix of shiny metal, knotted string, and beads looks wonderfully crafty and gives children a sense of pride every time they hear their wind chime sing.
- Best For: Near a seating area where the gentle sound can be enjoyed.
- Budget Tip: Use only what you already own; no need for special chime kits.
- Styling Idea: Stick to one metal color or add colored beads to match your garden palette.
- Practical Note: Tie secure knots and hang high enough that chimes can move freely without hitting anyone.
- Care & Maintenance: Check strings regularly and replace any that start to fray.
Conclusion
Upcycled garden projects are a lovely way to decorate your outdoor space and give kids a sense of ownership at the same time. With a few saved containers, worn-out clothes, or forgotten toys, you can build a space full of color, texture, and playful character. Start with one or two simple ideas, see which your children enjoy most, and then slowly add more. Before long, your garden will feel like a living scrapbook of family creativity.
FAQs
1. How can I do these projects on a very small budget?
Focus on using what you already have: cans, bottles, jars, cardboard, old clothes, and toys. Most of the cost usually comes from paint and potting soil, so buy small tins, share with a neighbor, or pick them up gradually. Let kids decorate in stages rather than buying everything at once. Even one or two small projects can make a big difference visually.
2. Are these upcycled projects suitable for renters?
Yes, most are completely moveable and non-permanent. Things like tin can planters, toy truck planters, and jar lanterns can be packed up when you move. For hanging items, use removable hooks or tie things to existing railings instead of drilling into walls. That way you can enjoy a decorated outdoor space without leaving marks behind.
3. What if we only have a tiny balcony or no garden at all?
Choose vertical or hanging ideas that don’t take up floor space. T-shirt wrapped hanging pots, plastic bottle herb planters, and small tin can planters work beautifully on balcony rails or window sills. You can also keep a mini fairy garden in a large pot indoors near a sunny window, so kids still get the fun of a “garden” project.
4. How do I keep kids safe while making these projects?
Let adults handle any cutting, drilling, or punching holes, and keep sharp tools out of reach. Offer child-safe scissors, non-toxic paints, and supervision when using glass jars or metal objects. Set up a clear “grown-up only” job list so children know which parts they can safely help with and which bits they only watch.
5. Which upcycled garden project is easiest for beginners?
Painted rocks and tin can planters are very simple and forgiving. Kids can splash on color, and even if the designs aren’t perfect, they look charming in the soil. Milk carton bird feeders are another easy win: cutting windows, decorating the outside, and filling them with seed is straightforward and satisfying when birds start to visit.
6. Will these projects survive bad weather?
Most will cope well with normal rain and sun if you use outdoor paints and sealers where possible. Very lightweight items like CD mobiles or carton feeders may need to come down during strong winds. Jars, boots, and rock markers are sturdy, but it’s fine to refresh or repaint them each year as a new family craft tradition.