10 Painted Cinder Block Garden Projects for Kids

If your kids love getting messy with paint and digging in the dirt, painted cinder blocks are the perfect weekend project. They’re cheap, easy to find, and sturdy enough to handle climbing, stacking, and endless play. With a few brushes and a handful of colors, you can turn plain gray blocks into playful garden decor that children feel proud of.
In this post, you’ll find ten simple, kid-friendly projects using cinder blocks as borders, planters, games, and even little science stations. Each idea is designed to be realistic, budget-conscious, and easy to adapt for small yards, patios, or balconies. By the end, you’ll have a garden that looks brighter, feels more welcoming, and tells a story that your kids helped create.
Quick List
- Rainbow Cinder Block Border Maze
- Alphabet Painted Cinder Block Planters
- Storybook Character Cinder Block Tower
- Painted Cinder Block Bug Hotel
- Cinder Block Hopscotch Garden Path
- Toy Car Garage Cinder Block Roadway
- Cinder Block Tic-Tac-Toe Game
- Fairy Castle Cinder Block Planters
- Ocean-Themed Painted Cinder Block Corner
- Weather Station Science Cinder Blocks
1. Rainbow Cinder Block Border Maze
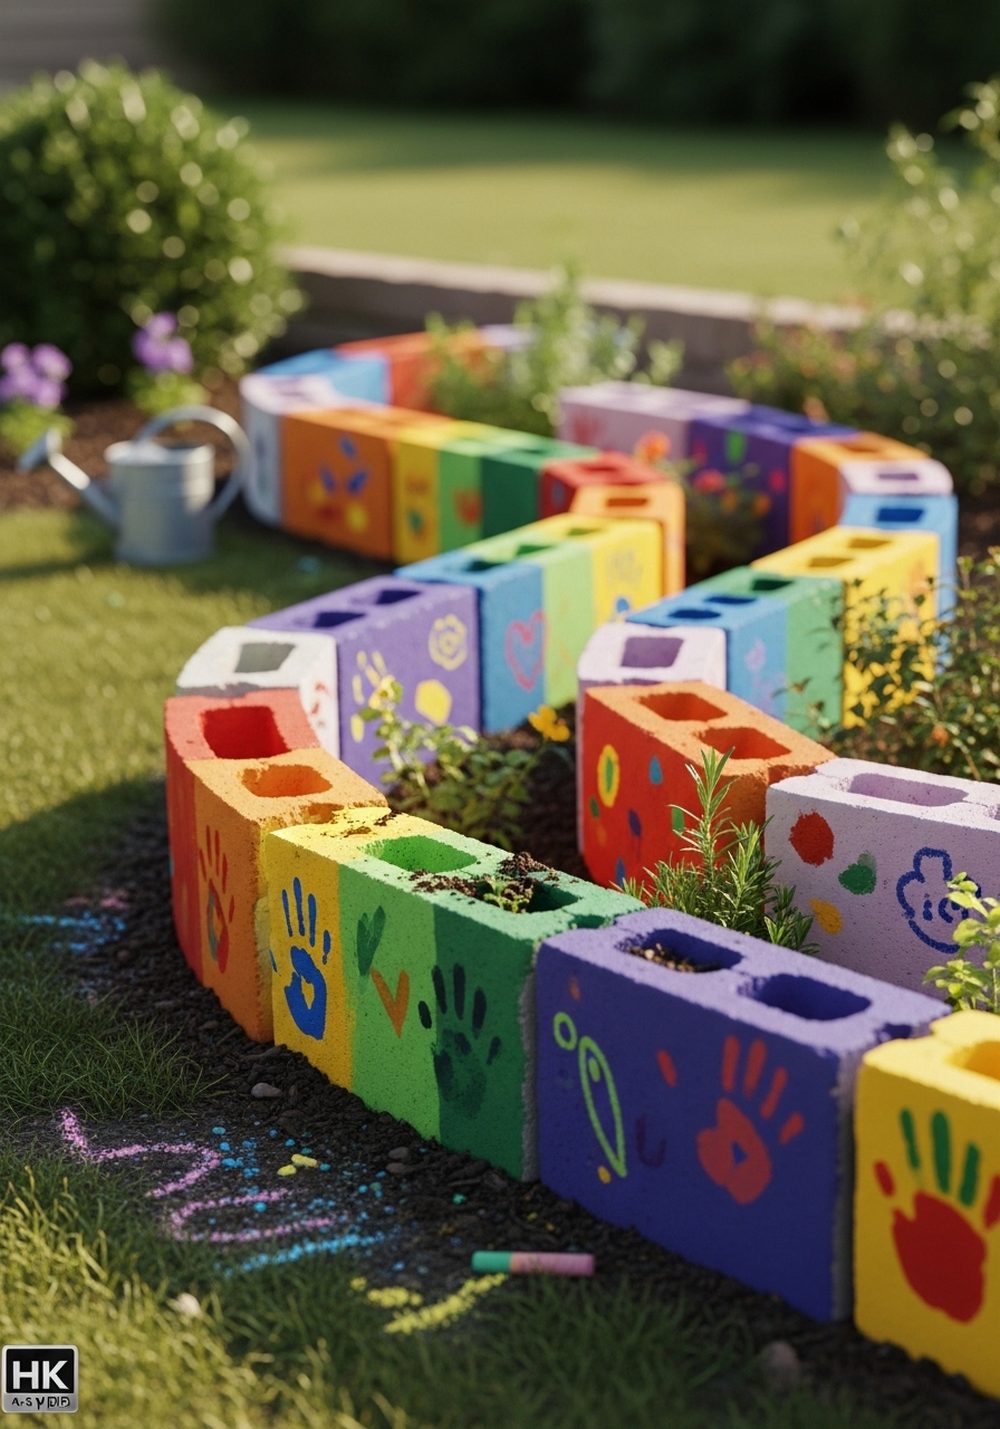
Turn a simple garden edge into a rainbow path kids will race along. Lay a low border of cinder blocks around flower beds or along the lawn, then let children paint each block in a different bright color. Add stripes, dots, or handprints to make every side unique. Arrange the blocks in gentle curves or zigzags to create a mini “maze” that guides little feet and eyes through the garden, framing your plants with cheerful color.
- Best For: Edging lawns, veggie beds, or around a sandpit.
- Budget Tip: Use leftover house paint or sample pots and buy blocks in stages.
- Styling Idea: Keep plants mostly green and white so the rainbow border really pops.
- Practical Note: Make sure blocks are laid flat and stable to avoid tripping.
- Care & Maintenance: Touch up scuffs once or twice a year with a quick repaint.
2. Alphabet Painted Cinder Block Planters

Turn learning letters into a leafy little lesson. Line up cinder blocks along a fence or wall and paint a large alphabet letter on each one. Plant herbs, flowers, or small veggies in the holes, and match them to the letter if you like—B for basil, M for mint, P for pansy. Kids can help paint, plant, and water, and you’ll end up with a colorful living alphabet that brightens the garden and invites curious little readers.
- Best For: Fences, narrow side yards, and balcony edges.
- Budget Tip: Start with just a few letters that spell your child’s name or a short word.
- Styling Idea: Use a single background color and change only the letter colors for a tidy look.
- Practical Note: Place heavier blocks on a solid surface like pavers, not soft lawn.
- Extra Idea: Add simple picture icons next to letters for younger children.
3. Storybook Character Cinder Block Tower

Bring favorite bedtime stories to life outdoors with a painted cinder block tower. Stack blocks in a short, stable formation—no taller than kids’ chest height—and paint each side with simple storybook characters, trees, stars, and castles. Kids can help choose the theme and colors, then plant small flowers or trailing vines in the top holes. The result is a sweet focal point that feels like a tiny story world growing right out of the soil.
- Best For: Corners of the garden or beside a reading nook.
- Budget Tip: Use one main stack and rotate themes as you repaint over time.
- Styling Idea: Stick to a soft palette of two or three main colors for a cohesive story feel.
- Practical Note: Stack blocks on level ground and secure with construction adhesive if needed.
- Care & Maintenance: Check the tower regularly to be sure it stays stable and safe.
4. Painted Cinder Block Bug Hotel
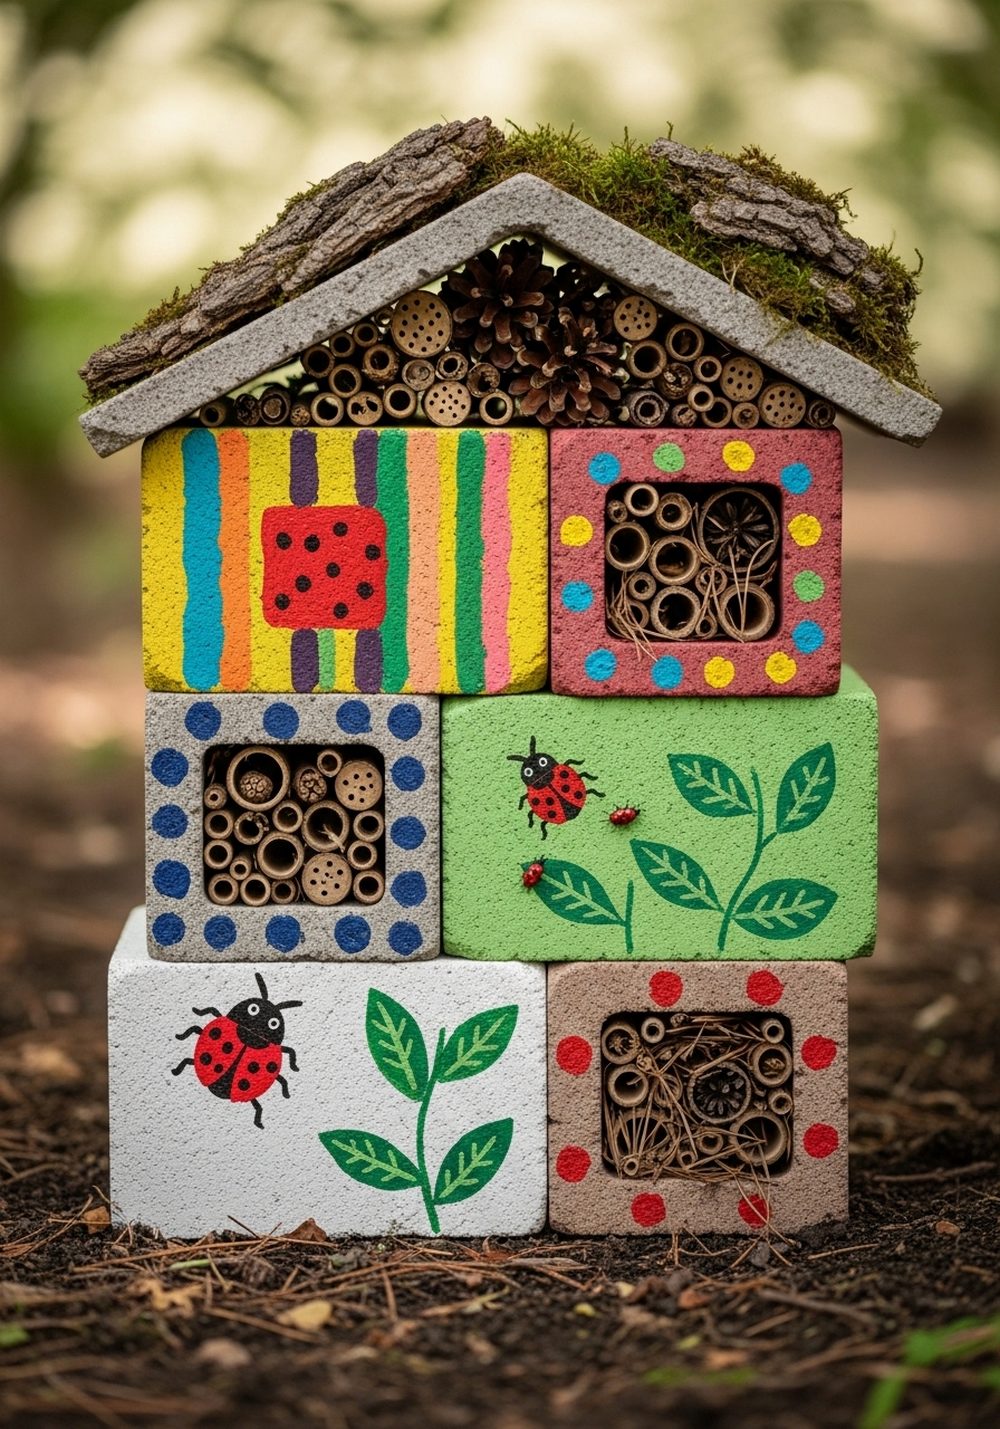
Invite friendly insects into the garden with a colorful bug hotel kids can build themselves. Stack a few cinder blocks on their sides and let the children paint the outer surfaces with patterns, leaves, or tiny bugs. Fill the hollow sections with bamboo canes, pinecones, bark, and dry sticks to create snug hiding spots. Kids get to decorate and then watch for ladybirds, bees, and other little visitors moving in over time.
- Best For: Wildlife-friendly gardens and curious young nature lovers.
- Budget Tip: Collect natural filling materials on walks instead of buying them.
- Styling Idea: Use earthy greens and browns with a few bright accents so it blends into foliage.
- Practical Note: Place away from high-traffic play areas to give insects a calm spot.
- Care & Maintenance: Refresh the natural materials every year or so if they rot or compact.
5. Cinder Block Hopscotch Garden Path
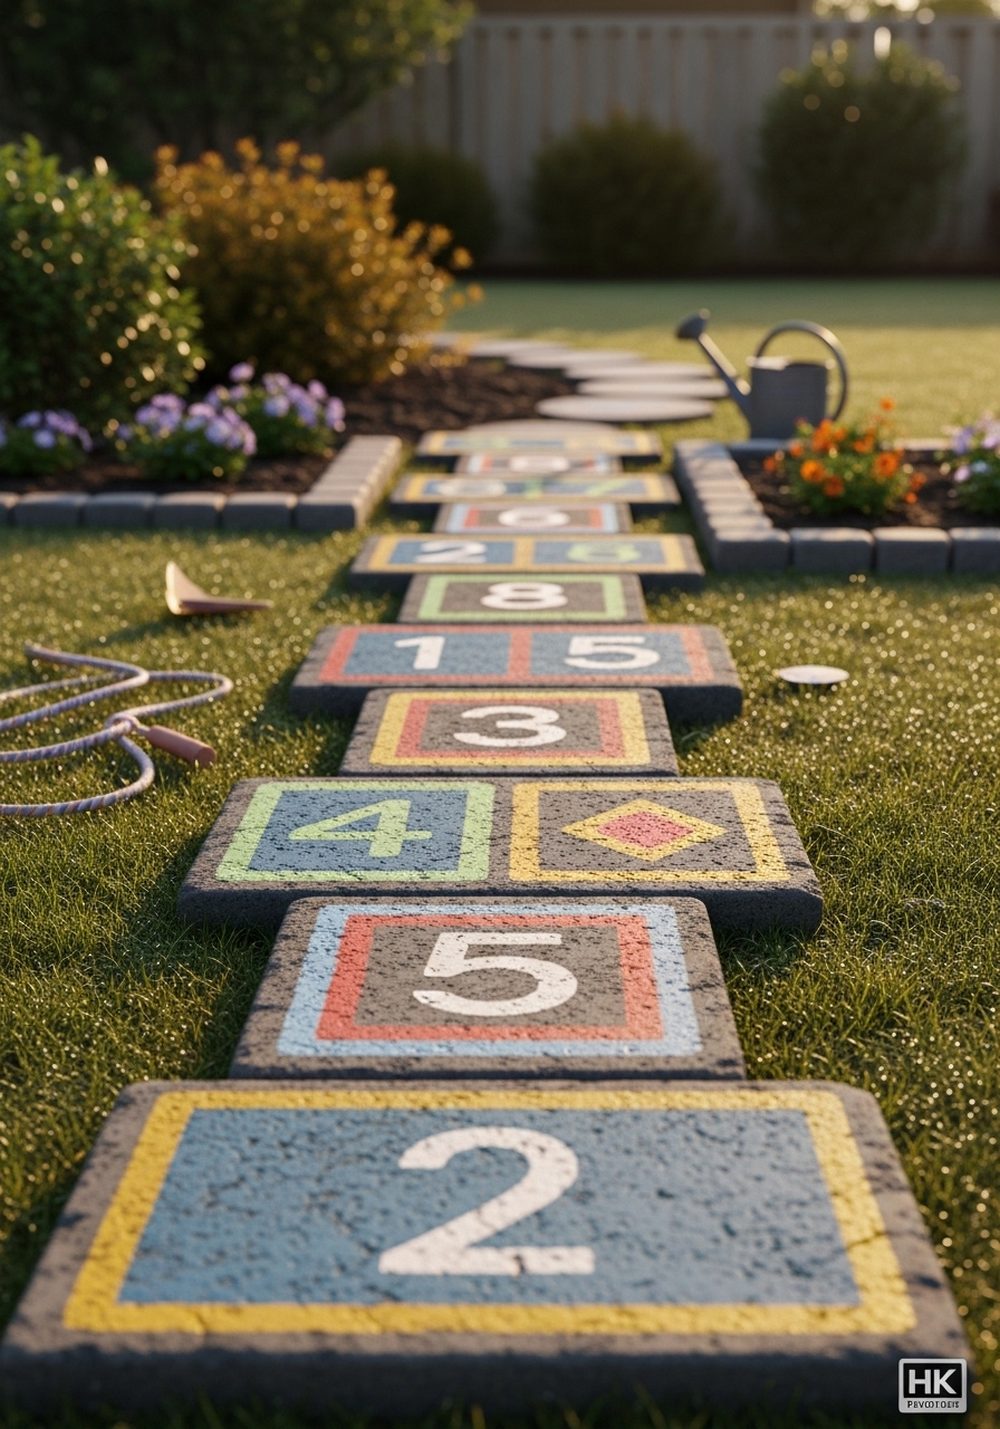
Swap boring stepping stones for a playful hopscotch path. Lay cinder blocks flat in a single or double line across a lawn or through a bed, then paint numbers, shapes, or simple frames on each block. Kids can hop from one to another while you water or weed, turning garden chores into a short game. The painted blocks double as a bright pathway and an easy way to keep little shoes out of muddy soil.
- Best For: Paths between beds or leading to a playhouse or shed.
- Budget Tip: Use fewer blocks and repeat numbers to shorten the course.
- Styling Idea: Choose two accent colors that match nearby flowers or outdoor cushions.
- Practical Note: Make sure the blocks sit firmly on level ground for safe jumping.
- Extra Idea: Add glow-in-the-dark dots so the path is fun at dusk too.
6. Toy Car Garage Cinder Block Roadway
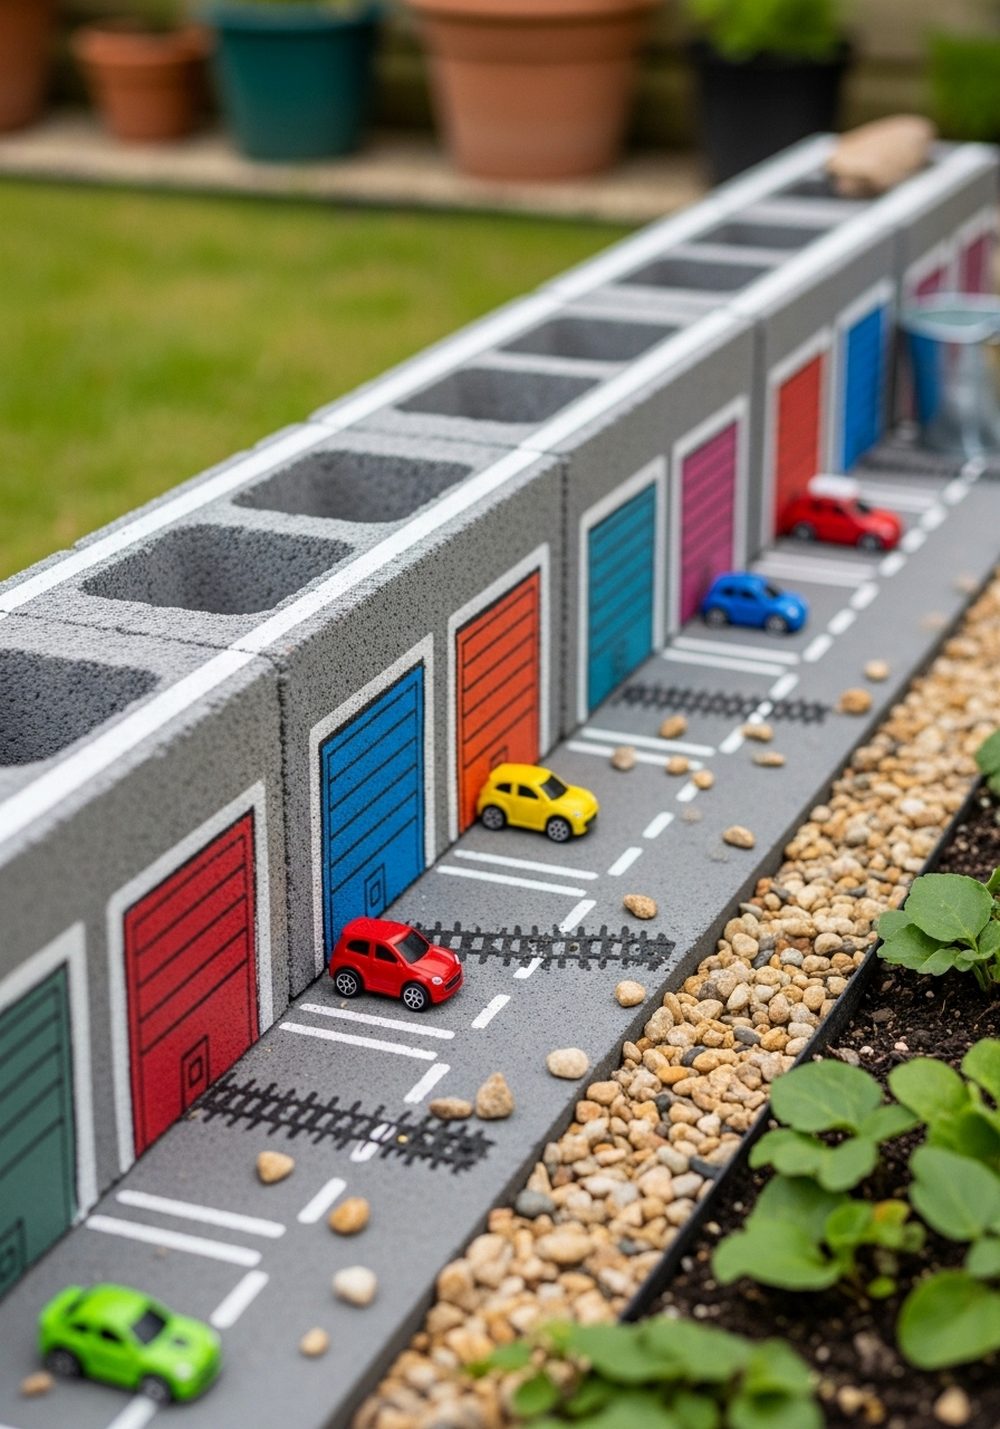
If your kids love toy cars, turn cinder blocks into a miniature street scene. Lay blocks on their sides so the hollows become “garages,” then paint road markings across the top and colorful garage doors around each opening. Set the blocks along a strip of gravel or mulch beside low plants, and kids can drive their cars along the “road” while parking them in each block. It’s a playful feature that also adds structure to the garden edge.
- Best For: Narrow strips along fences, driveways, or paths.
- Budget Tip: Start with two or three blocks and extend as you find more.
- Styling Idea: Use muted gray for roads with bright primary colors for the garage doors.
- Practical Note: Avoid placing this where you mow, to keep blocks and cars safe.
- Care & Maintenance: Rinse off mud and repaint road lines when they fade.
7. Cinder Block Tic-Tac-Toe Game
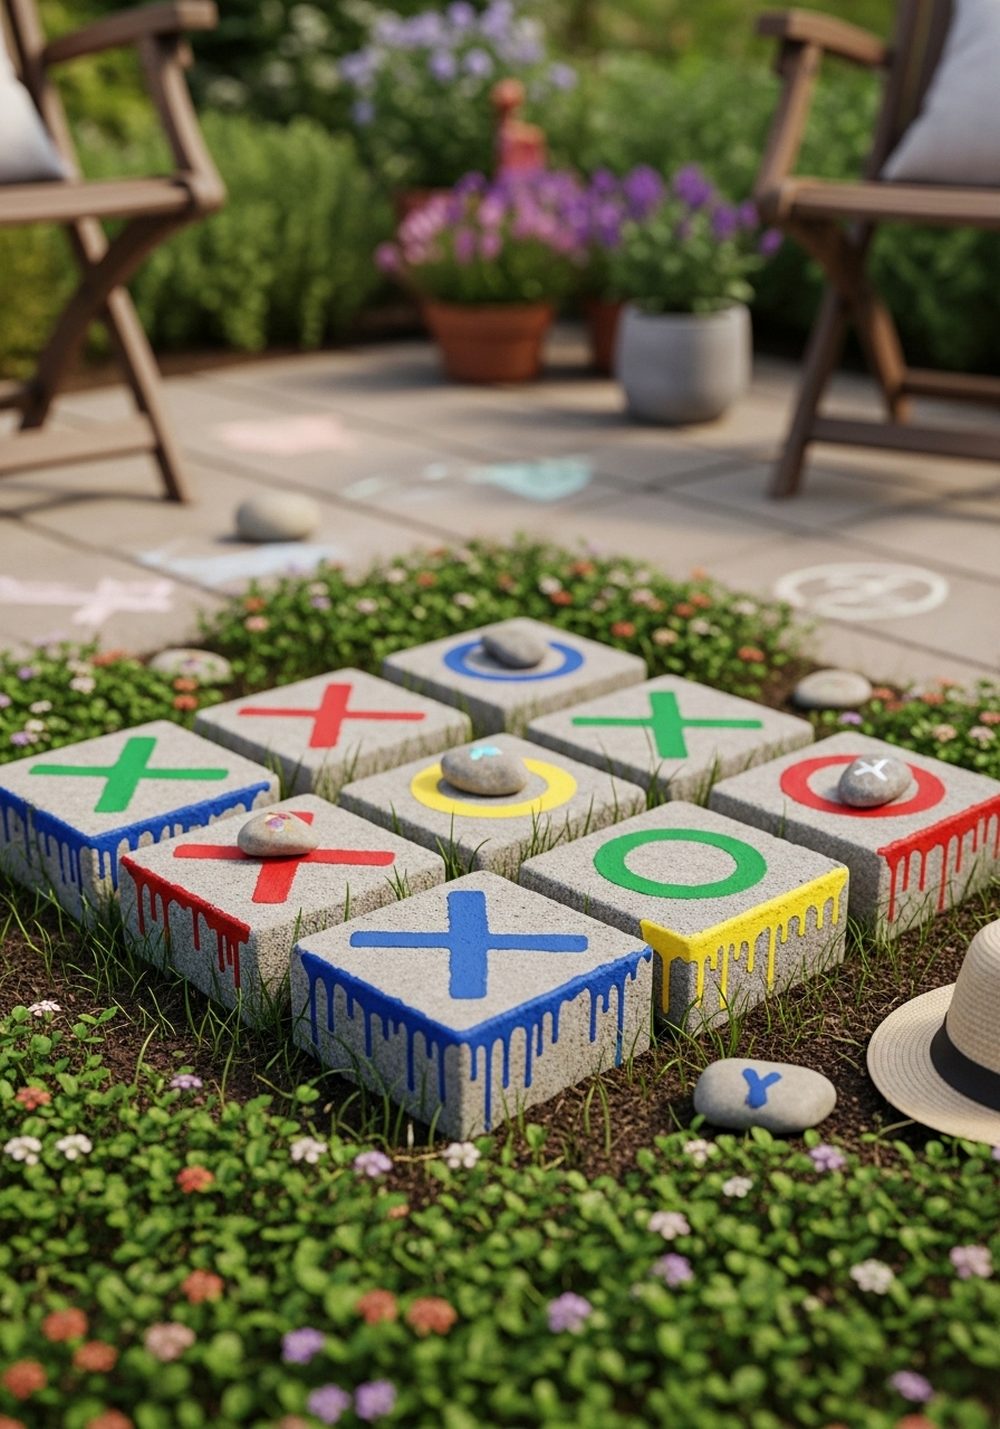
Create a simple garden game zone with a cinder block tic-tac-toe board. Arrange nine flat blocks in a square and paint a grid outline, then add large Xs and Os or leave them blank and use painted stones as markers. Kids can sit or kneel at ground level to play, and the grid doubles as a fun graphic element in the lawn or gravel. When not in use, the blocks still act as stepping stones or a playful visual feature.
- Best For: Level patches of lawn, Gravel areas, or under a shade tree.
- Budget Tip: Use plain blocks and only paint the grid and markers to save paint.
- Styling Idea: Keep colors simple—white grid on dark blocks with just one accent color.
- Practical Note: Leave enough space around the board for kids to move comfortably.
- Extra Idea: Store painted stone markers in a small metal bucket nearby.
8. Fairy Castle Cinder Block Planters
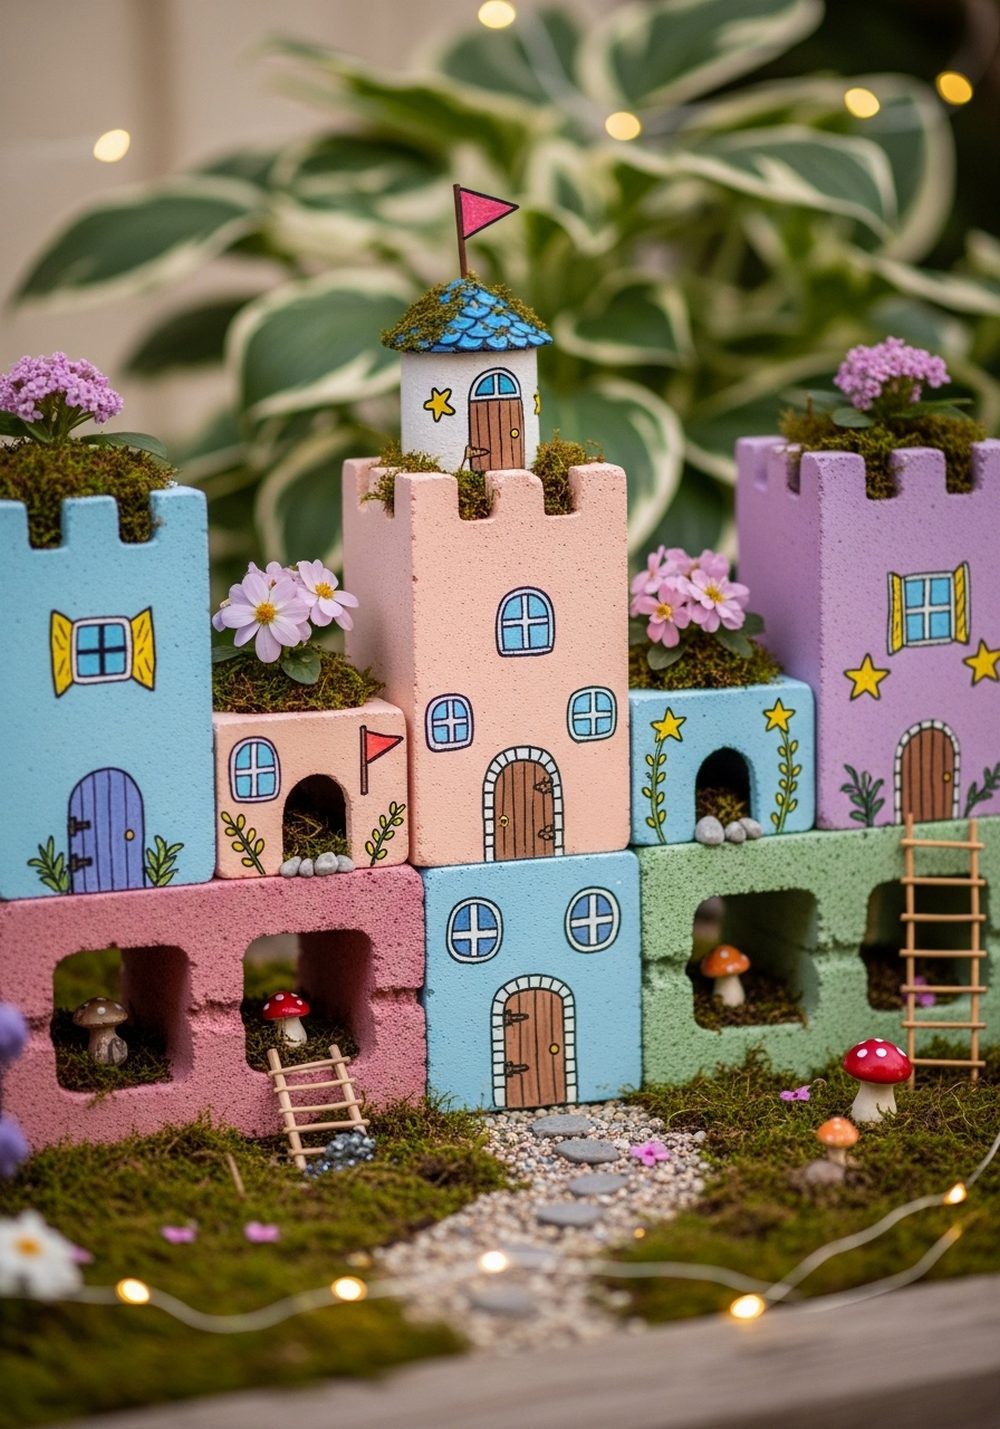
Turn cinder blocks into a magical fairy castle that grows flowers. Stack blocks in a simple castle shape—two or three levels high—and paint soft pastel walls, tiny windows, doors, and flags with your kids. Fill some of the holes with soil and plant trailing flowers, moss, or tiny groundcovers. Add a few small fairy houses, ladders, and miniature animals, and you’ve created a whimsical little world that doubles as a charming garden centerpiece.
- Best For: A focal point near a patio, path, or children’s play corner.
- Budget Tip: Use inexpensive annuals and small fairy accessories collected over time.
- Styling Idea: Stick to pastels and white to keep the castle dreamy rather than busy.
- Practical Note: Keep the stack low and wide to stay stable in all weather.
- Care & Maintenance: Choose hardy, low-growing plants that don’t mind shallow soil.
9. Ocean-Themed Painted Cinder Block Corner

Bring the seaside to your backyard with an ocean-themed cinder block display. Arrange blocks in a small cluster against a fence or wall, then paint waves, fish, shells, and friendly sea creatures with your kids. Use lots of blues, aquas, and sandy tones. Fill the openings with sandy-colored gravel, succulents, and a few shell decorations. The scene adds a cool, fresh mood to the garden and makes a fun backdrop for paddling pools or water play.
- Best For: Sunny corners, poolside spots, or near a water table.
- Budget Tip: Use found shells and homemade clay sea creatures instead of store-bought decor.
- Styling Idea: Pair with striped cushions or a blue outdoor rug to tie the theme together.
- Practical Note: Secure loose shells and ornaments so they don’t blow away.
- Care & Maintenance: Choose drought-tolerant succulents that thrive in full sun and shallow soil.
10. Weather Station Science Cinder Blocks
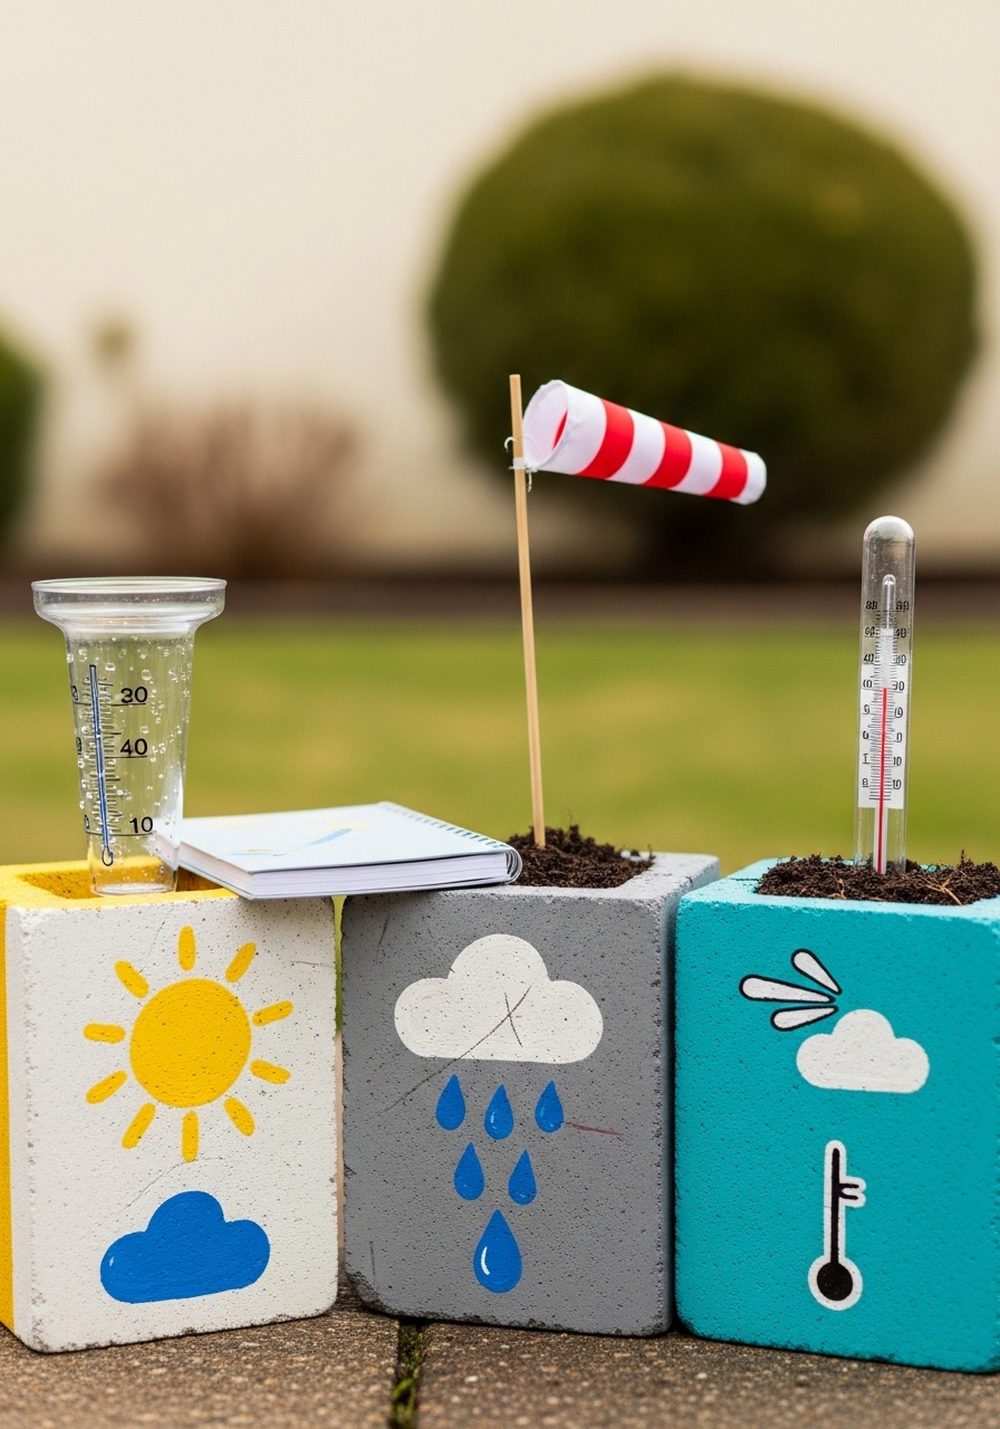
Turn your garden into a mini outdoor classroom with a cinder block weather station. Stand a few blocks upright and paint suns, clouds, raindrops, and numbers on the sides. Use one block to hold a simple rain gauge, another for a small wind sock or ribbon-topped stick, and plant the last one with a hardy herb or flower. Kids can check the rain level, watch the wind direction, and note changes in the plants, all in one colorful spot.
- Best For: Curious kids who love science and daily routines.
- Budget Tip: Make a rain gauge from a clear jar with hand-drawn measurement lines.
- Styling Idea: Use bold primary colors so symbols are easy to see from a distance.
- Practical Note: Place in an open area, not under trees or eaves, for accurate rain readings.
- Extra Idea: Keep a simple notebook and pencil nearby to record daily weather observations.
Conclusion
Painted cinder blocks are one of those rare garden projects that are tough, affordable, and endlessly playful. With a few simple supplies, you can turn plain concrete into colorful borders, games, planters, and tiny worlds your kids will want to visit every day. Start with one small idea—a rainbow border, a fairy castle, or a hopscotch path—and see how your children join in. Bit by bit, you’ll grow a garden that feels creative, personal, and full of happy memories.
FAQs
1. How many cinder blocks do I need to start a project with my kids?
You don’t need many at all. For small projects like a tic-tac-toe board or mini bug hotel, 3–9 blocks are enough. Begin with what your budget allows and expand over time. Because blocks are modular, you can always add more and repaint as your garden and your kids’ ideas grow.
2. What kind of paint should we use on cinder blocks in the garden?
Use exterior-grade or masonry paint so the colors last outdoors. If that’s not available, basic acrylic craft paint topped with a clear outdoor sealer works well. Let kids paint during dry weather, and make sure blocks are clean and dust-free first so the paint sticks properly.
3. Are these projects safe for young children?
They can be, as long as adults handle the heavy lifting and stacking. Place blocks on level ground, keep towers low and wide, and check for sharp edges. Younger children can focus on painting, filling planters with soil, and decorating, while adults position and secure the blocks in the garden.
4. Will painted cinder blocks damage the lawn or patio?
No, cinder blocks are generally safe to use on grass, soil, gravel, or hard surfaces. Just avoid placing them where lawnmowers or cars need to pass. If you’re renting, you can set blocks on top of outdoor rugs, trays, or pavers so they’re easy to move without leaving marks.
5. How do I stop the paint from peeling in sun and rain?
Start with dry, clean blocks and apply two thin coats of paint instead of one thick one. Once the design is finished and fully dry, add a clear outdoor sealer. Position blocks where they aren’t constantly sitting in puddles, and expect to touch up small chips each year—kids usually enjoy the repainting.
6. Can I adapt these ideas for a very small balcony or patio?
Absolutely. Choose the lower, simpler projects: a single row of alphabet planters, a mini bug hotel, or an ocean-themed corner with just two or three blocks. Stack upward rather than spreading out, and use the blocks as planters, toy storage, and decor all at once to make the most of a compact space.