10 Painted Rock Paths With Fairy-Tale Charm
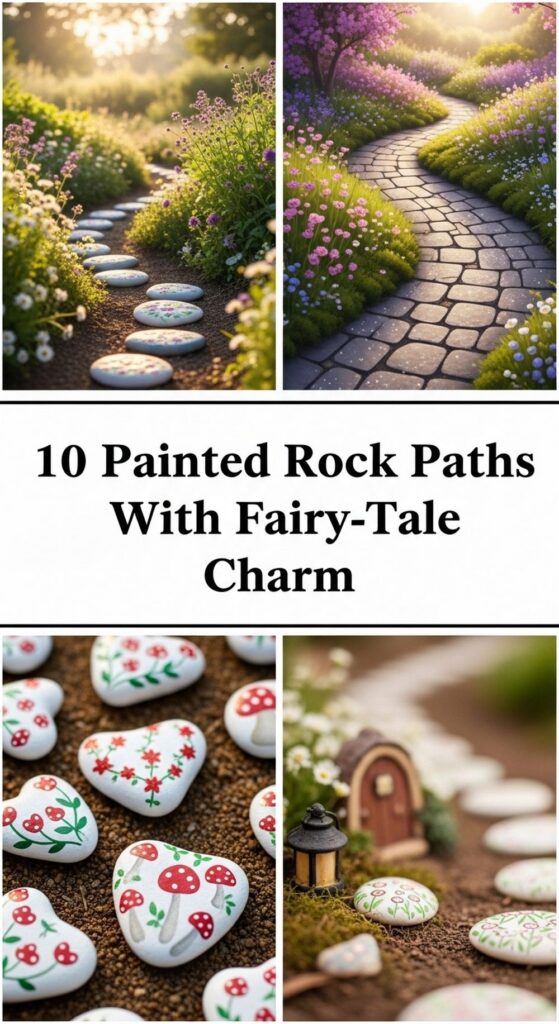
If you’ve ever wished your garden felt a little more like the pages of a storybook, a painted rock path is a wonderfully simple place to start. With just a few stones, some outdoor paint, and a bit of imagination, you can turn an ordinary walkway into a magical route that kids and grown-ups love to follow.
These ten ideas are perfect for home gardeners, renters, and small-space owners who want budget-friendly ways to add color and charm. From glow-in-the-dark stars to fairy doors and story-stones, you’ll find easy projects that are fun to paint and even more delightful to walk on.
Quick List
- Pastel Storybook Pebble Path
- Glow-In-The-Dark Starry Path
- Fairy Door Stepping Stones
- Rainbow River Rock Trail
- Mosaic Mandala Path Circles
- Forest Creature Footprint Path
- Story-Stone Milestone Walk
- Enchanted Toadstool Rock Steppers
- Galaxy Swirl Stone Path
- Secret Garden Word Stones
1. Pastel Storybook Pebble Path

A pastel storybook pebble path is a gentle, dreamy way to guide guests through your garden. Collect smooth, small to medium river pebbles and paint them in soft shades of pink, blue, lilac, yellow, and mint. Add simple swirls, dots, and tiny vines if you like, then seal them with a clear outdoor varnish. Lay the pebbles closely together in a shallow trench filled with sand or fine gravel so they form a solid ribbon of color that winds through your beds or borders.
- Best For: Cottage-style gardens, front paths, and children’s play corners.
- Budget Tip: Use stones from your own yard and a basic set of craft paints instead of specialty colors.
- Styling Idea: Keep the planting around it mainly green and white so the pastels really stand out.
- Practical Note: Make sure the stones sit level so they’re comfortable and safe to walk on.
2. Glow-In-The-Dark Starry Path
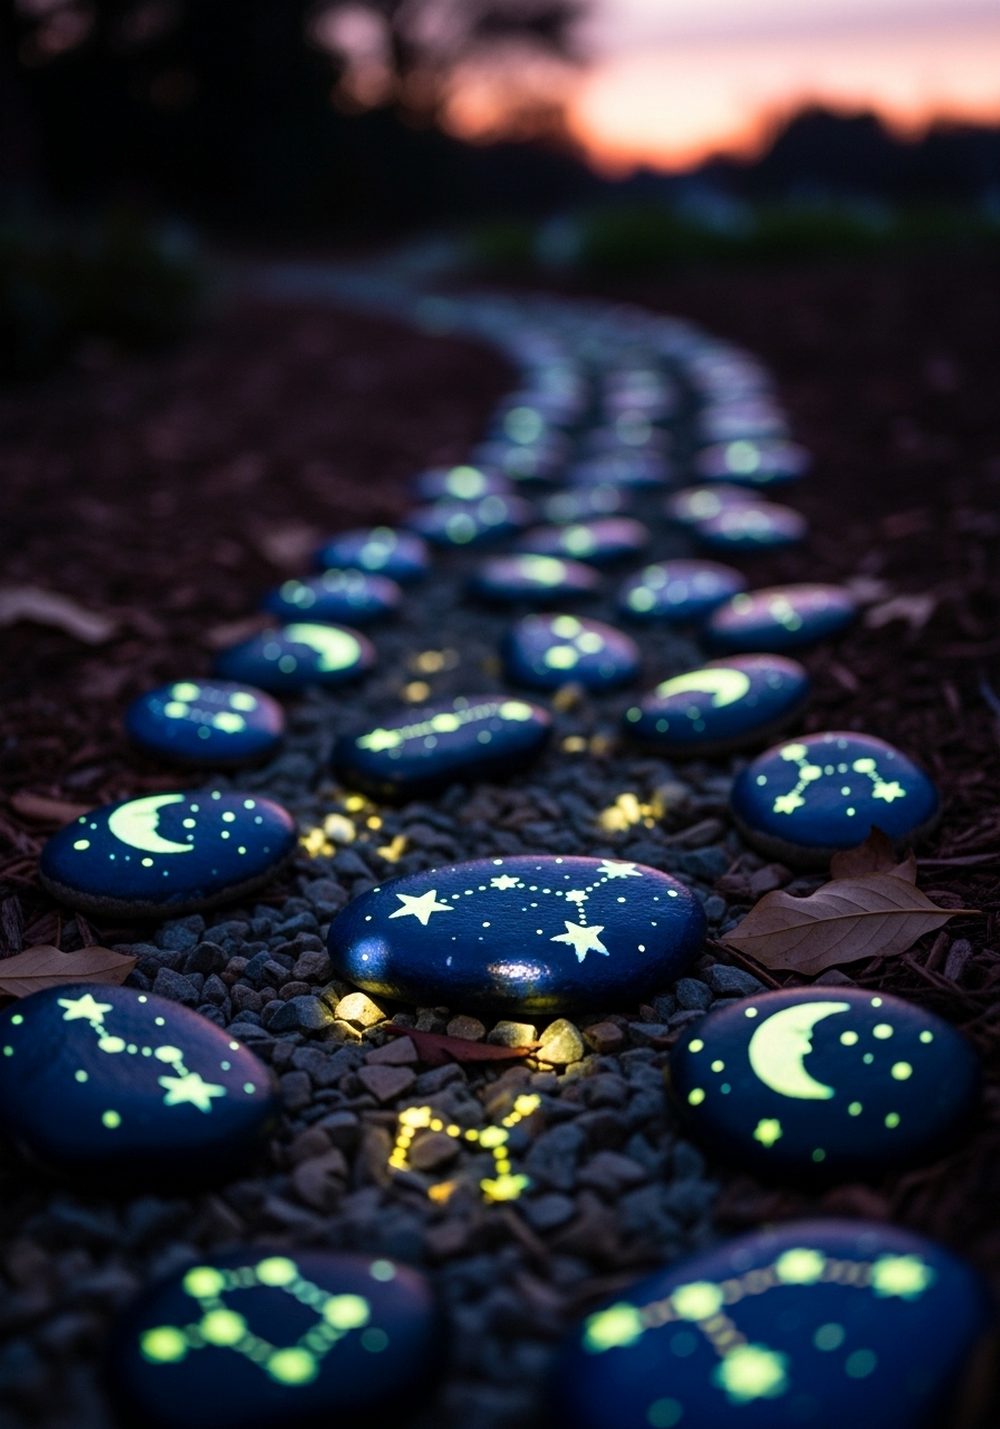
A glow-in-the-dark starry path feels like walking through a fairy tale at night. Start with flat stepping stones or larger rocks and paint them in dark blues and purples. Once dry, add constellations, moons, and scattered stars using glow-in-the-dark outdoor paint. Arrange the stones along an existing path or as stepping stones across a lawn. By day, the path looks beautifully painted; by night it softly glows, especially near patios or seating areas where you can enjoy the effect.
- Best For: Evening gardens, side paths, and spaces near outdoor seating.
- Budget Tip: Only paint a few “feature” stones at key spots instead of the whole path.
- Styling Idea: Pair with simple solar stake lights to enhance the nighttime magic.
- Care & Maintenance: Rinse gently with water if dirt dulls the glow, and top up the paint over time.
3. Fairy Door Stepping Stones
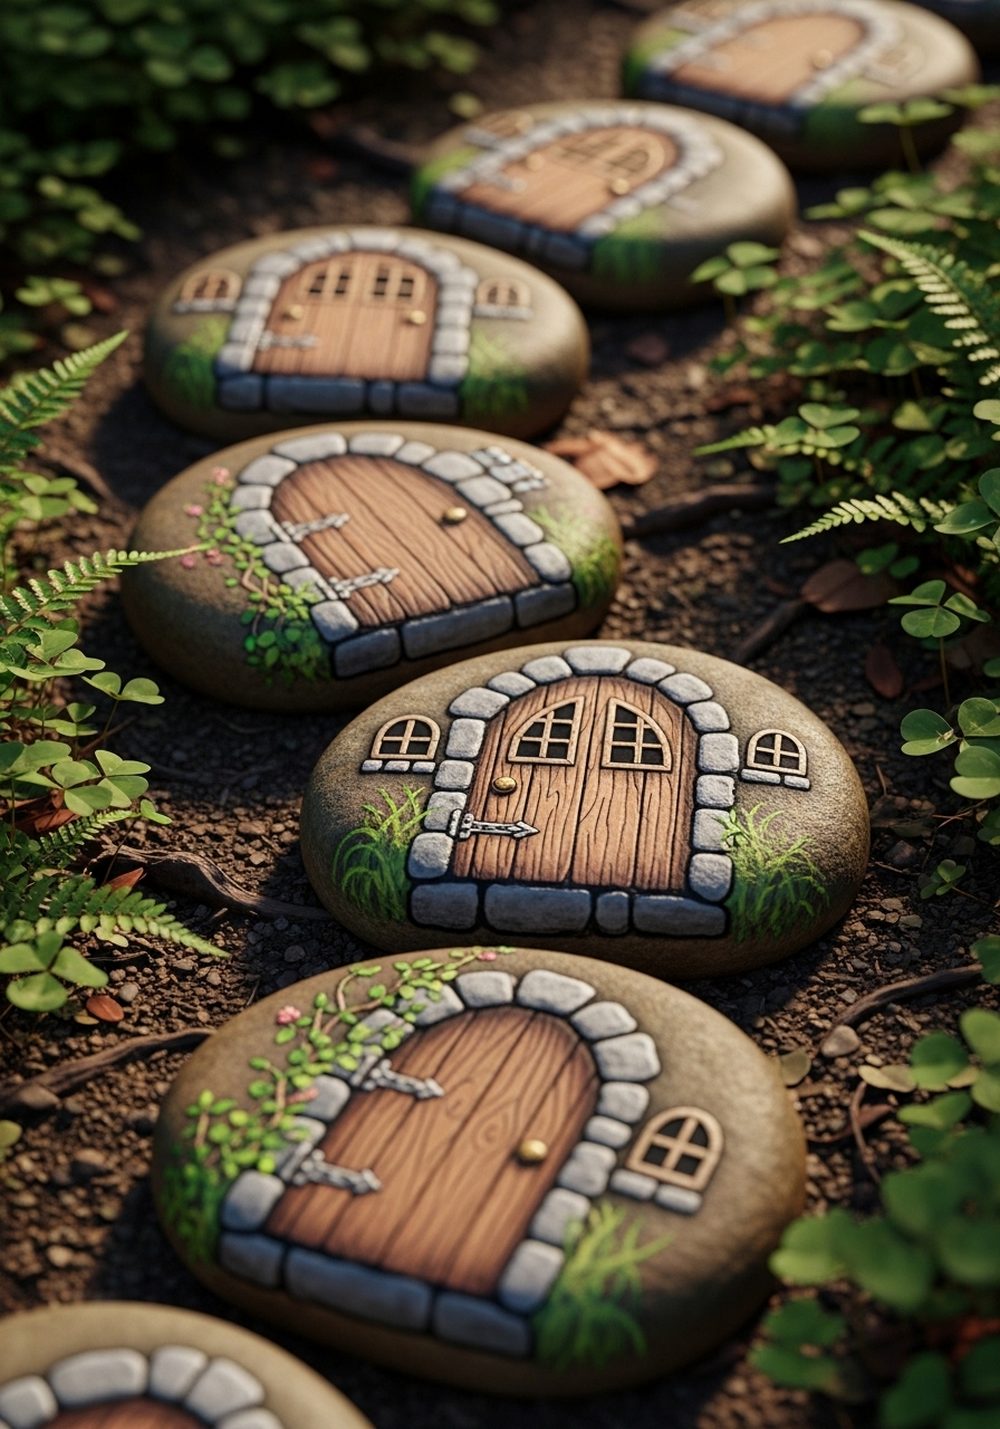
Fairy door stepping stones instantly transform a simple path into a tiny village underfoot. Choose chunky, flat stones and paint them to look like little doors: wooden planks, stone frames, tiny handles, and maybe a potted plant or window beside each one. Place them in a winding line through plants so it feels like you’re stepping past hidden fairy houses. Kids love spotting each different door, and it gives adults a fun talking point as they walk through the garden.
- Best For: Family gardens and shady paths under trees or shrubs.
- Budget Tip: Reuse old, cracked pavers and cover imperfections with your fairy designs.
- Styling Idea: Surround the stones with moss, creeping thyme, or low ferns for a woodland feel.
- Extra Idea: Add a tiny real fairy door on a nearby tree trunk to complete the story.
4. Rainbow River Rock Trail
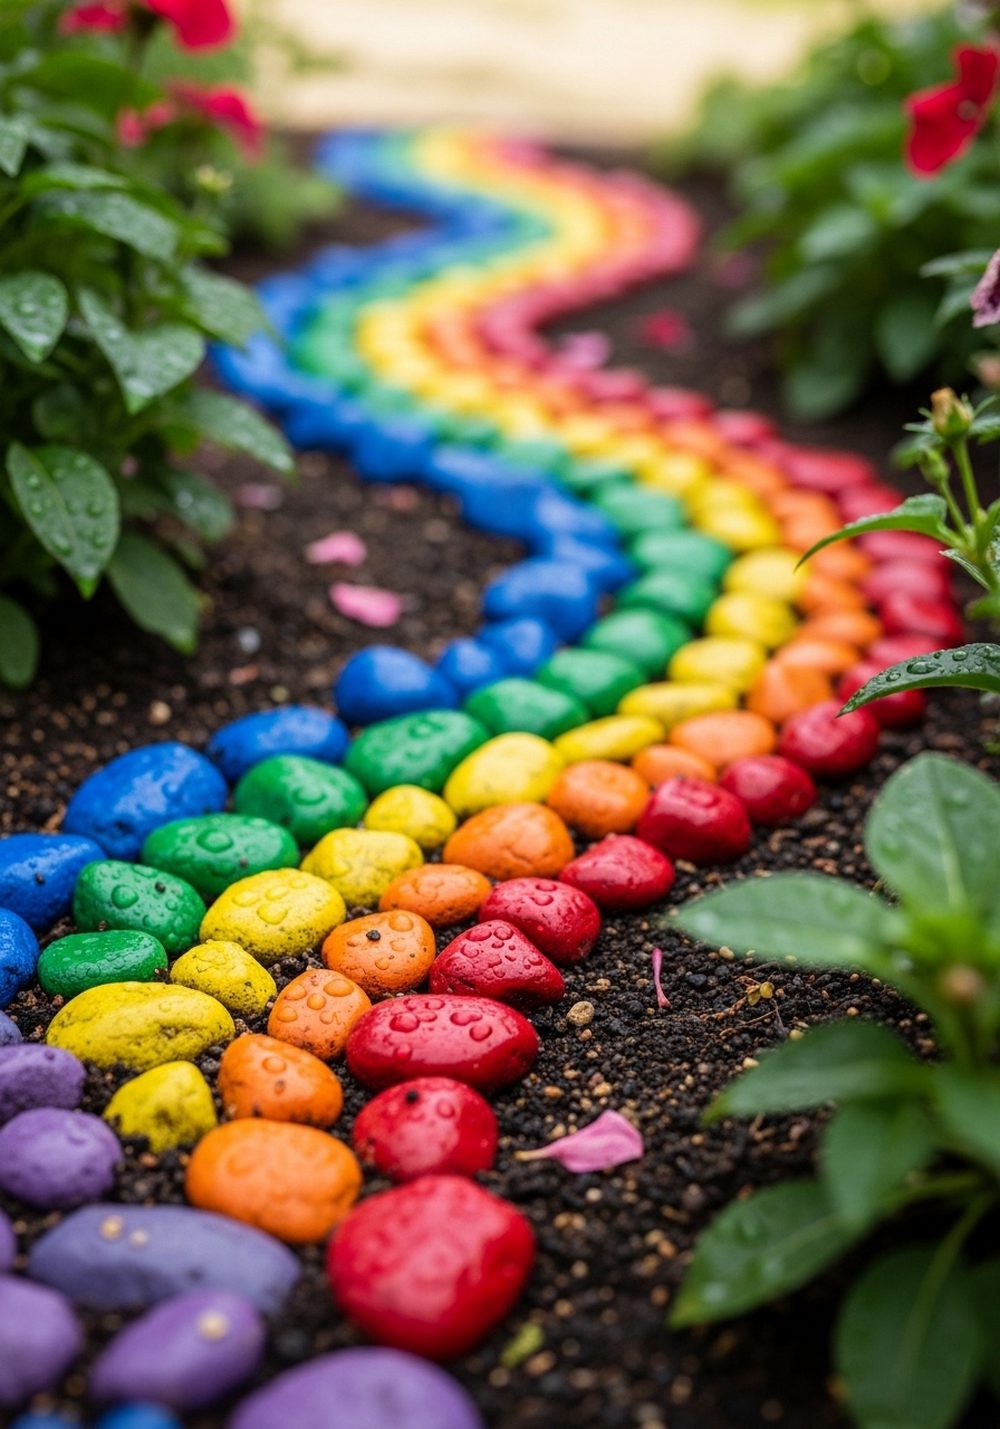
A rainbow river rock trail brings bold, happy color to any outdoor space. Paint medium to large river rocks in bright rainbow shades and arrange them in color groups so the path flows from red to violet. You can nestle the rocks into gravel, mulch, or even lawn, following an existing walkway or creating a new curved trail through your beds. The rainbow effect looks especially cheerful on grey, cloudy days and can lift a very plain corner of the garden.
- Best For: Front yard walkways and children’s play areas.
- Budget Tip: Start with just the “primary” colors and add more shades as you buy extra paint.
- Styling Idea: Use mostly green foliage plants around the trail so the rainbow really pops.
- Practical Note: Keep the tops of the rocks fairly flat and large enough for stable footing.
5. Mosaic Mandala Path Circles
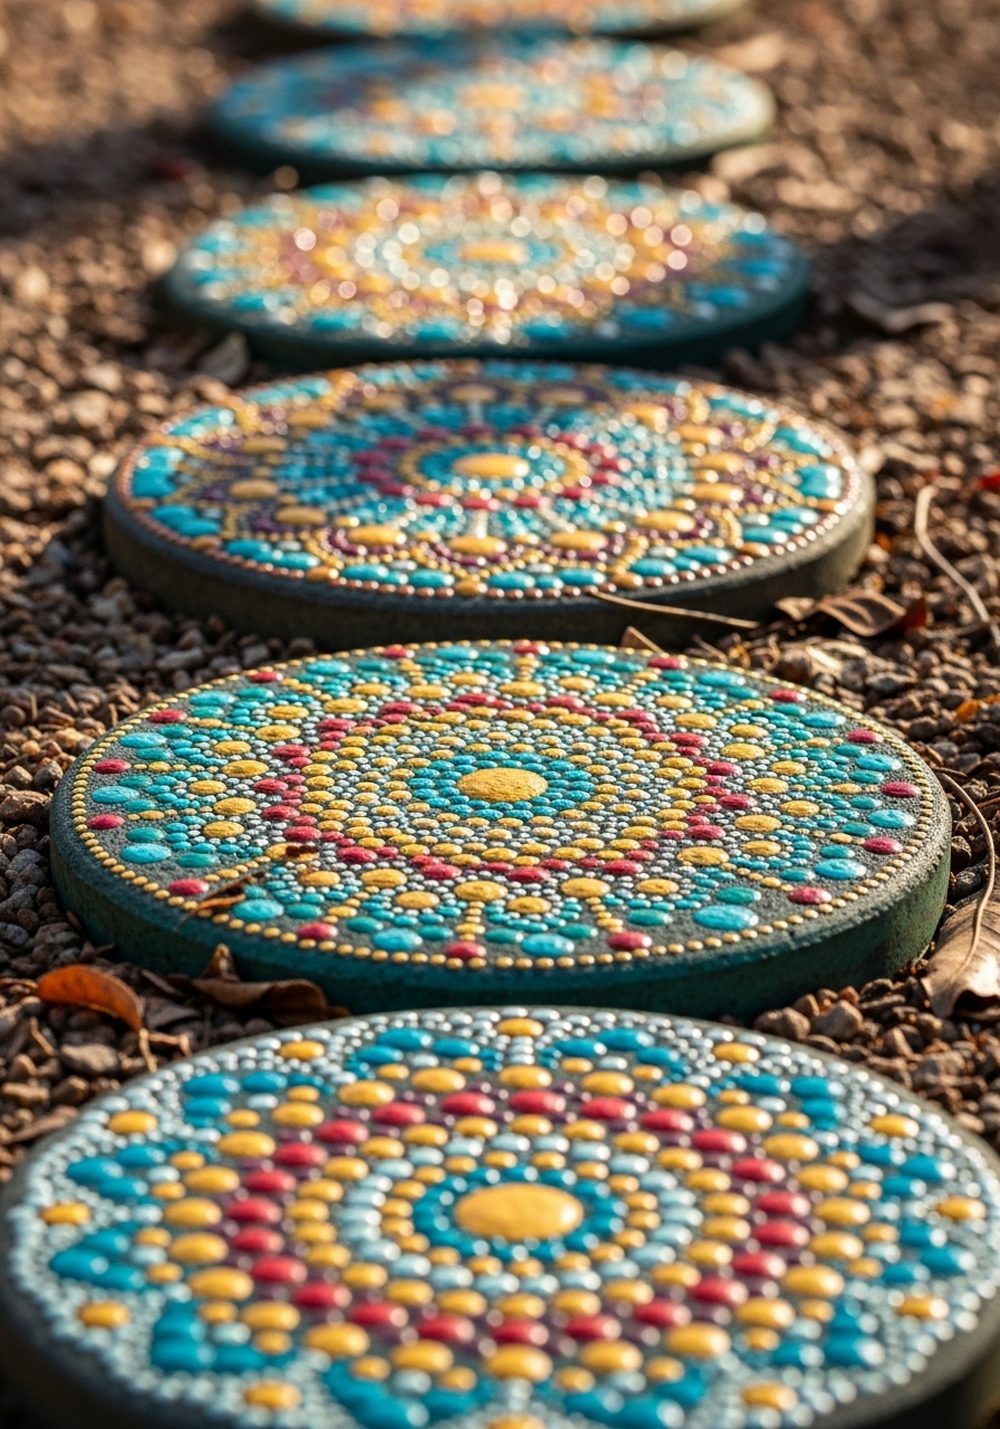
Mosaic mandala path circles add a rich, artistic feel beneath your feet. Use round stepping stones or cut circular pavers and paint mandala patterns radiating from the center in jewel tones. Dots, petals, and geometric lines look stunning in contrasting colors. Space the circles evenly along a path, or cluster them in a wider section to form a decorative “landing area.” From above, the path feels like a row of mini artworks leading you deeper into the garden.
- Best For: Formal paths, patio transitions, and focal points.
- Budget Tip: Limit your palette to three or four colors to stretch your paints further.
- Styling Idea: Echo the mandala colors in nearby pots, cushions, or a garden bench.
- Care & Maintenance: Seal well and avoid harsh scrubbing to keep the designs crisp.
6. Forest Creature Footprint Path
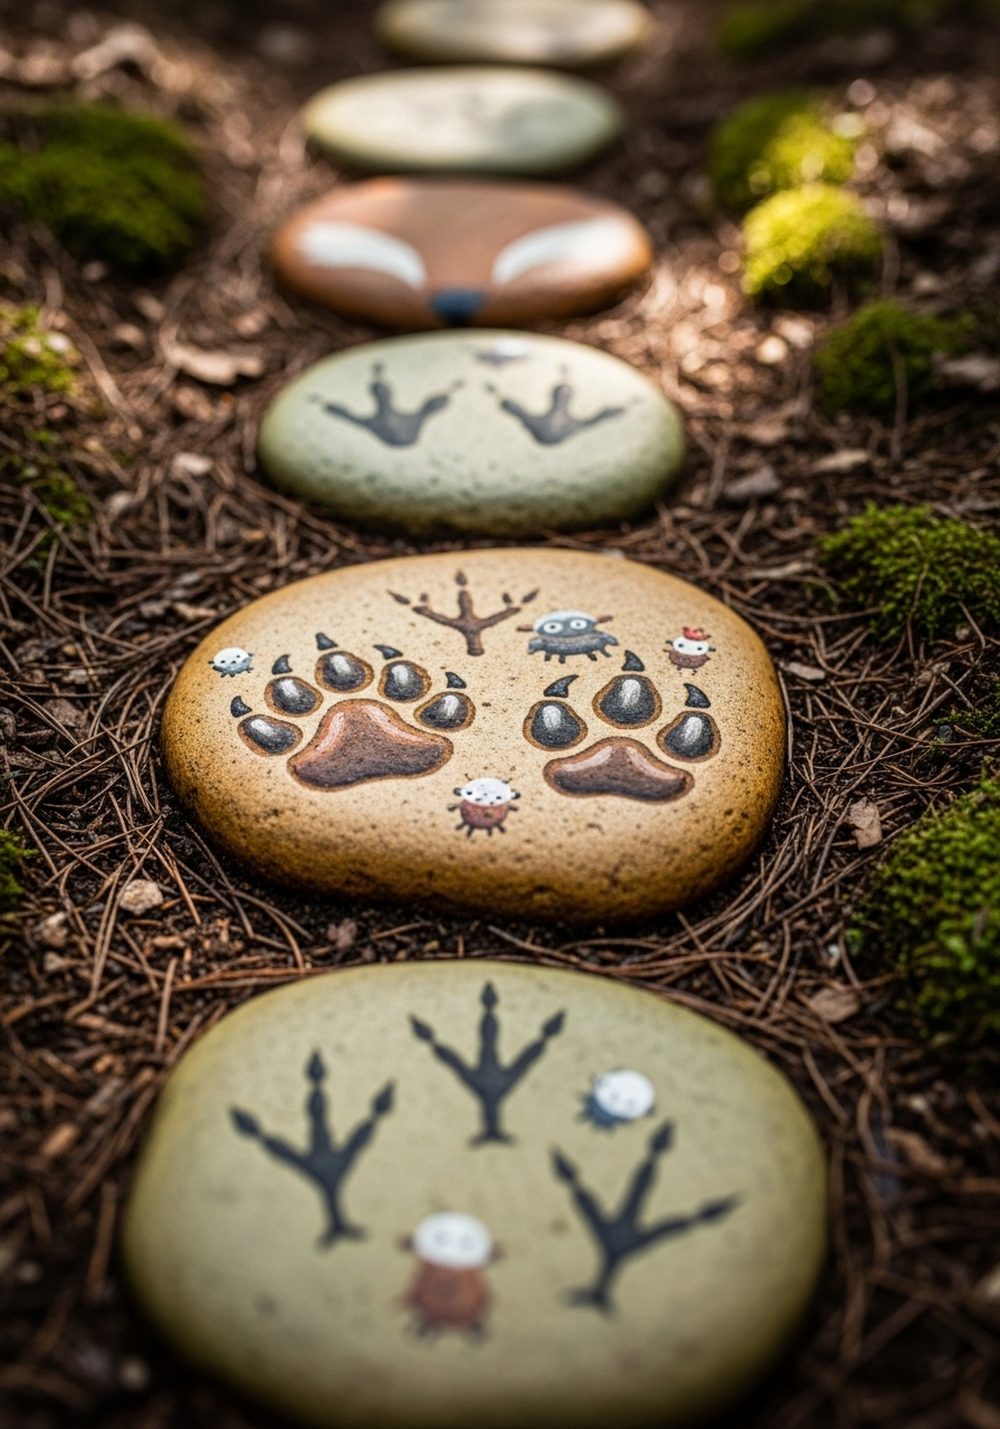
A forest creature footprint path makes every walk feel like tracking animals through an enchanted wood. Paint footprints on flat stones: think fox paws, deer tracks, bird prints, and maybe a few invented mythical creatures. Lay the stones through a shady border or under trees, spacing them like real tracks. Children will enjoy following the prints, and adults get a subtle, story-like detail underfoot that doesn’t overwhelm the rest of the planting.
- Best For: Woodland-style gardens and narrow, informal paths.
- Budget Tip: Only outline the prints in one or two colors to save on paint.
- Styling Idea: Use bark mulch, pine cones, and ferns around the stones for a forest floor look.
- Practical Note: Keep the designs simple enough to stay visible when a bit dusty or damp.
7. Story-Stone Milestone Walk
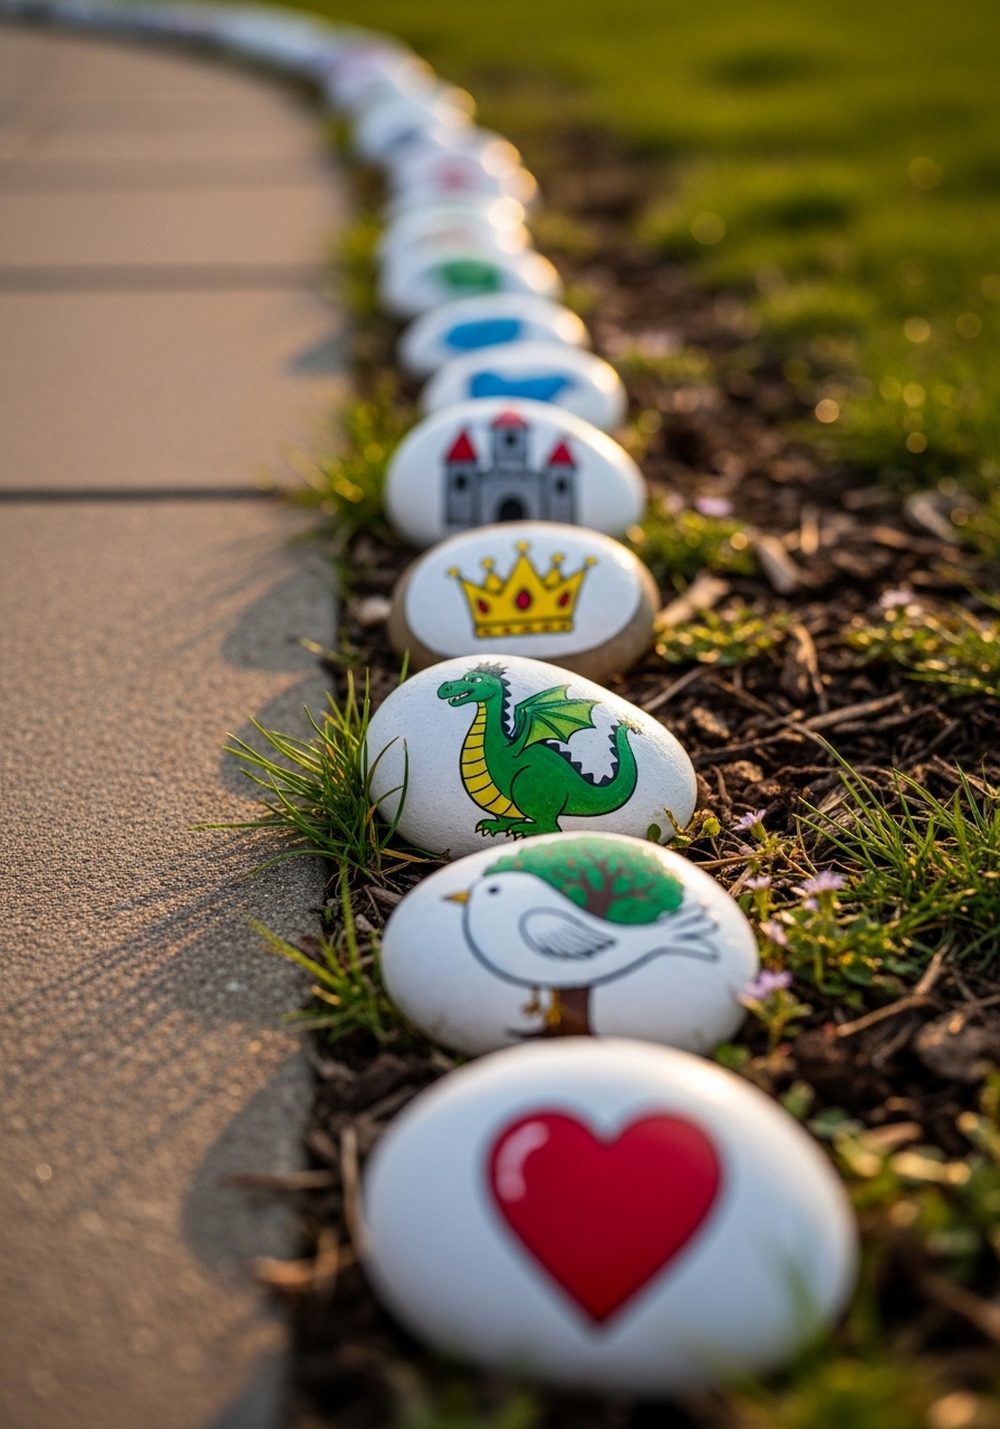
A story-stone milestone walk turns your path edges into a tiny illustrated book. Paint small stones with simple pictures: castles, trees, crowns, birds, suns, and other fairy-tale symbols. Place them in a sequence along the side of a straight or curved path, like chapters in order. As you walk, you can “read” the images and make up your own story. This is a lovely way to bring charm to plain stepping stones without painting directly on the path itself.
- Best For: Renters or anyone who can’t paint on permanent paving.
- Budget Tip: Use offcuts of paint from other projects and mix your own shades.
- Styling Idea: Match the story theme to your garden style—woodland creatures, ocean tales, or royal stories.
- Extra Idea: Swap or re-order stones occasionally to create a new story for kids.
8. Enchanted Toadstool Rock Steppers
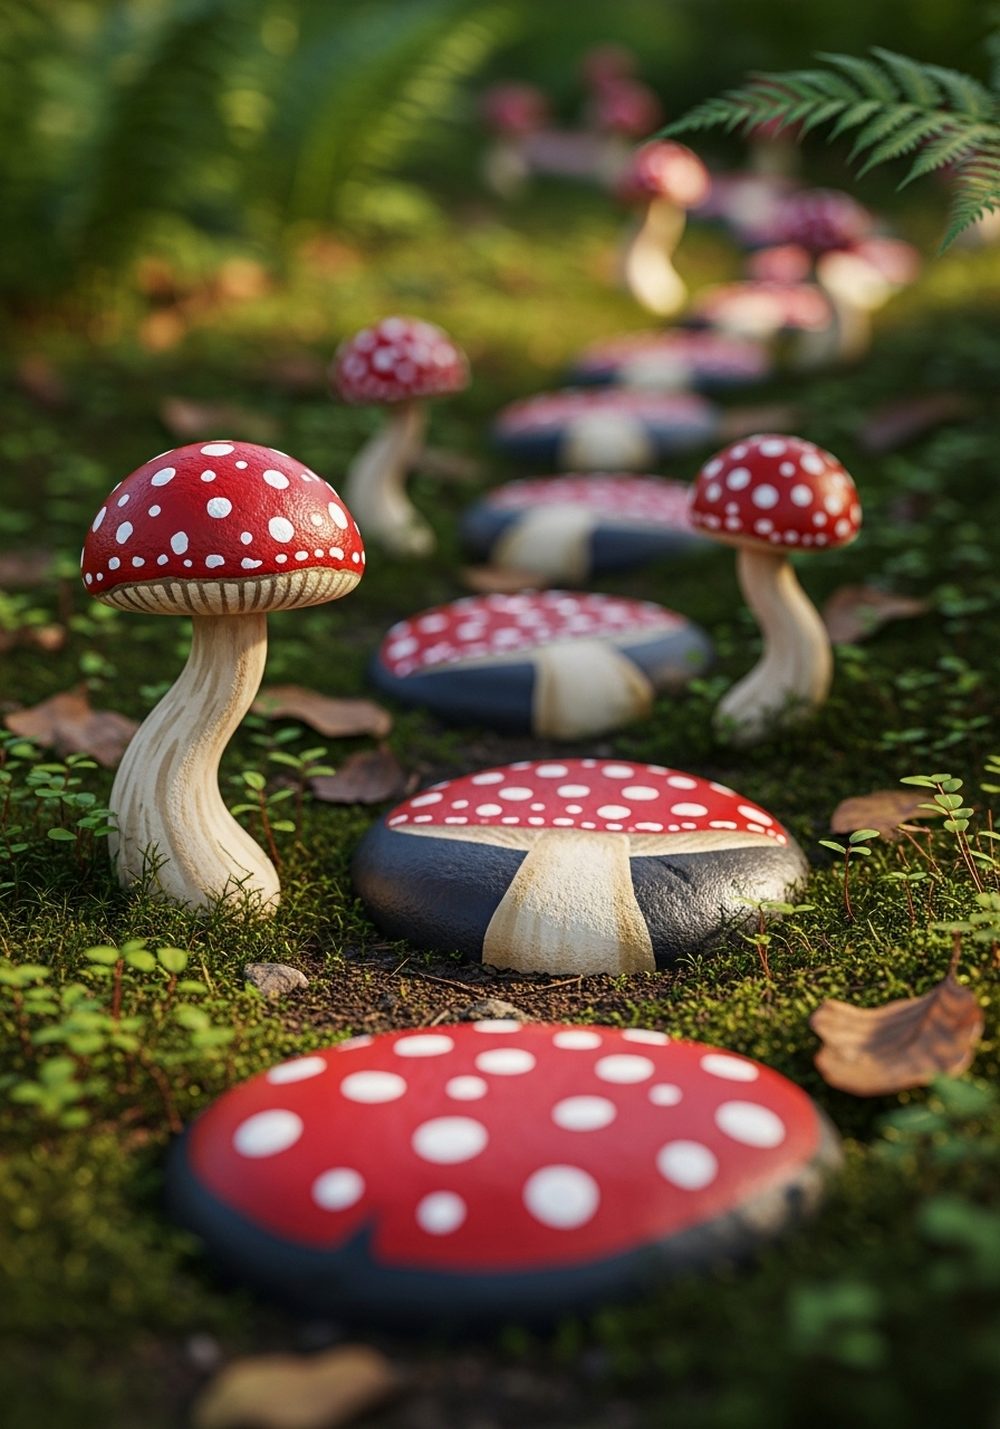
Enchanted toadstool rock steppers make your garden look like a fairy glen. Paint rounded rocks with creamy stems and red caps covered in white spots, then position them like stepping stones leading to a bench, tree, or hidden corner. Tuck them partly into soil or groundcover so they feel rooted in place. They look adorable among ferns, hostas, and shade-loving plants, and even a short run of three or five “mushrooms” can create a magical focal point.
- Best For: Shady corners, under trees, and along narrow winding paths.
- Budget Tip: Use leftover white and red paint, and tint with a little brown for softer shades.
- Styling Idea: Add tiny fairy figurines or miniature furniture nearby for extra whimsy.
- Care & Maintenance: Recoat the caps every year or two if the sun fades the red.
9. Galaxy Swirl Stone Path

A galaxy swirl stone path brings a dramatic, slightly mystical feel to your garden. Paint large flat stepping stones in layered blues, purples, and blacks, then swirl lighter shades through the center to mimic distant galaxies. Add tiny dots of white stars and a few brighter “planets.” Laid in a curve, the path looks like a trail of little universes under your feet, especially striking in modern gardens with simple planting and dark mulch or gravel.
- Best For: Contemporary gardens, minimalist spaces, and night-time entertaining areas.
- Budget Tip: Use sponges and dry-brushing to create soft blends without needing lots of paint.
- Styling Idea: Pair with sleek black pots, silvery foliage, and warm white fairy lights.
- Practical Note: Avoid making the surface too glossy so it doesn’t become slippery when wet.
10. Secret Garden Word Stones

Secret garden word stones add a gentle touch of inspiration to every step. Choose smooth rocks and paint them in soft or neutral shades, then add simple words like “Dream,” “Grow,” “Hope,” or “Magic” in your neatest hand. Scatter them along a path, nestle them among plants, or line them up at key points like the start and end of a walkway. As you stroll past, the words catch the eye and make the garden feel more personal and soulful.
- Best For: Meditation paths, quiet corners, and small balcony walkways.
- Budget Tip: Stick to one background color and use a single contrasting shade for the lettering.
- Styling Idea: Keep the font consistent so the stones feel like part of one story.
- Extra Idea: Give a few word stones as gifts, then add new ones to your path over time.
Conclusion
With a few smooth stones, some outdoor paint, and a spark of imagination, your garden path can become a true fairy-tale walkway. These painted rock ideas are easy to adapt to any space, from tiny balconies to winding backyard trails. Start with one simple concept—maybe a handful of word stones or a short rainbow stretch—and add more as you go. Step by step, you’ll create a path that feels just as magical to walk as it is to look at.
FAQs
1. How can I make a painted rock path on a very small budget?
Start with stones you already have or can collect locally, and buy just a few basic paint colors. Choose simple designs like single-color pebbles, footprints, or word stones. You can always layer new details later as you get more supplies. Sealing only the most used stones first also helps spread out costs.
2. Are painted rock paths suitable for renters who can’t change hard landscaping?
Yes. Use loose rocks or stepping stones laid on top of existing gravel, soil, or mulch, rather than painting existing paving. Story-stones and word stones are perfect because you can lift and take them with you when you move, leaving the garden surface unchanged.
3. What kind of paint should I use so the designs last outdoors?
Look for outdoor acrylic or masonry paint, and always seal your finished stones with a clear, weather-resistant sealer designed for exterior use. This helps protect against rain, sun fading, and light scuffs. Avoid very glossy finishes in areas that get slippery when wet.
4. How do I keep painted stones safe to walk on?
Choose stones with fairly flat tops and set them firmly into sand, soil, or gravel so they don’t wobble. Avoid thick raised decorations and heavy glitter that can flake off. In damp or icy weather, treat the path like any other outdoor surface and walk carefully.
5. Can I use these ideas on a balcony or small patio?
Definitely. Arrange painted stones in shallow trays, long planters, or low boxes filled with gravel to create mini “paths” between pots. You still get the fairy-tale effect, but everything stays contained and portable, perfect for small rentals or balconies.
6. How do I mix plants and painted stones without it looking too busy?
Keep one element simple. If your stones are bright and detailed, choose mostly green plants with softer textures. If your planting is very colorful, stick to a limited palette and simpler designs on the stones. Leaving a little breathing room between clusters helps everything feel intentional and calm.