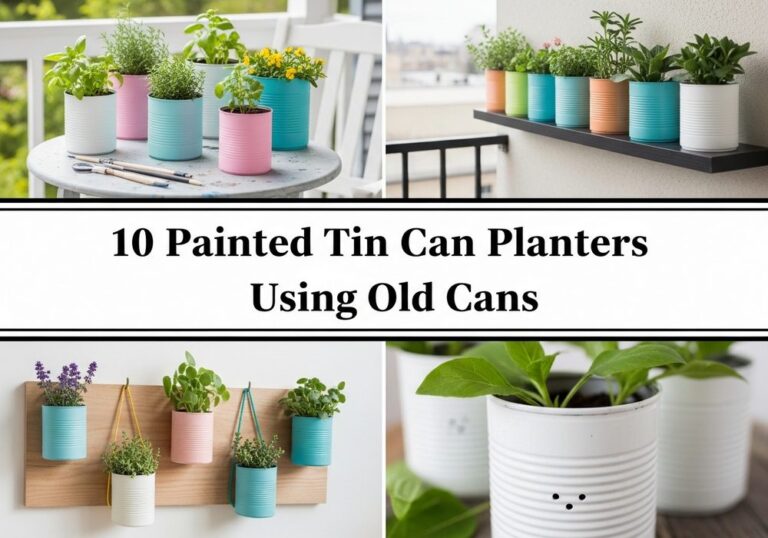
10 Creative Upcycled Can Decor Ideas For A Charming Garden

If you’ve got empty tin cans piling up in the recycling bin, you’re also sitting on a pile of easy garden decor potential. With a little paint, a few simple tools, and some creativity, those humble cans can become planters, lanterns, wind chimes, and more.
This post is for home gardeners, renters, and small-space owners who want budget-friendly, low-waste ways to decorate outdoors. You’ll find simple projects that add color, height, light, and personality to your space using materials you already have. Start with one idea or mix several to create a garden that feels more welcoming, more “you,” and a lot more fun.
Quick List
- Colorful Tin Can Herb Rail
- Punched-Tin Can Lantern Path
- Hanging Tin Can Flower Cascade
- Rustic Tin Can Wind Chimes
- Tin Can Bird Feeder Trio
- Ombre-Painted Tin Can Planters
- Vintage Label Tin Can Vases
- Stacked Tin Can Garden Totem
- Tin Can Centerpiece For Outdoor Table
- Mini Tin Can Fairy Garden Village
1. Colorful Tin Can Herb Rail
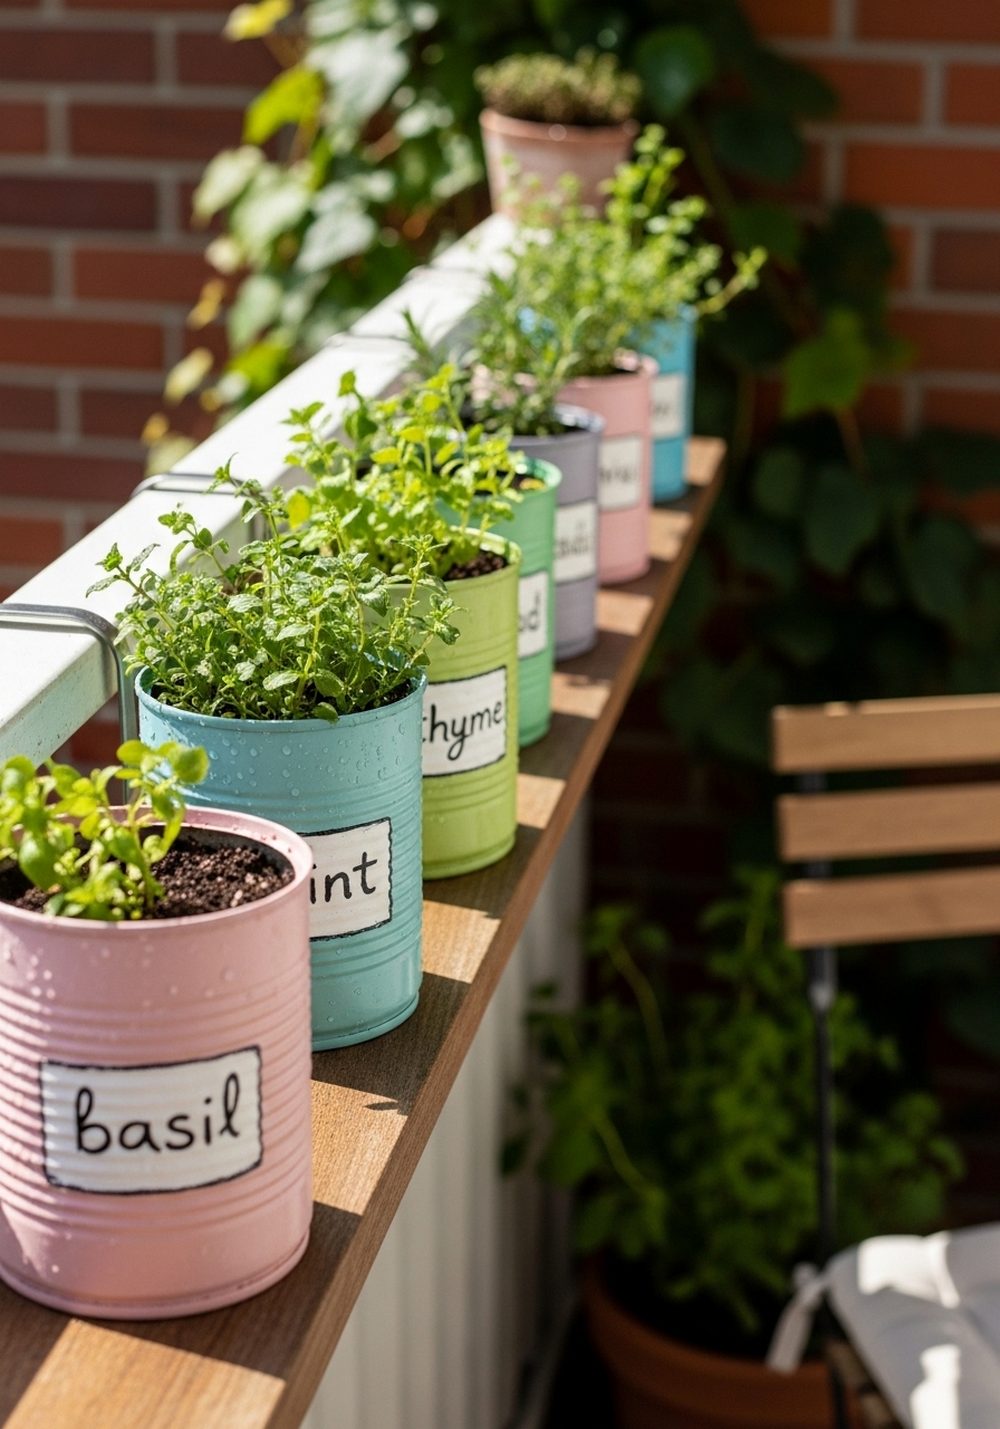
Turn a plain railing into a cheerful herb bar by clipping or screwing painted tin cans along the edge. Clean and drill drainage holes in each can, then paint them in your favorite bright or pastel shades. Attach sturdy hooks or clamps and fill with potting mix and compact herbs like basil, thyme, and parsley. The row of cans instantly adds color and texture to a balcony or deck, while keeping fresh herbs within easy reach for outdoor dining.
- Best For: Balconies, small patios, and narrow decks.
- Budget Tip: Use leftover paint samples and basic hose clamps or S-hooks.
- Styling Idea: Stick to one color family (blues, greens, or warm tones) for a calm, cohesive look.
- Practical Note: Place saucers or a tray underneath if you’re worried about drips on neighbors below.
- Care & Maintenance: Trim herbs regularly so they stay compact and productive.
2. Punched-Tin Can Lantern Path

Create a magical evening glow by turning cans into lanterns that line a path or frame a garden bed. Fill each can with water, freeze it, then punch patterns through the metal using a nail and hammer; the ice helps keep the can from denting. Once thawed and dried, add tea lights or small LED candles inside. At dusk, the tiny holes throw dotted patterns across gravel, grass, and nearby plants, transforming even a simple walkway into something special.
- Best For: Garden paths, driveways, and around patios for nighttime gatherings.
- Budget Tip: Use basic tea lights or solar tealights and keep the designs simple to save time.
- Styling Idea: Paint the cans in soft white or metallics for a subtle, timeless look.
- Practical Note: Place them where you won’t kick or trip over them; nestle them slightly into gravel or soil.
- Care & Maintenance: Empty out rainwater and let the cans dry between uses to prevent heavy rust.
3. Hanging Tin Can Flower Cascade

Make use of vertical space by hanging tin cans at different heights to create a cascading wall of flowers. Drill drainage holes and two small side holes at the top of each can, then thread sturdy twine or wire through to hang them from a beam, hook, or bracket. Plant trailing varieties like lobelia, ivy, or petunias so they spill over the rims. The layered effect draws the eye upward and turns a blank wall or pergola into a living curtain of color.
- Best For: Pergolas, fences, and walls that need softening.
- Budget Tip: Use one type of plant and bulk potting mix to keep costs down.
- Styling Idea: Mix a few bare metal cans with painted ones for a rustic-meets-modern look.
- Practical Note: Don’t overload the structure—keep each can light and use strong fixings.
- Care & Maintenance: Check moisture frequently; hanging containers dry out faster than ground-level pots.
4. Rustic Tin Can Wind Chimes

Upcycled tin can wind chimes add sound as well as visual interest to your garden. Start with several small cans in different sizes, clean them, and drill a hole in the base of each. Paint or leave them as-is, then string them from a piece of driftwood or a branch using twine, fishing line, or thin chain. When the breeze blows, the cans gently tap together, creating a soft, tinkling sound and a playful focal point on a porch or tree.
- Best For: Covered porches, pergolas, and sturdy branches.
- Budget Tip: Decorate with leftover beads, washers, or old keys for added charm.
- Styling Idea: Keep the colors muted and weathered for a relaxed cottage-garden feel.
- Practical Note: Hang them where the sound is pleasant but not right outside bedroom windows.
- Care & Maintenance: Check knots and connections once in a while so cans don’t fall in strong winds.
5. Tin Can Bird Feeder Trio

Give your garden a wildlife-friendly upgrade by turning tin cans into simple bird feeders. Smooth any sharp edges, then mount the cans horizontally to a wooden post or fence using screws or wire. Fill them with seed and add a small perch, such as a dowel or twig, just outside the opening. Grouping two or three together at different heights makes a charming “bird buffet” that brings movement and interest to even a small space.
- Best For: Family gardens where watching birds is part of the fun.
- Budget Tip: Use scrap wood and natural branches for posts and perches.
- Styling Idea: Paint each can a different color or pattern to make them pop against foliage.
- Practical Note: Place feeders away from windows and in a spot that’s safe from prowling cats.
- Care & Maintenance: Clean the cans and refresh seed regularly to keep visiting birds healthy.
6. Ombre-Painted Tin Can Planters

For a modern twist, turn your cans into ombre planters that fade from dark to light. Choose one color family—say teal, coral, or grey—and gently blend two or three shades up each can. Once dry, add drainage holes and plant succulents, small ferns, or compact blooms. Group several cans together on a shelf or low wall to create a subtle gradient effect that looks polished, even though the materials are simple and recycled.
- Best For: Minimalist gardens, balconies, and window ledges.
- Budget Tip: Mix white paint into a single color to create multiple shades rather than buying lots of tins.
- Styling Idea: Keep plants in a similar tone (all silvery greens, for example) to match the sleek look.
- Practical Note: Place a tray beneath indoor or balcony displays to catch any drips.
- Care & Maintenance: Touch up paint every season if chips bother you, or embrace a slightly distressed look.
7. Vintage Label Tin Can Vases

Turn your outdoor table into a charming “market stall” by wrapping tin cans in vintage-style labels and using them as vases. Print or hand-draw simple designs, glue them around the cans, and lightly distress the edges with a bit of sandpaper for an aged look. Fill each can with one type of flower—like all daisies in one and all roses in another—for an easy, cohesive style. Cluster them on a tray or line them down the center of a table for instant character.
- Best For: Garden parties, picnics, and outdoor dining corners.
- Budget Tip: Use brown paper, old book pages, or plain kraft paper instead of fancy printouts.
- Styling Idea: Stick to neutral labels and let the flower colors do the talking.
- Practical Note: Add small stones at the bottom for weight so they don’t topple in a breeze.
- Care & Maintenance: Replace paper wraps if they get splashed too often or start to peel.
8. Stacked Tin Can Garden Totem

Build a quirky focal point by stacking painted tin cans into a garden totem. Thread a metal rod or sturdy dowel through pre-drilled holes in the center of each can, stacking them in any color and pattern combination you like. You can alternate plain and patterned cans, or add simple shapes like stripes and dots. Stand the totem in a bed of flowers or by an entrance; the vertical structure adds height and a touch of whimsy to otherwise flat areas.
- Best For: Borders, near pathways, or as a playful feature in kids’ gardens.
- Budget Tip: Use mis-matched leftover paints and let each family member decorate a can.
- Styling Idea: Choose a repeating color (like white or black) to tie all the different designs together.
- Practical Note: Secure the base of the rod firmly into the soil or a buried pot of concrete for stability.
- Care & Maintenance: Rotate the totem occasionally if one side weathers faster than the others.
9. Tin Can Centerpiece For Outdoor Table

A row of simple tin cans can become a surprisingly stylish centerpiece for your outdoor table. Clean several cans, leave some metallic and paint others in a limited palette—perhaps white, grey, and one accent color. Fill each with a single variety of flower or herb and line them down the center on a wooden board or runner. The repeating shapes and colors create a calm, rhythmic look that works beautifully for everyday meals or special occasions.
- Best For: Patio dining tables, picnic benches, or outdoor buffets.
- Budget Tip: Use whatever you’re growing—herbs, simple foliage, or cuttings from shrubs—rather than buying flowers.
- Styling Idea: Add a few candles in between the cans for soft evening light.
- Practical Note: Keep arrangements low so guests can see each other across the table.
- Care & Maintenance: Refresh water and trim stems every few days to keep the display looking fresh.
10. Mini Tin Can Fairy Garden Village

Turn the tiniest cans—think tomato paste or small snack cans—into a miniature fairy village for a magical garden corner. Paint doors, windows, and tiny details onto each can, then set them into shallow trays or directly on soil. Surround them with moss, pebbles, miniature furniture, and low-growing plants to complete the scene. Children especially love rearranging the “houses,” and adults enjoy the whimsical surprise tucked beside a path or under a shrub.
- Best For: Shady corners, under trees, or near seating where guests can notice the details.
- Budget Tip: Use collected stones, twigs, and offcuts of wood for accessories instead of buying mini decor.
- Styling Idea: Choose a soft palette of pastels for a storybook feel or bold primary colours for a playful look.
- Practical Note: Avoid placing tiny pieces where pets or very young children might swallow them.
- Care & Maintenance: Clear fallen leaves and refresh moss or small plants as needed.
Conclusion
Upcycled tin cans are proof that you don’t need expensive materials to create a beautiful, character-filled garden. With some basic tools and imagination, they become lanterns, planters, bird feeders, and playful features that add color, height, and charm. Start with one simple project—maybe a herb rail or a lantern path—and see how it transforms your space. From there, keep experimenting and let your garden grow into a uniquely personal, eco-friendly retreat.
FAQs
Q1. How can I decorate my garden with cans on a very small budget?
Focus on simple projects that use what you already have: basic planters, a small wind chime, or a single row of cans as a centerpiece. Use leftover wall paint, test pots, or even watered-down acrylics. Natural accessories like stones, twigs, and offcuts of wood can add detail without extra cost.
Q2. Are upcycled can projects safe for renters who can’t make permanent changes?
Yes. Choose ideas that attach with removable hooks, clamps, or freestanding supports. Hanging cascades, herb rails fixed with S-hooks, and movable centerpieces can all be taken down without leaving marks. Avoid drilling into walls or railings if your lease doesn’t allow it.
Q3. How do I stop tin cans from rusting outdoors?
Thoroughly dry the cans after cleaning, then seal them with an outdoor clear varnish or a spray sealer after painting. Adding drainage holes helps stop water from sitting at the bottom. A bit of gentle patina can look charming, so don’t worry too much if they weather slightly over time.
Q4. What are good plants for tin can planters?
Choose compact plants with shallow roots, such as herbs, small annual flowers, succulents, and some ferns. Avoid deep-rooted shrubs or plants that grow very large. Always add drainage holes and use good-quality potting mix so the roots stay healthy.
Q5. Can I mix these can projects with other garden decor without making it look cluttered?
Yes—just repeat a few colors or materials to tie everything together. For example, keep all your cans in similar tones and match them to cushions, plant pots, or lanterns. Leave some breathing space between displays so each feature—like a totem, fairy village, or lantern path—has its own moment.
Q6. What’s the easiest upcycled can idea for beginners?
Simple planters or a basic table centerpiece are the easiest starting points. They only require cleaning, drilling a few holes, and a quick coat of paint. Once you’re comfortable with those, you can move on to punched lanterns, hanging cascades, or more detailed projects like fairy villages.