10 DIY Mosaic Stepping Stones For A Colorful Garden Path

A simple garden path can become the highlight of your outdoor space with just a few handmade mosaic stepping stones. Whether you have a big backyard, a compact side yard, or a rented garden you want to personalize, DIY stones are a brilliant way to add color, pattern, and personality underfoot.
In this guide, you’ll find ten easy, creative mosaic stepping stone ideas you can make with basic materials like concrete, broken tiles, glass gems, and old crockery. Each idea includes styling tips and budget-friendly suggestions so you can build a path that feels playful, welcoming, and completely your own—one stone at a time.
Quick List
- Sunburst Crockery Mosaic Stepping Stones
- Sea Glass & Pebble Wave Stones
- Broken Tile Patchwork Garden Path
- Leaf Imprint Stones With Mosaic Borders
- Kid-Friendly Handprint Mosaic Memory Stones
- Solar Glow-In-The-Dark Mosaic Stones
- Vintage China Story Stones
- Geometric Modern Pattern Stepping Stones
- Nature Motif Insect & Flower Mosaic Stones
- Word Art & Numbered Path Mosaic Stones
1. Sunburst Crockery Mosaic Stepping Stones

Use old plates and teacups to create radiant sunburst designs that brighten every step. Pour concrete into round molds, then press a central circle of yellow or gold pieces, adding rays of mixed crockery shards stretching to the edge. The curved shapes naturally form a lively, energetic pattern that looks gorgeous against green foliage. Once cured and sealed, these stones bring cheerful color and charming texture to any path, especially in areas that catch afternoon light.
- Best For: Cottage-style gardens, informal lawns, and flower borders.
- Budget Tip: Use chipped or thrifted crockery instead of buying new tiles.
- Styling Idea: Stick to one main color (like blues or reds) so the sunbursts feel coordinated.
- Practical Note: Keep surfaces fairly flat by pressing shards firmly into the concrete.
2. Sea Glass & Pebble Wave Stones
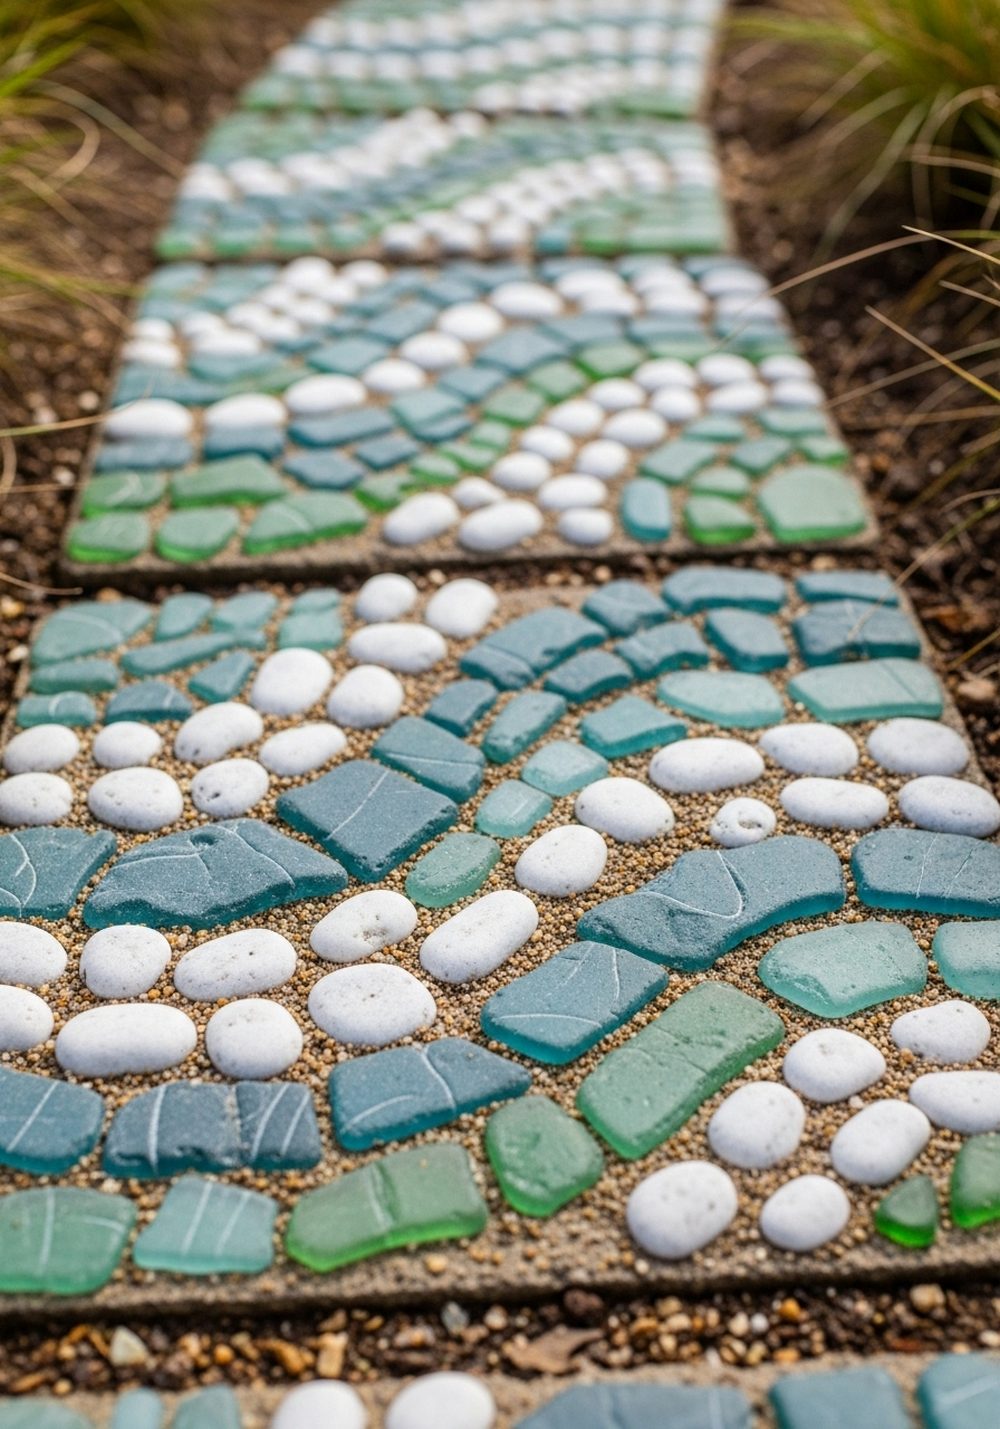
Create a calm, coastal feel underfoot with stones that look like little ocean waves. Arrange blue and green glass pieces in soft curves across each wet concrete stone, then outline the waves with smooth white pebbles. The combination of frosted glass and natural stone brings a gentle shimmer and texture to the path, especially when the light hits. Place these stepping stones among grasses or near a water feature for a soothing, seaside-inspired corner.
- Best For: Gardens with grasses, ponds, or coastal-inspired plantings.
- Budget Tip: Mix a few pieces of real sea glass with recycled bottle glass or decorative pebbles.
- Styling Idea: Keep the palette to blues, greens, and whites for a clean, beachy look.
- Care & Maintenance: Rinse occasionally to remove dirt so the glass keeps its sparkle.
3. Broken Tile Patchwork Garden Path

Turn leftover tiles into a playful patchwork path full of color and character. Break old wall or floor tiles into small pieces, then press them into wet concrete in random arrangements—just like a mosaic quilt. You can mix patterns and colors or keep to a few tones for a slightly calmer look. Once installed, each stone becomes a mini artwork, and together they make a vibrant, textured path that’s especially striking through a simple green lawn or low groundcover.
- Best For: Busy family gardens and relaxed, eclectic spaces.
- Budget Tip: Ask friends or local tilers for offcuts and broken pieces.
- Styling Idea: Stick to one “anchor” color that appears in each stone for a unified path.
- Practical Note: Avoid tiles with sharp edges on the walking surface; place those along the sides.
4. Leaf Imprint Stones With Mosaic Borders

Combine nature’s patterns with a neat mosaic frame for a graceful, organic look. Press large leaves—like hosta, fern, or maple—into the wet concrete to create deep imprints, then arrange small tiles or glass pieces around the outer edge as a border. When the leaves are peeled away, their veins and shapes stand out beautifully. These stones blend seamlessly into shady beds and woodland-style corners, adding subtle decoration without overpowering the plants.
- Best For: Shady paths through beds, under trees, or alongside ferns.
- Budget Tip: Use inexpensive glass gems or cut-up plain tiles for the borders.
- Styling Idea: Choose greens and browns to echo the foliage, or metallic tiles for a delicate shine.
- Care & Maintenance: Seal the stones to protect delicate imprinted details from weathering too quickly.
5. Kid-Friendly Handprint Mosaic Memory Stones

Turn your path into a timeline of family memories with handprint stepping stones. While the concrete is still soft, let each child press in their hand and write their name or year with a stick. Add simple mosaic layers around the handprint using bright glass gems or tiles in favorite colors. These stones are full of personality and make a sweet route to a play area, veg patch, or garden bench—plus children love spotting “their” stone each time they walk past.
- Best For: Family gardens, play areas, and homes with young children.
- Budget Tip: Buy bulk packs of glass gems, then let kids choose their colors.
- Styling Idea: Assign each child a color theme so their stone stands out.
- Practical Note: Supervise closely for safety when pressing hands into soft concrete.
6. Solar Glow-In-The-Dark Mosaic Stones

Add a little nighttime magic with stepping stones that glow after dark. Embed glow-in-the-dark pebbles or tiles in swirling patterns on the surface, and if you like, set a small solar light module into one edge. During the day they look like pretty, speckled mosaics; at night they softly shine, guiding the way along the path. They’re especially stunning near seating areas where you can enjoy the gentle glow without harsh lighting.
- Best For: Evening entertaining areas and paths near patios or decks.
- Budget Tip: Use glow stones sparingly in patterns, mixing with regular pebbles.
- Styling Idea: Keep designs simple—spirals, circles, or constellations—to avoid clutter.
- Practical Note: Position solar modules where they receive good daylight to recharge.
7. Vintage China Story Stones

If you have old floral plates or heirloom china that’s too chipped to use, turn them into “story stones.” Arrange pieces from the same plate together on each stepping stone to create framed little scenes—roses, birds, or borders—surrounded by neutral tiles or plain concrete. When laid as a path, you get a sequence of tiny pictures that feel nostalgic and romantic. These stones are perfect near roses, lavender, and other classic cottage plants.
- Best For: Cottage and vintage-style gardens or sentimental family spaces.
- Budget Tip: Mix heirloom pieces with thrifted floral plates to stretch your supply.
- Styling Idea: Keep background tiles neutral so the china patterns remain the focus.
- Care & Maintenance: Seal thoroughly to help protect delicate designs and make them easier to clean.
8. Geometric Modern Pattern Stepping Stones

For a more contemporary look, use strong geometric mosaics in limited colors. Cut tiles into triangles, rectangles, and slender strips, then lay them in bold chevrons, stripes, or diamond shapes on smooth, square stepping stones. Using just one or two colors—such as white and charcoal—creates a clean, graphic path that suits modern planting schemes with grasses, structural shrubs, and simple pots. The sharp lines bring order and rhythm to the garden.
- Best For: Modern, minimalist gardens and small urban yards.
- Budget Tip: Buy a single box of plain tiles and cut them into varied shapes.
- Styling Idea: Pair these stones with metal or concrete planters for a coordinated look.
- Practical Note: Keep surfaces as level as possible so the stones are comfortable to walk on.
9. Nature Motif Insect & Flower Mosaic Stones
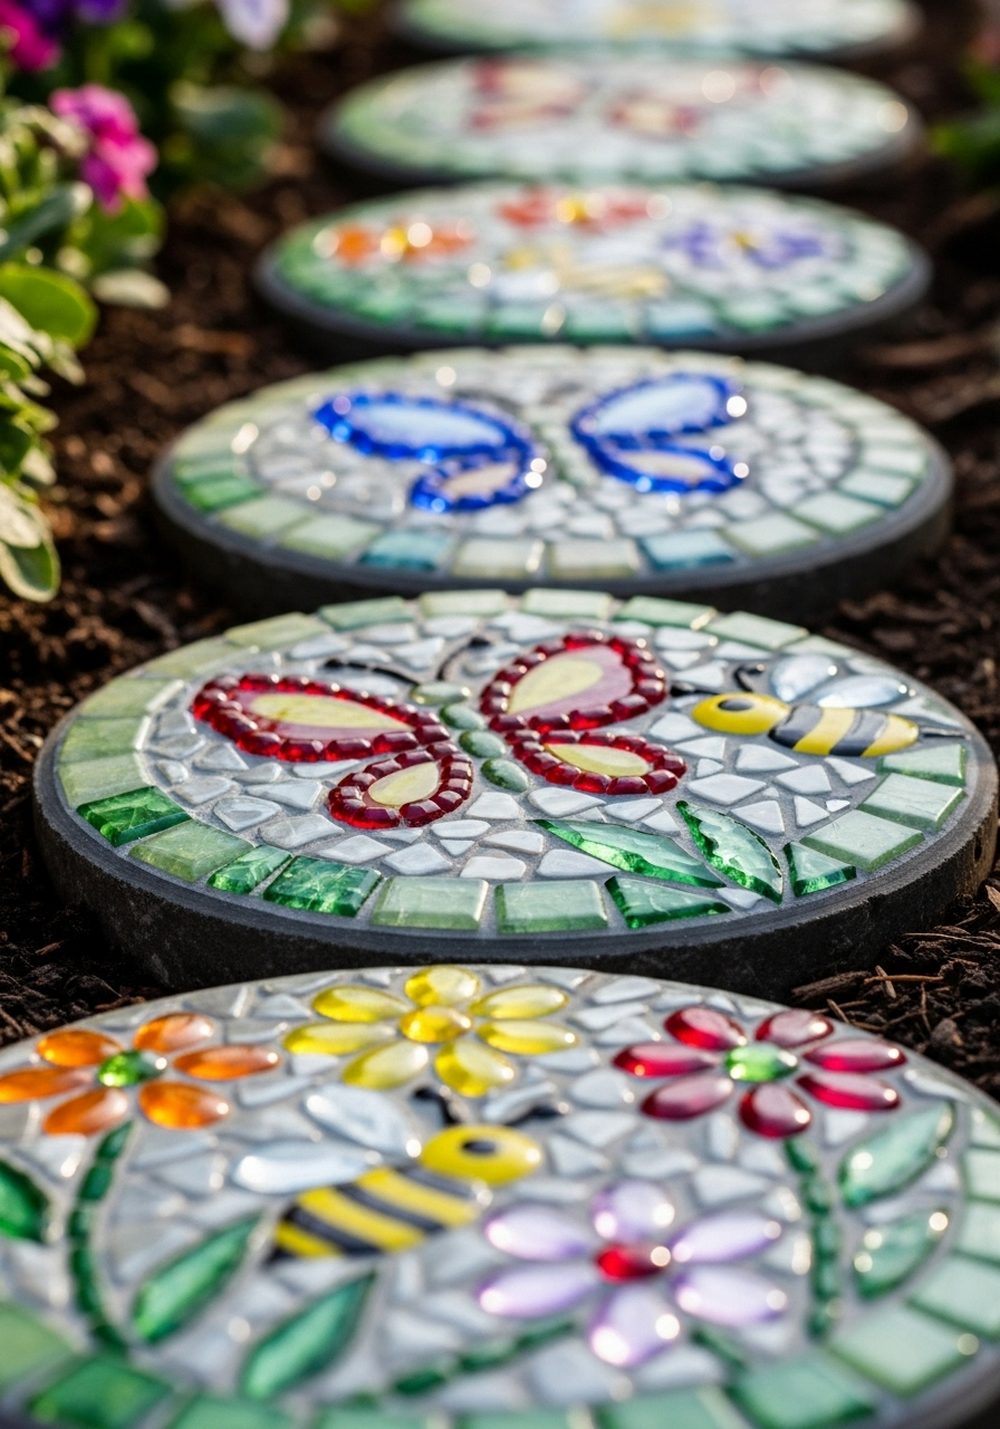
Add a playful, nature-themed touch underfoot with mosaic butterflies, bees, and flowers. Draw simple outlines in the concrete, then fill them with colorful tiles or glass gems—yellow and black for bees, bright blues and reds for petals and wings. Scatter these designs across several stones along the path so each step reveals a new little creature. Children especially enjoy spotting them, and they fit beautifully among pollinator-friendly plantings.
- Best For: Family gardens, wildlife gardens, and pollinator beds.
- Budget Tip: Use small leftover pieces from other mosaic projects for details.
- Styling Idea: Repeat the same insect or flower on multiple stones so the path feels cohesive.
- Care & Maintenance: Avoid very raised pieces in busy areas to reduce tripping risk.
10. Word Art & Numbered Path Mosaic Stones
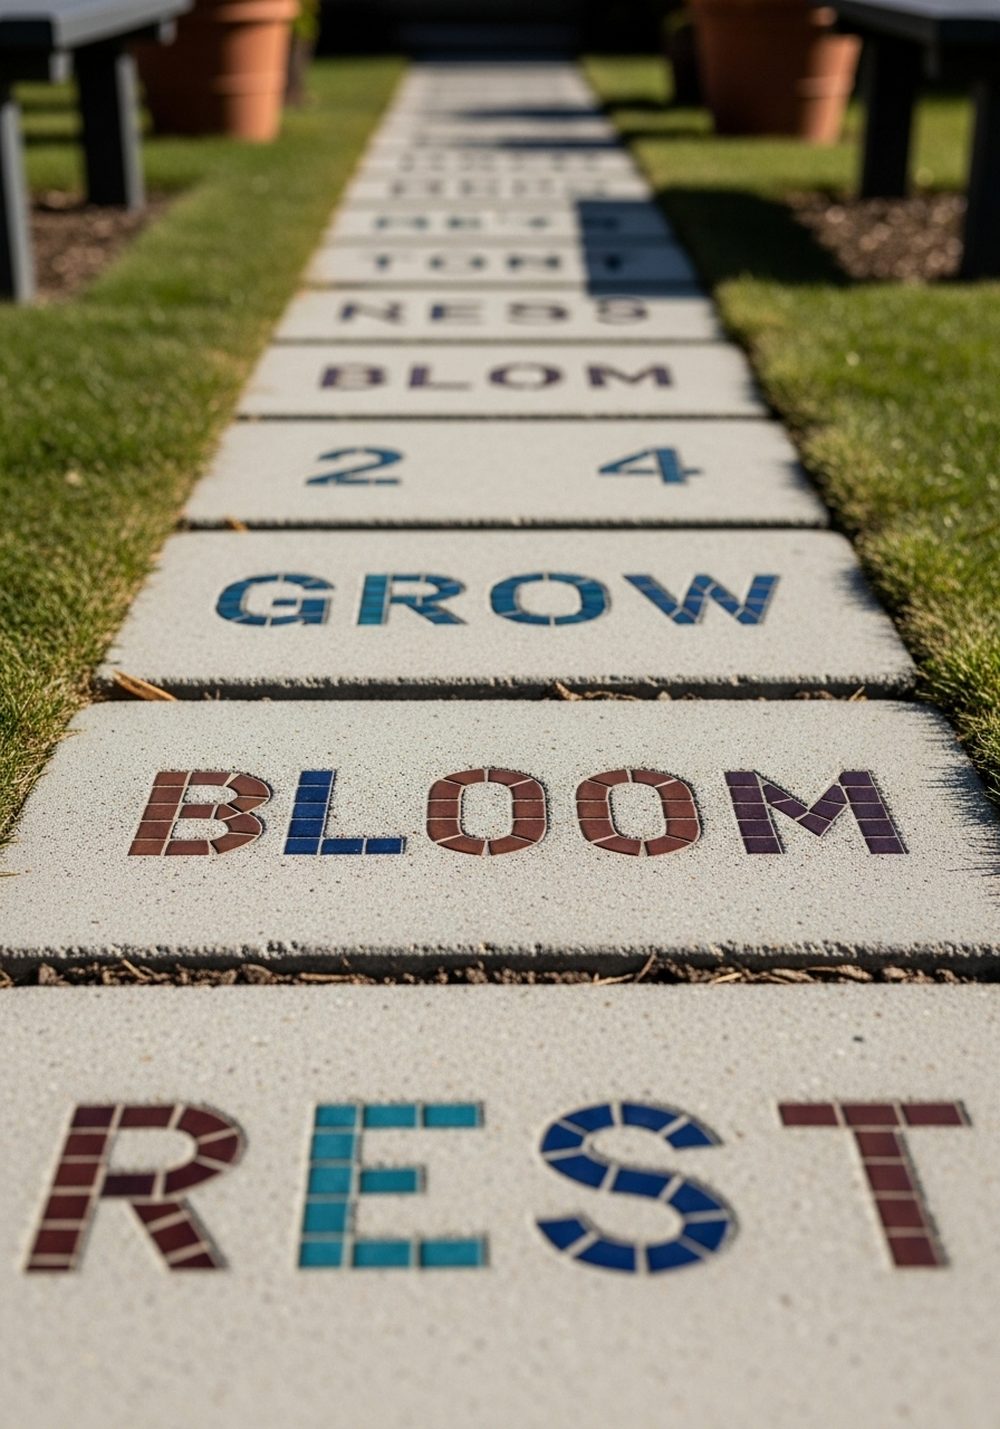
Guide guests along your path with stones that spell out short garden words or numbers. Use contrasting tiles to form simple letters and digits while the concrete is fresh, keeping the designs bold and easy to read. You can number each step leading to a patio or spell a little phrase like “grow” or “bloom” along the way. These stones work both as decoration and subtle wayfinding, giving your garden path a fun, interactive feel.
- Best For: Entrances, side paths, and routes to key garden features.
- Budget Tip: Use offcuts and simple square tiles; letters don’t need fancy materials.
- Styling Idea: Choose one strong accent color for all words to tie the path together.
- Practical Note: Keep letters large and blocky so they’re readable from standing height.
Conclusion
DIY mosaic stepping stones are a lovely way to turn a plain path into a colorful, personal feature that feels unique to your garden. With simple materials and a bit of creativity, each stone becomes a mini artwork that tells a story as you walk. Start with just one or two designs that fit your style and budget, then slowly build your path—stone by stone—into a vibrant route you’ll enjoy every time you step outside.
FAQs
1. Can I make mosaic stepping stones on a very small budget?
Yes. Use broken plates, leftover tiles, or glass from old jars instead of buying new supplies. Basic ready-mix concrete and simple molds like plastic trays or old plant saucers keep costs low. Focus on a few key colors and patterns so even budget materials look intentional and stylish.
2. Are these stepping stones suitable for renters who might move?
They can be. Instead of setting the stones permanently in mortar, simply lay them on a compacted base of sand or fine gravel. When you move, you can lift the stones, rinse them off, and take them to your next garden or balcony.
3. How do I make sure my mosaic stones are safe to walk on?
Press all pieces firmly into the concrete so no sharp edges stick up, and avoid using very raised elements in main walking areas. Once fully cured, seal the surface with an outdoor-grade sealer to smooth small rough spots and help prevent chips. Test each stone with flat shoes before installing it in a busy path.
4. Will mosaic stepping stones survive bad weather?
If you use outdoor-rated materials and seal them, they can last for years. Choose ceramic tiles, glass, and crockery that won’t absorb lots of water, and ensure the stones can drain well rather than sitting in puddles. In very cold climates, lifting stones for winter storage can help them last even longer.
5. Can I use these ideas for tiny gardens or balconies?
Definitely. You don’t need a long path—just a few mosaic stepping stones grouped in gravel, tucked among pots, or used as “landing spots” between planters can create a decorative mini path. Smaller molds work well for tight spaces, and bold patterns make each piece feel like a feature, even in a compact area.
6. Do I need any special tools to cut tiles for mosaics?
For most projects, simple tile nippers or a basic tile cutter are enough. You can also use a hammer (wrapped pieces in cloth first) to break tiles into more organic shapes. Always wear safety glasses and gloves when cutting or breaking materials, and work slowly so you get usable pieces without too many sharp slivers.