10 Upcycled Tin Can Planters For A Cozy Cottage Garden Look
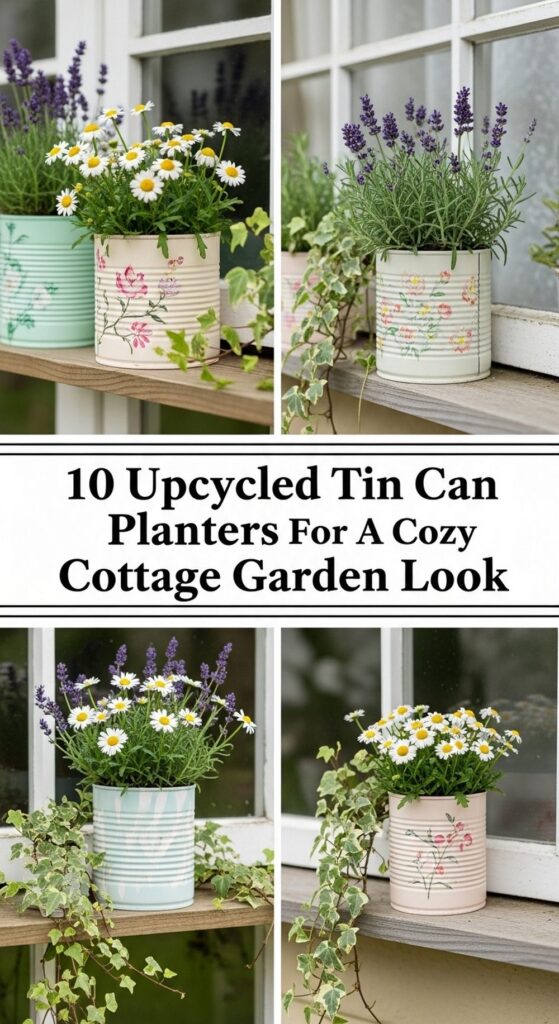
If you love the charm of cottage gardens but don’t have a big budget for fancy containers, upcycled tin cans might become your new favorite materials. They’re easy to find, simple to decorate, and surprisingly beautiful once you add a little paint, twine, and flowers.
In this guide, you’ll discover ten creative ways to turn everyday cans into sweet cottage-style planters. From herb-filled windowsills to fairy-lit hanging cans, these ideas work in small courtyards, balconies, and classic back gardens. With just a few basic tools and some imagination, you can create a garden that feels warm, personal, and full of storybook character.
Quick List
- Hand-Painted Wildflower Tin Can Herb Pots
- Hanging Tin Can Lantern Planters With Fairy Lights
- Pastel Distressed Tin Cans On A Rustic Crate
- Lace & Burlap Wrapped Tin Can Rose Pots
- Tin Can Ladder Shelf Cottage Planter Display
- Tin Can Window Box Trio For Cottage Kitchen Herbs
- Galvanized-Style Tin Can Wild Strawberry Planters
- Tin Can Pole Planter Tower With Trailing Blooms
- Kids’ Nature-Stamped Tin Can Pollinator Station
- Tin Can Table Centerpiece With Moss And Mini Blooms
1. Hand-Painted Wildflower Tin Can Herb Pots

Turn plain tins into adorable herb pots with a few coats of paint and simple flower doodles. Start by cleaning and drying your cans, then add drainage holes in the base. Paint them in a light base color, let them dry, and lightly sketch tiny wildflowers, leaves, and dots in another shade. Fill with good potting mix and plant easy herbs like chives, parsley, or thyme. Group three or five together on a shelf or step for instant cottage charm.
- Best For: Sunny windowsills, small balconies, or narrow stoops.
- Budget Tip: Use leftover wall paint or tester pots instead of buying new.
- Styling Idea: Stick to two or three soft colors so the herbs remain the star.
- Practical Note: Always drill or nail a few drainage holes before planting.
- Care & Maintenance: Trim herbs regularly to keep them compact and fresh-looking.
2. Hanging Tin Can Lantern Planters With Fairy Lights

For a magical cottage feel in the evenings, transform tin cans into a mix of planter and lantern. Punch patterns of stars, dots, or hearts around the sides using a hammer and nail. Paint them in soft pastels, add drainage at the bottom, then plant trailing ivy or small flowers. Thread strong twine or chain through holes near the rim and hang them from branches, pergolas, or hooks. Weave warm white fairy lights in and around the cans for a gentle evening glow.
- Best For: Covered porches, pergolas, or sturdy tree branches.
- Budget Tip: Use battery-operated fairy lights and thrifted twine or ribbon.
- Styling Idea: Repeat the same pattern on every can for a calm, cohesive look.
- Practical Note: Keep electrical parts out of direct water and heavy rain.
- Extra Idea: Add a single tea light (LED is safest) inside for special occasions.
3. Pastel Distressed Tin Cans On A Rustic Crate
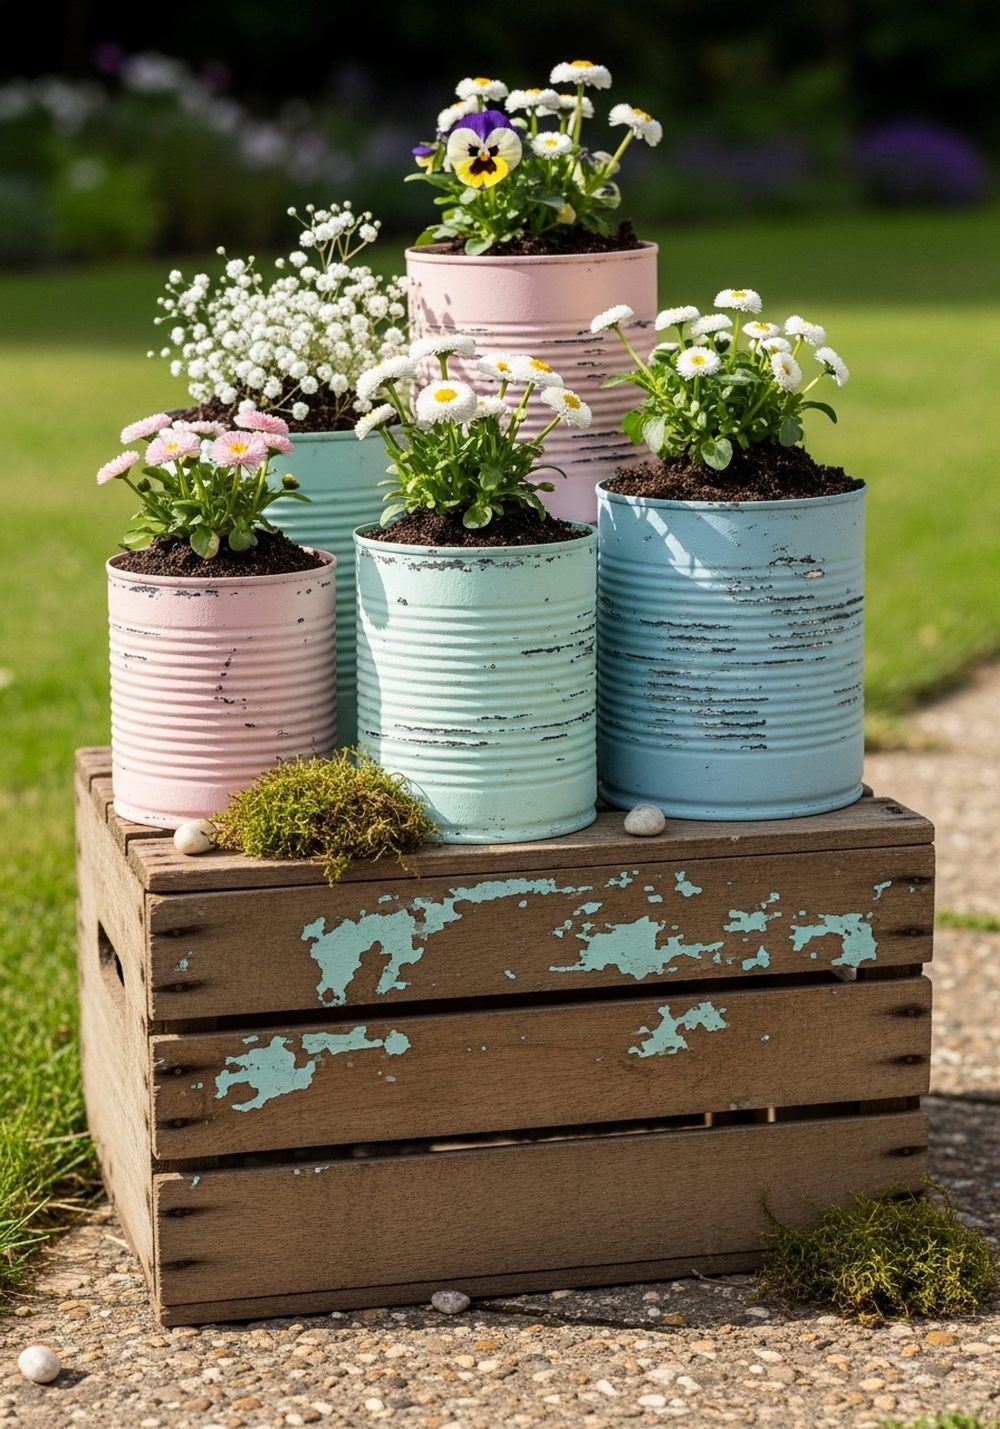
This idea is perfect if you love that weathered, timeworn cottage style. Paint your tin cans in different pastel shades like blush, mint, or duck-egg blue. Once dry, lightly sand edges and ridges so hints of metal or the original label color peek through. Fill them with small flowering plants and group them on top of an old wooden crate or box. Place the crate beside a bench, gate, or doorway to create a relaxed, layered display.
- Best For: Entryways, side paths, and corners that need softening.
- Budget Tip: Use a reclaimed crate or wooden fruit box instead of buying decor.
- Styling Idea: Mix flowers in whites, lilacs, and yellows to keep it soft and romantic.
- Practical Note: Line the crate with plastic or a tray to protect the wood.
- Care & Maintenance: Rotate flowering cans when blooms fade, swapping in fresh ones.
4. Lace & Burlap Wrapped Tin Can Rose Pots

For a more dressed-up cottage look, wrap your cans in strips of burlap and lace. Secure the layers with hot glue and finish with a little bow of jute or ribbon. Plant miniature roses or compact flowering plants inside, using a small layer of gravel at the base for drainage. These tins look especially lovely on outdoor dining tables, windowsills, or along a porch rail, adding a romantic, vintage feel without being fussy.
- Best For: Garden parties, afternoon tea set-ups, or wedding-style corners.
- Budget Tip: Use offcuts of lace and burlap from craft stores or old textiles.
- Styling Idea: Stick to white lace and natural burlap for classic cottage charm.
- Practical Note: Keep fabric-wraps above soil level so they don’t stay soggy.
- Extra Idea: Add a tiny handwritten tag naming each rose variety.
5. Tin Can Ladder Shelf Cottage Planter Display

Rescue an old wooden ladder and turn it into a tiered stand for your tin can planters. Sand any rough spots, then leave it bare or wash it with diluted paint for a faded look. Arrange cans of different heights and colors on each rung, mixing flowers, herbs, and trailing plants. The ladder gives your garden vertical interest and makes a small space feel fuller and more layered, just like a storybook cottage border.
- Best For: Small patios or narrow side yards that need height.
- Budget Tip: Look for damaged ladders second-hand; you only need them to stand.
- Styling Idea: Repeat one accent color on every rung to pull the display together.
- Practical Note: Ensure the ladder is stable and secure, especially on uneven ground.
- Care & Maintenance: Rotate sun-loving and shade-loving cans to suit each rung’s light.
6. Tin Can Window Box Trio For Cottage Kitchen Herbs

Create a “fake window box” using three matching tin cans grouped together on a ledge or shelf. Paint all three in a soft neutral shade and decorate with simple botanical stamps or stencils. Screw or tie them onto a narrow board so they sit snugly as a trio. Fill with your favorite kitchen herbs and position them under a window where you can reach them easily. The look is half garden, half farmhouse kitchen, and very cottage.
- Best For: Ground-floor windows, balcony rails, or fence shelves.
- Budget Tip: Use scrap wood for the backing board and leftover paint.
- Styling Idea: Label each herb by hand on the can using a paint pen or chalk marker.
- Practical Note: Make sure the ledge is level and the trio is securely fixed.
- Care & Maintenance: Water gently and often; herbs in small containers dry out quickly.
7. Galvanized-Style Tin Can Wild Strawberry Planters
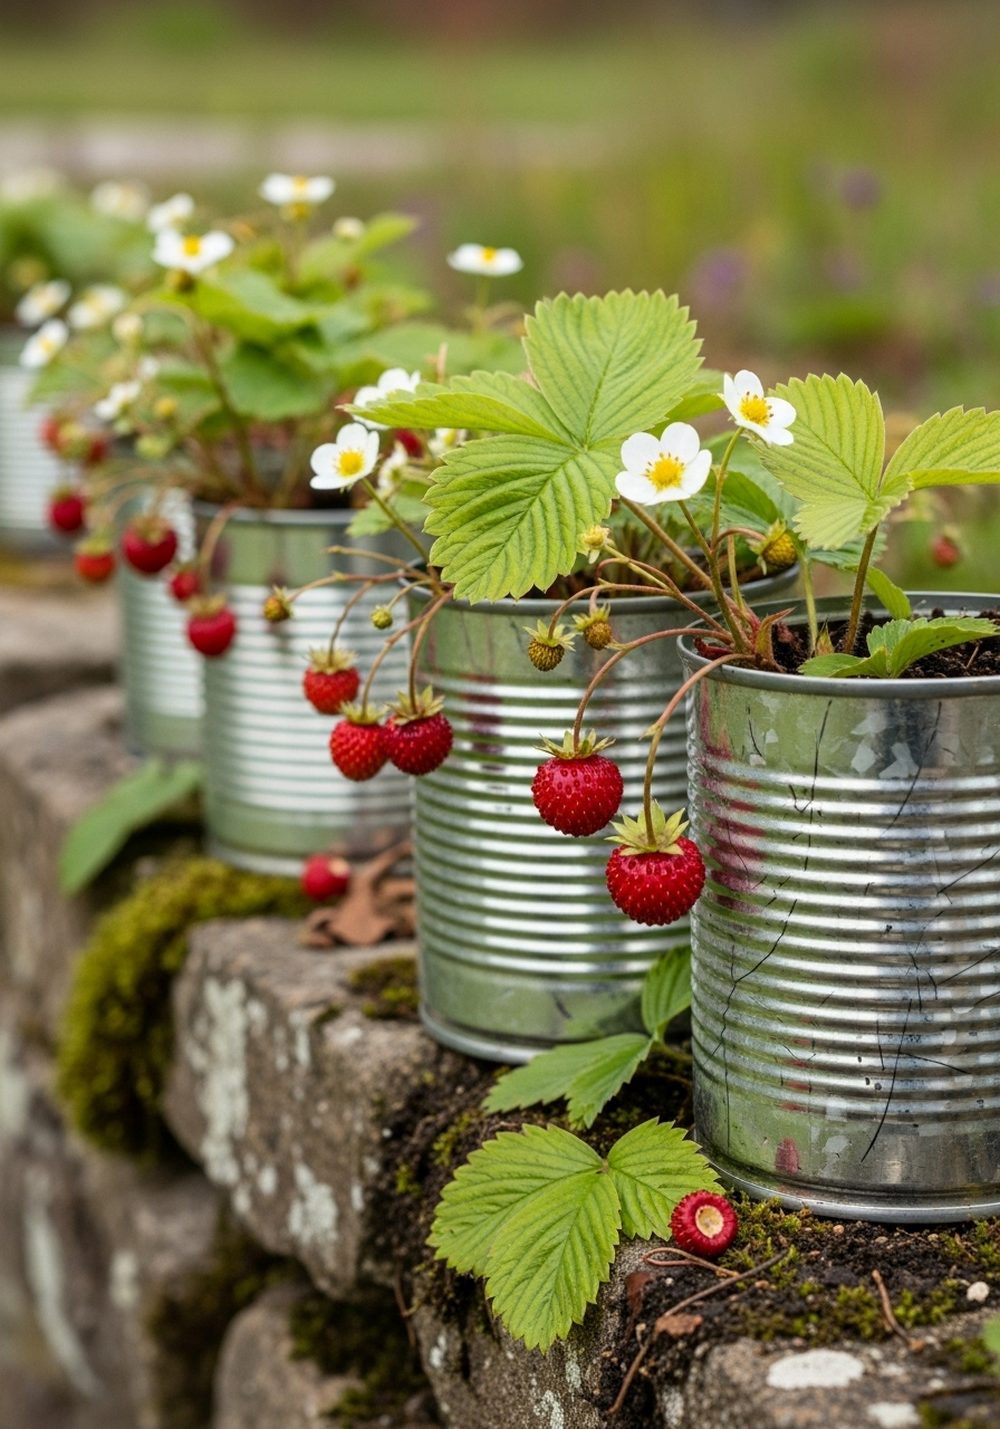
If you love the look of galvanized tubs but not the price, this tin can trick is ideal. Lightly sand your cans, then give them a thin wash of grey or metallic paint to mimic aged metal. Plant wild strawberries or alpine varieties that tumble softly over the sides. Place the cans on low walls, steps, or edging stones so the fruit can trail. The combination of silvery “galvanized” cans and bright red berries is pure cottage garden joy.
- Best For: Sunny spots along walls, steps, or the front of borders.
- Budget Tip: Grow strawberries from runners or small starter plants to save money.
- Styling Idea: Mix in a few plain, unpainted cans for a more rustic, casual feel.
- Practical Note: Use rich, well-draining compost; strawberries dislike soggy roots.
- Care & Maintenance: Remove runners or replant them to keep plants productive.
8. Tin Can Pole Planter Tower With Trailing Blooms

Build a vertical accent by attaching tin cans to a central pole or sturdy stake. Pre-drill holes, then screw or wire cans at staggered heights around the pole. Paint them in coordinated cottage colors and fill with trailing plants like lobelia, petunias, or ivy. Sink the pole into a large pot or directly into the ground. As the plants grow, they spill over the cans and create a column of color that draws the eye upward.
- Best For: Small gardens needing a focal point without taking up much floor space.
- Budget Tip: Use a scrap metal or wooden pole and mismatched cans you already have.
- Styling Idea: Choose one main flower color—like soft purple or pink—for a dreamy look.
- Practical Note: Anchor the pole very securely so wind doesn’t topple it.
- Care & Maintenance: Water from the top and let it trickle down, topping up as needed.
9. Kids’ Nature-Stamped Tin Can Pollinator Station
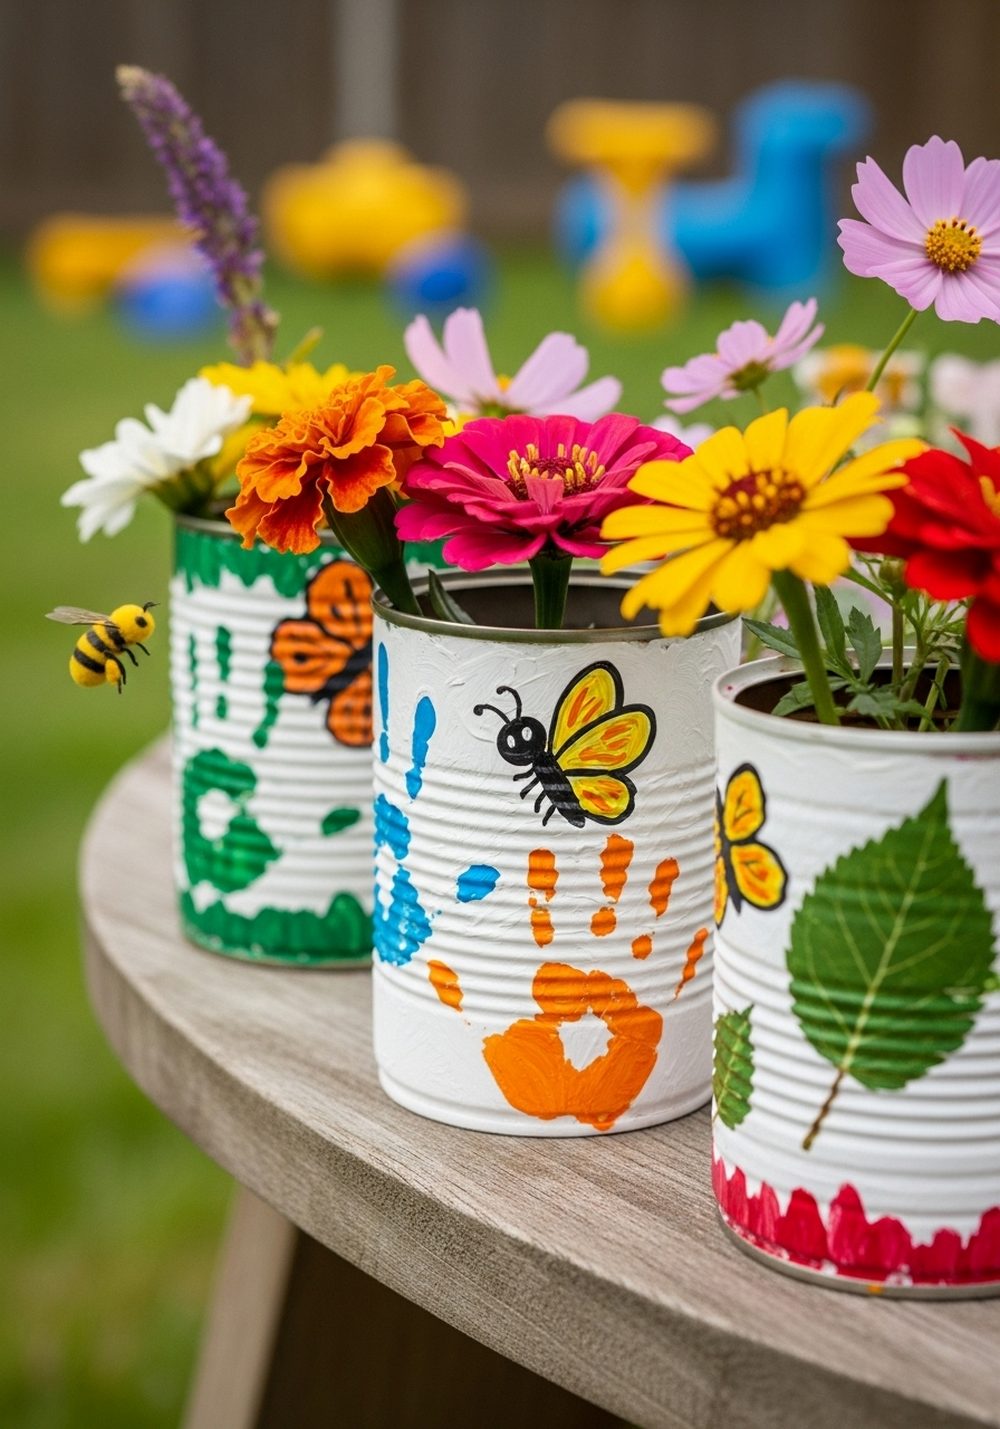
Get children involved with a project that looks sweet and helps the garden too. Let them paint tin cans in bright base colors, then press leaves, flowers, or simple shapes into the paint to make prints. Once dry, plant nectar-rich flowers that bees and butterflies love. Group the cans on a low bench or stump where kids can easily watch visiting pollinators. The mix of cheerful art and buzzing life fits perfectly into a relaxed cottage garden.
- Best For: Family gardens, school plots, or shared community spaces.
- Budget Tip: Reuse kids’ poster paints and free seeds from swaps or friends.
- Styling Idea: Keep this corner playful and colorful; cottage gardens can be informal.
- Practical Note: Place cans in a sunny, sheltered spot to attract more pollinators.
- Extra Idea: Add a simple homemade sign saying “Bee Buffet” or similar for fun.
10. Tin Can Table Centerpiece With Moss And Mini Blooms

Dress your outdoor table in full cottage style with a cluster of tiny tin can planters. Choose smaller cans, paint them in whites and creams, and wrap a few with strips of floral fabric or ribbon. Arrange them in a shallow tray lined with fresh moss or faux moss, and plant them with mini daisies, violas, or forget-me-nots. This movable centerpiece instantly makes tea, breakfast, or evening drinks feel like a garden event.
- Best For: Patio tables, bistro sets, or picnic benches.
- Budget Tip: Use offcuts of fabric from old pillowcases, sheets, or dresses.
- Styling Idea: Mix different heights of cans for a charming, collected look.
- Practical Note: Keep the tray light enough to move indoors during bad weather.
- Care & Maintenance: Refresh moss and swap out plants as seasons change.
Conclusion
Upcycled tin cans are one of the simplest ways to bring cozy cottage character into any outdoor space, from balcony to back garden. With a little cleaning, painting, and planting, they become charming planters, lanterns, and centerpieces that feel handmade and personal. Pick just one idea to start—a herb trio, a ladder display, or a table centerpiece—then gradually add more as you collect cans. Before long, you’ll have a garden that looks beautifully layered, lived-in, and uniquely yours.
FAQs
Q1. How can I decorate my garden with tin cans on a very tight budget?
Rinse and save cans from everyday groceries, then use leftover house paint or cheap tester pots for color. Simple touches like twine, ribbon, or fabric scraps can dress them up without cost. Start with a few cans grouped together rather than lots spread out; a small, intentional cluster looks more designed and still very charming.
Q2. Are tin can planters safe for renters who can’t make permanent changes?
Yes, tin can planters are ideal for renters because they’re portable and lightweight. Use movable stands, crates, or trays rather than drilling into walls or railings. When you move, you can simply take the cans with you or empty them and recycle the metal if you don’t want to keep them.
Q3. Will tin cans rust and ruin the look of my garden?
Tin cans may slowly rust outdoors, but that can actually add to a rustic cottage feel. If you prefer a cleaner look, paint the cans thoroughly, including the rims, and use a clear sealant over the top. Keep them slightly raised on stones or little feet so they don’t sit in constant water, which speeds up rusting.
Q4. What plants work best in small tin can planters?
Choose compact plants that don’t mind smaller root spaces, such as herbs, violas, pansies, small succulents, alpine strawberries, and low-growing annuals. Check the light in your space and pick plants to match—sun lovers for bright spots, shade-tolerant varieties for sheltered corners. Avoid large shrubs or deep-rooted plants, as they’ll struggle in shallow containers.
Q5. How do I stop tin can planters from damaging my balcony or windowsill?
Always add drainage holes, then place each can on a saucer, tray, or scrap of wood to catch extra water. This protects painted railings and stone from rust marks. If you’re fixing cans to a ledge or fence, use removable hooks or straps rather than screws, so everything can be taken down without leaving holes behind.
Q6. What’s the easiest tin can planter project for beginners?
The simplest place to start is with a trio of hand-painted herb cans. Drill a few holes in the bottom, add paint in one color, let it dry, and then plant ready-grown herbs. Group them on a crate, step, or table. It’s quick, satisfying, and gives you useful plants straight away, while you build confidence to try more detailed designs.