10 Recycled Tin Can Garden Art Ideas Kids Will Love Making

If your recycling bin is overflowing with tin cans and your kids are bursting with energy, this is the perfect project list for you. Recycled tin can garden art is colourful, budget-friendly, and a brilliant way to get little hands involved in decorating your outdoor space.
In this post, you’ll find ten easy, family-friendly ideas that turn plain cans into planters, bird feeders, lanterns, and more. Most projects use basic craft supplies you may already have at home, and many can be finished in an afternoon. By the end, you’ll have a brighter, more playful garden and a bunch of proud young makers eager to show off their creations.
Quick List
- Rainbow Painted Tin Can Planters
- Tin Can Wind Chime Orchestra
- Tin Can Flower Totem Towers
- Tin Can Bird Feeders
- Starry Tin Can Lanterns
- Tin Can Bug Hotel Stack
- Tin Can Garden Creatures
- Hanging Tin Can Rain Chain
- Tin Can Vertical Wall Garden
- Tin Can Mini Fairy Houses
1. Rainbow Painted Tin Can Planters
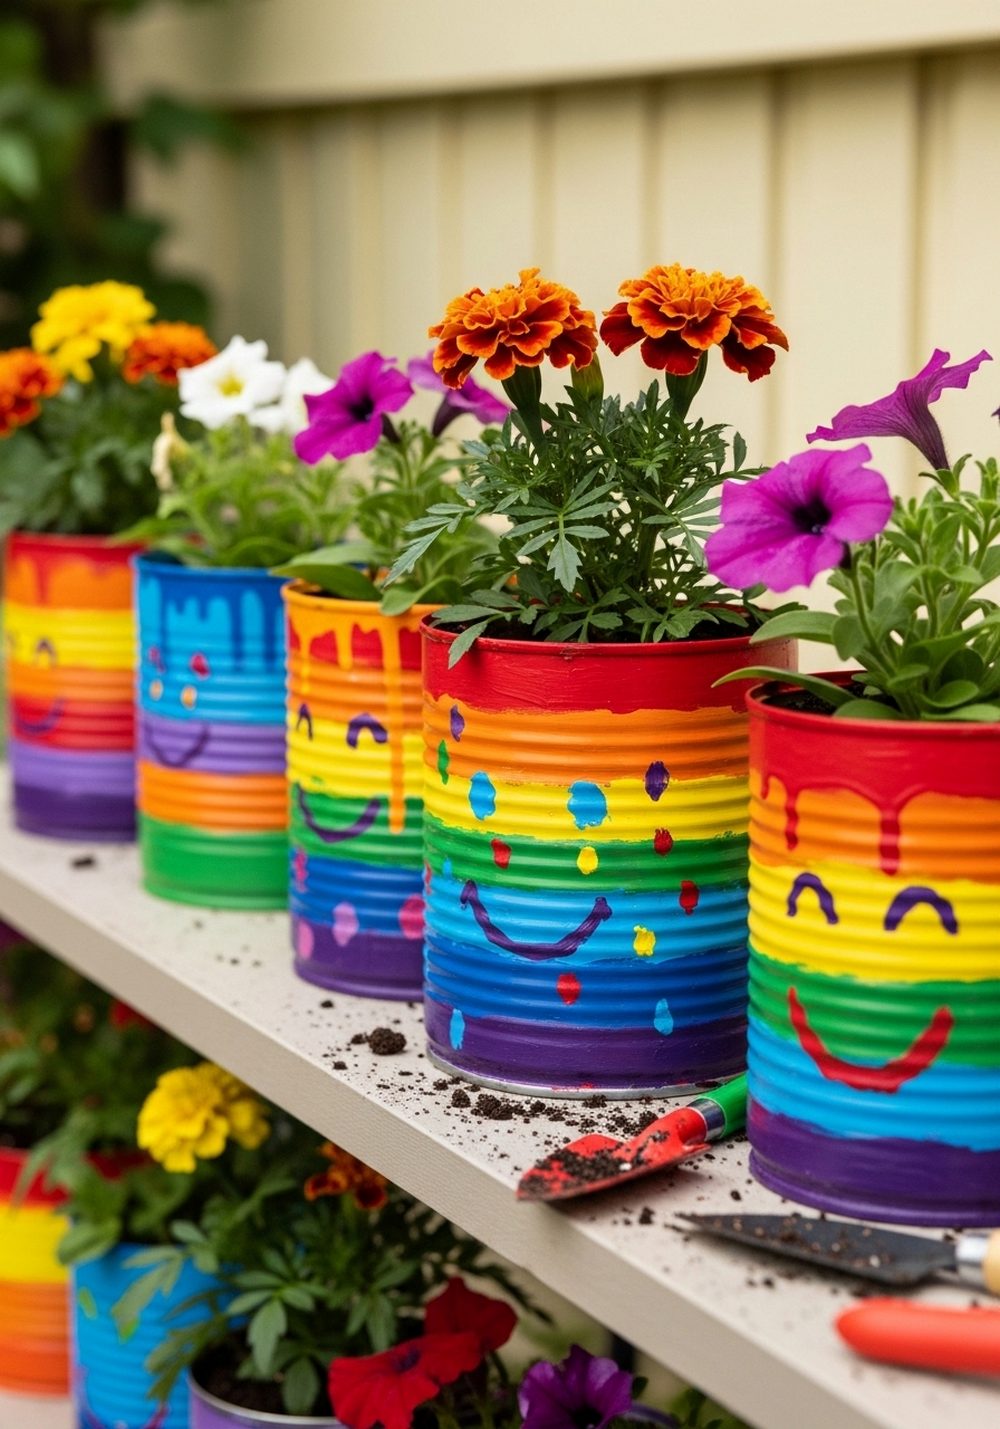
Turn a row of old tin cans into a cheerful rainbow of mini planters. After an adult checks for sharp edges and adds drainage holes, kids can prime and paint each can in different colours, stripes, or polka dots. Once dry, fill them with potting mix and tuck in small flowers, herbs, or succulents. Line them along steps, a balcony rail, or a windowsill. The mix of bright paint and fresh green plants instantly makes any corner feel happier and more playful.
- Best For: Small patios, windowsills, or balconies where space is limited.
- Budget Tip: Use leftover house paint or sample pots and seeds instead of full-grown plants.
- Styling Idea: Arrange cans in rainbow order or stick to two or three colours for a coordinated look.
- Practical Note: Use a hammer and nail or drill (adult job) to add drainage holes before planting.
- Care & Maintenance: Water lightly and rotate cans occasionally so plants grow evenly.
2. Tin Can Wind Chime Orchestra
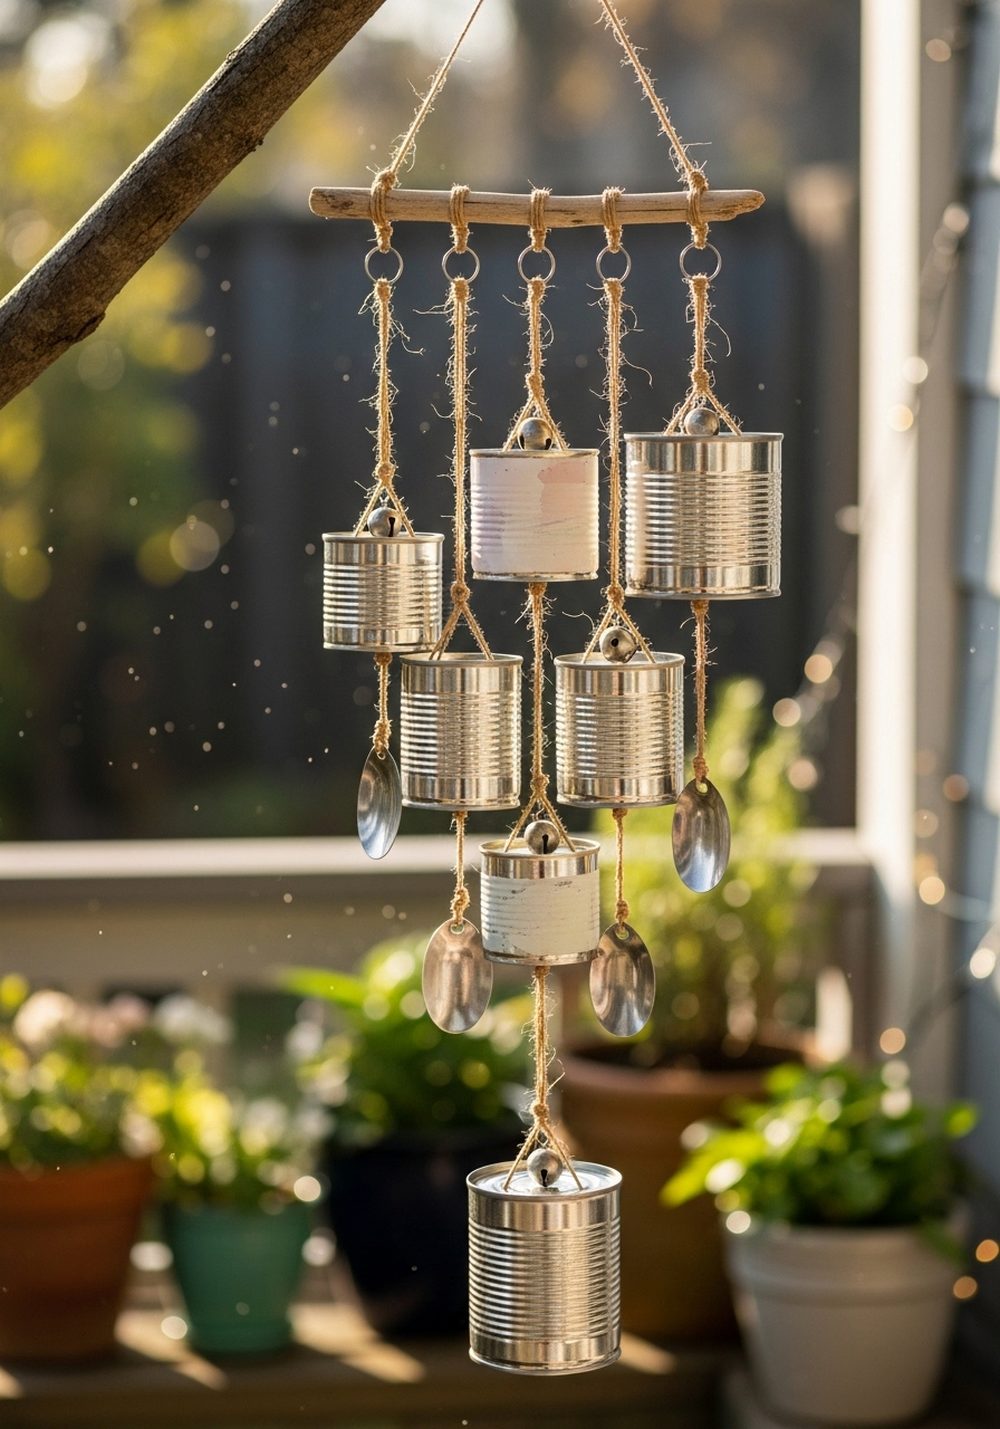
Kids will love turning tin cans into a tinkling “orchestra” that sings in the breeze. Collect several cans in different sizes, paint them in bold colours, then hang them upside down from a sturdy stick or branch using string or thin rope. Add beads, bells, or metal washers to the ends of some strings so they gently tap the cans. Hang your wind chime from a tree, porch beam, or balcony hook for soft, musical sounds on windy days.
- Best For: Porches, pergolas, and tree branches where the wind can catch the chimes.
- Budget Tip: Use old keys, washers, and beads from broken jewellery instead of buying new pieces.
- Styling Idea: Choose a colour theme, such as ocean blues or sunset tones, for a more polished look.
- Practical Note: Make sure strings are tied securely and hang the chime where kids won’t bump their heads.
- Care & Maintenance: Check knots regularly and bring the chime in during extreme weather to prevent damage.
3. Tin Can Flower Totem Towers
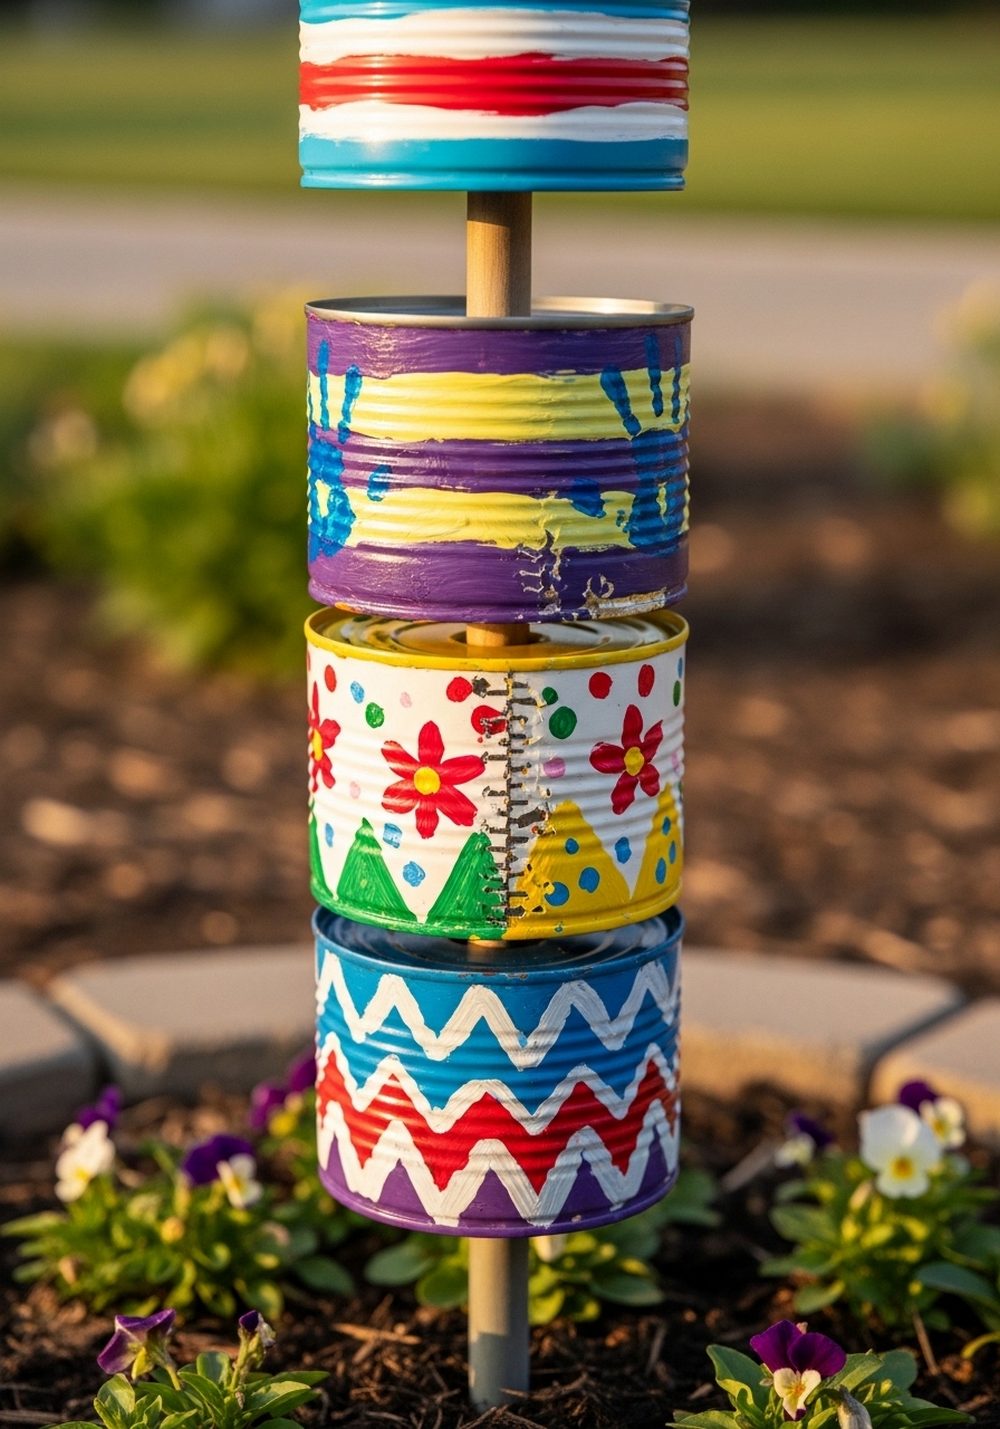
Stack painted tin cans on a central pole to create a fun flower totem in your garden bed. Once an adult has drilled holes in the centre of each can, kids can decorate them with stripes, zigzags, and tiny doodles. Thread the cans onto a wooden dowel or metal rod pushed firmly into the soil, spacing them slightly apart. You can leave them empty as sculpture or tuck faux flowers or trailing plants into some of the cans for extra colour.
- Best For: Flower beds or borders that need a vertical focal point.
- Budget Tip: Use a scrap metal rod or old broom handle as the centre pole.
- Styling Idea: Alternate solid-colour cans with patterned ones to create rhythm and interest.
- Practical Note: Ensure the pole is deeply anchored so the tower doesn’t wobble or tip over.
- Extra Idea: Add a painted wooden ball or finial on top for a finished “totem” look.
4. Tin Can Bird Feeders

A recycled tin can bird feeder is a lovely way for kids to decorate and care for local wildlife at the same time. Lay a can on its side, then let kids paint it in soft colours or add simple patterns. Once dry, glue a small stick or dowel under the opening as a perch and run ribbon or twine through the top to hang it. Fill the can with bird seed and suspend it from a tree branch where birds can enjoy a safe snack.
- Best For: Gardens with trees or sturdy hooks, and families who enjoy birdwatching.
- Budget Tip: Use basic bird seed and scrap sticks from the yard as perches.
- Styling Idea: Match feeder colours to nearby flowers or go pastel for a gentle, cottage feel.
- Practical Note: Hang away from windows to prevent collisions and out of reach of curious pets.
- Care & Maintenance: Clean the inside regularly and replace damp seed to keep birds healthy.
5. Starry Tin Can Lanterns

Starry tin can lanterns add instant magic to a garden evening. An adult can fill a can with water and freeze it, then punch star and moon shapes through the sides using a hammer and nail. Once thawed and dried, kids can paint the outside in dark sky colours and add tiny dots like stars. Place a battery-operated tealight inside and set the lanterns along steps, tabletops, or pathways. At dusk, the punched shapes will glow and cast sparkly patterns on nearby surfaces.
- Best For: Evening garden parties, cosy patios, and family campfire nights.
- Budget Tip: Use battery tealights instead of real candles so you can reuse them often.
- Styling Idea: Paint each lantern in different night-sky shades—navy, deep purple, or dark green.
- Practical Note: Adults should handle the hole-punching and supervise any use of tools.
- Care & Maintenance: Bring lanterns indoors in bad weather to prevent rust and fading.
6. Tin Can Bug Hotel Stack
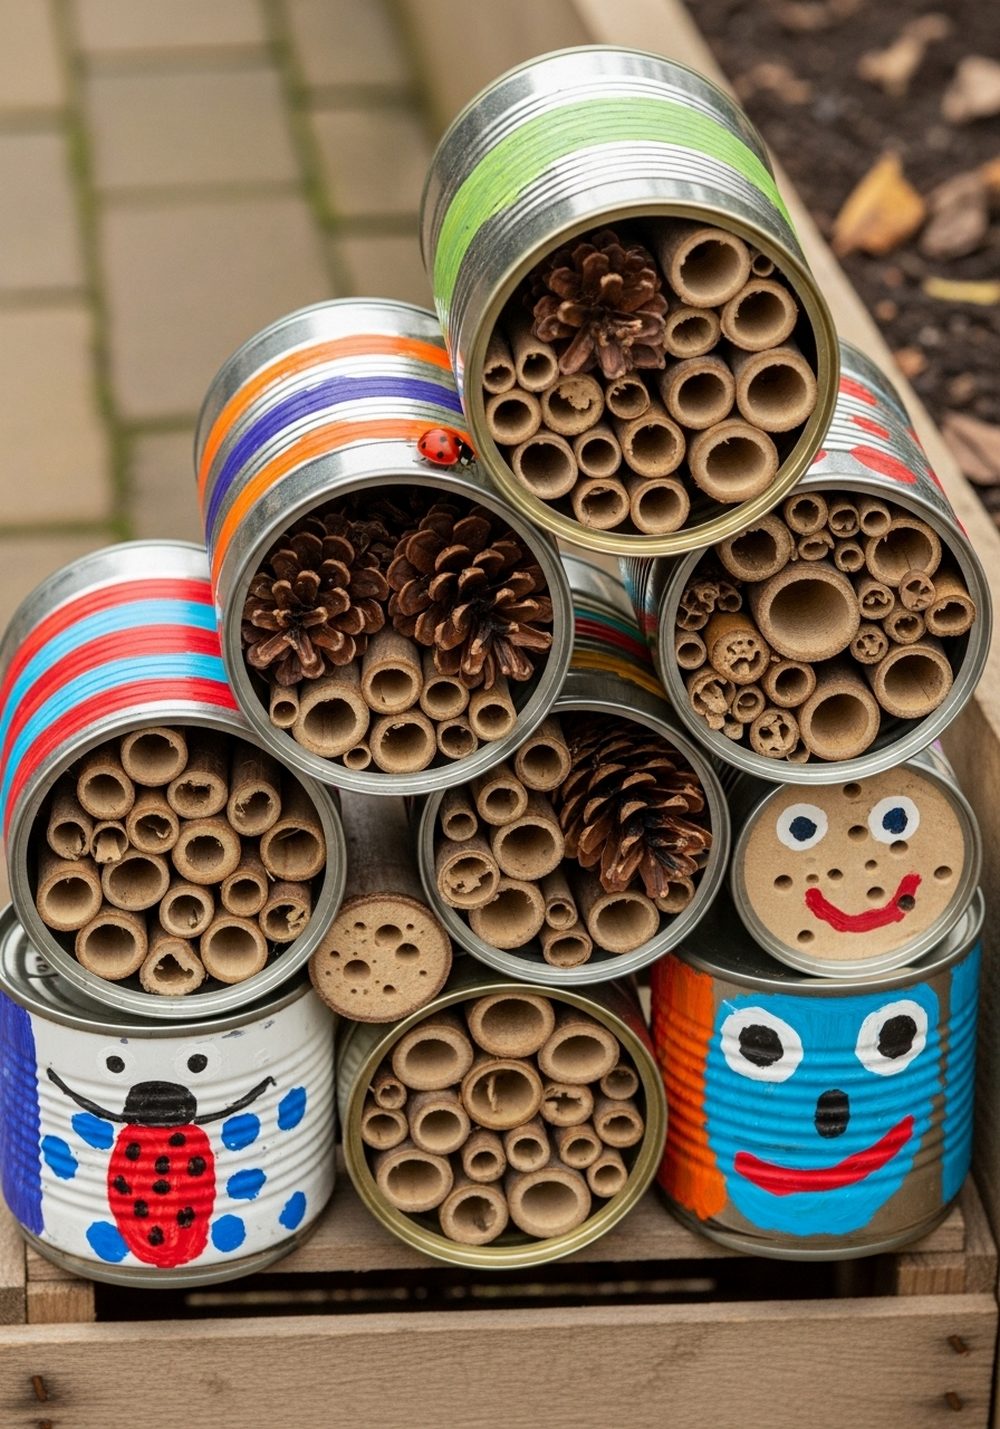
Give helpful garden insects a fun home with a stacked bug hotel made from tin cans. Kids can paint the outsides in earthy colours, then fill each can with hollow bamboo, pinecones, bark, and rolled corrugated card. Stack the cans horizontally in an old wooden crate or frame, securing them with strong glue or cable ties. Place the bug hotel in a quiet corner of the garden where it can stay dry and undisturbed. Over time, bees and other helpful insects may move in.
- Best For: Nature-loving kids and wildlife-friendly gardens.
- Budget Tip: Fill the cans with natural materials collected on walks or from your yard.
- Styling Idea: Paint simple “bug” faces or patterns on the fronts of the cans for a playful touch.
- Practical Note: Position the hotel off the ground and out of heavy rain to protect the inhabitants.
- Care & Maintenance: Refresh the natural filling every year or two as it breaks down.
7. Tin Can Garden Creatures
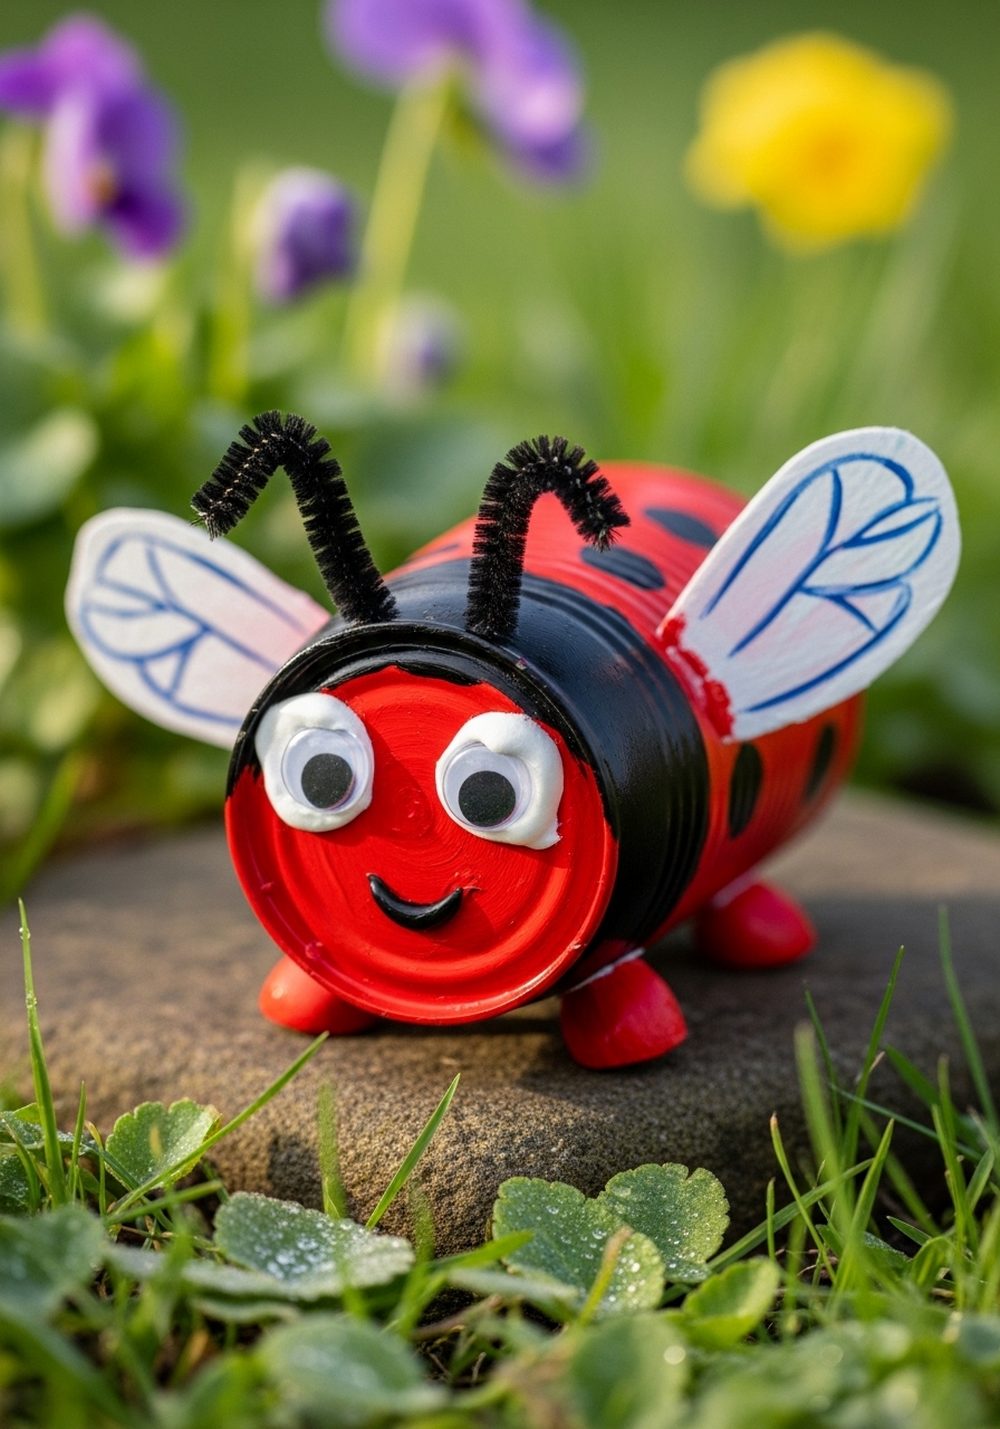
Turn tin cans into a friendly gang of garden creatures: ladybirds, bees, caterpillars, or even funny monsters. Kids can paint the cans bright colours, then add details like stripes, spots, eyes, and smiles. Pipe cleaners make great antennae or legs, and cardboard or foam can be glued on as wings. Place the creatures among plants, along a path, or on a low wall. The mix of colour and personality will make kids feel like the garden is full of tiny characters they created themselves.
- Best For: Family gardens where kids play and explore regularly.
- Budget Tip: Use craft scraps like leftover googly eyes, foam, and pipe cleaners rather than buying new.
- Styling Idea: Choose a theme—only insects, only fantasy creatures, or all red-and-black ladybirds.
- Practical Note: Use outdoor-safe glue and bring more delicate pieces inside during heavy rain.
- Extra Idea: Name each creature and make simple plant marker signs to match.
8. Hanging Tin Can Rain Chain
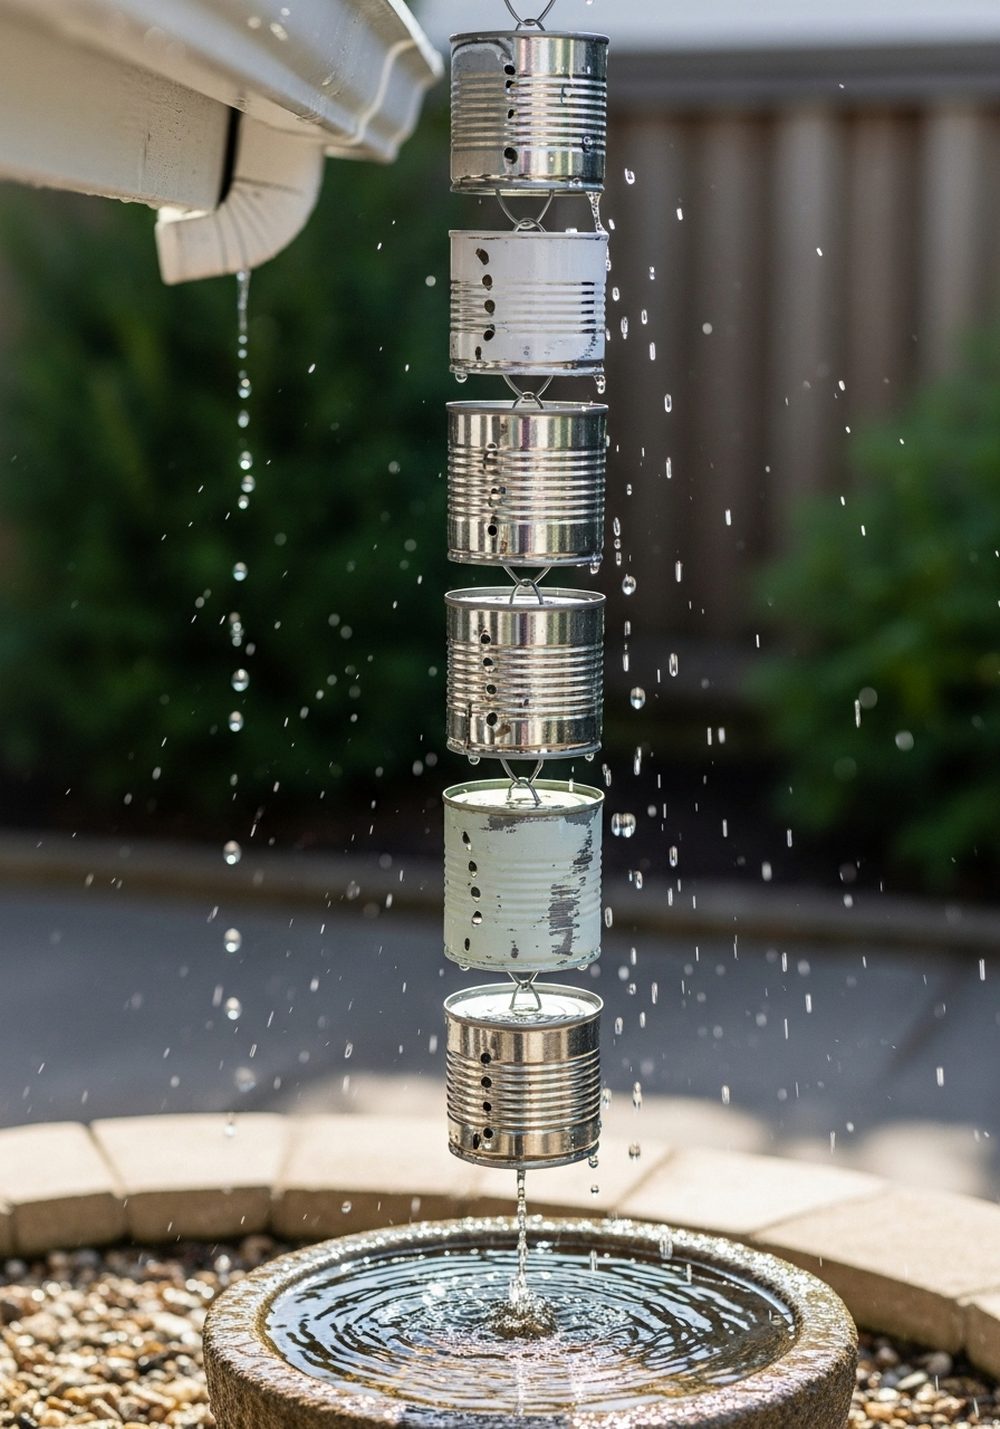
A tin can rain chain is both decorative and fascinating for kids to watch on wet days. Use several small cans, painted in matching or ombré colours, and attach them to each other vertically with sturdy wire or chain. Hang the top from a gutter or overhang so rainwater trickles from one can into the next, eventually emptying into a bowl or small stone-filled basin below. Kids will love seeing and hearing the water travel down the chain while adding a sculptural touch to the garden.
- Best For: Areas where water naturally drips from a roof edge or gutter.
- Budget Tip: Use a simple metal hook and old bowl or planter to catch the water at the bottom.
- Styling Idea: Choose cool blues and greens for a watery theme, or metallic paints for a modern look.
- Practical Note: Ensure all connections are strong and hang it where overflow won’t cause muddy puddles.
- Care & Maintenance: Clear out leaves and debris from the cans now and then so water flows freely.
9. Tin Can Vertical Wall Garden

Make a small fence or wall come alive with a vertical garden built from tin cans. After an adult screws or bolts each can to a wooden fence or board, kids can paint them and then help fill them with soil and plants. Use trailing flowers, strawberries, or herbs for a lush, overflowing look. Arrange the cans in neat rows or a fun zigzag pattern. It’s a brilliant way to add greenery and colour without taking up precious floor space.
- Best For: Tiny yards, narrow side passages, and balcony walls.
- Budget Tip: Start with just a few cans and gradually add more as you collect them.
- Styling Idea: Stick to one colour family—like all pastels or all brights—for a tidy, coordinated effect.
- Practical Note: Make sure the fence or wall is strong enough to support the weight of soil and plants.
- Care & Maintenance: Water regularly and check that drainage holes aren’t blocked so roots stay healthy.
10. Tin Can Mini Fairy Houses
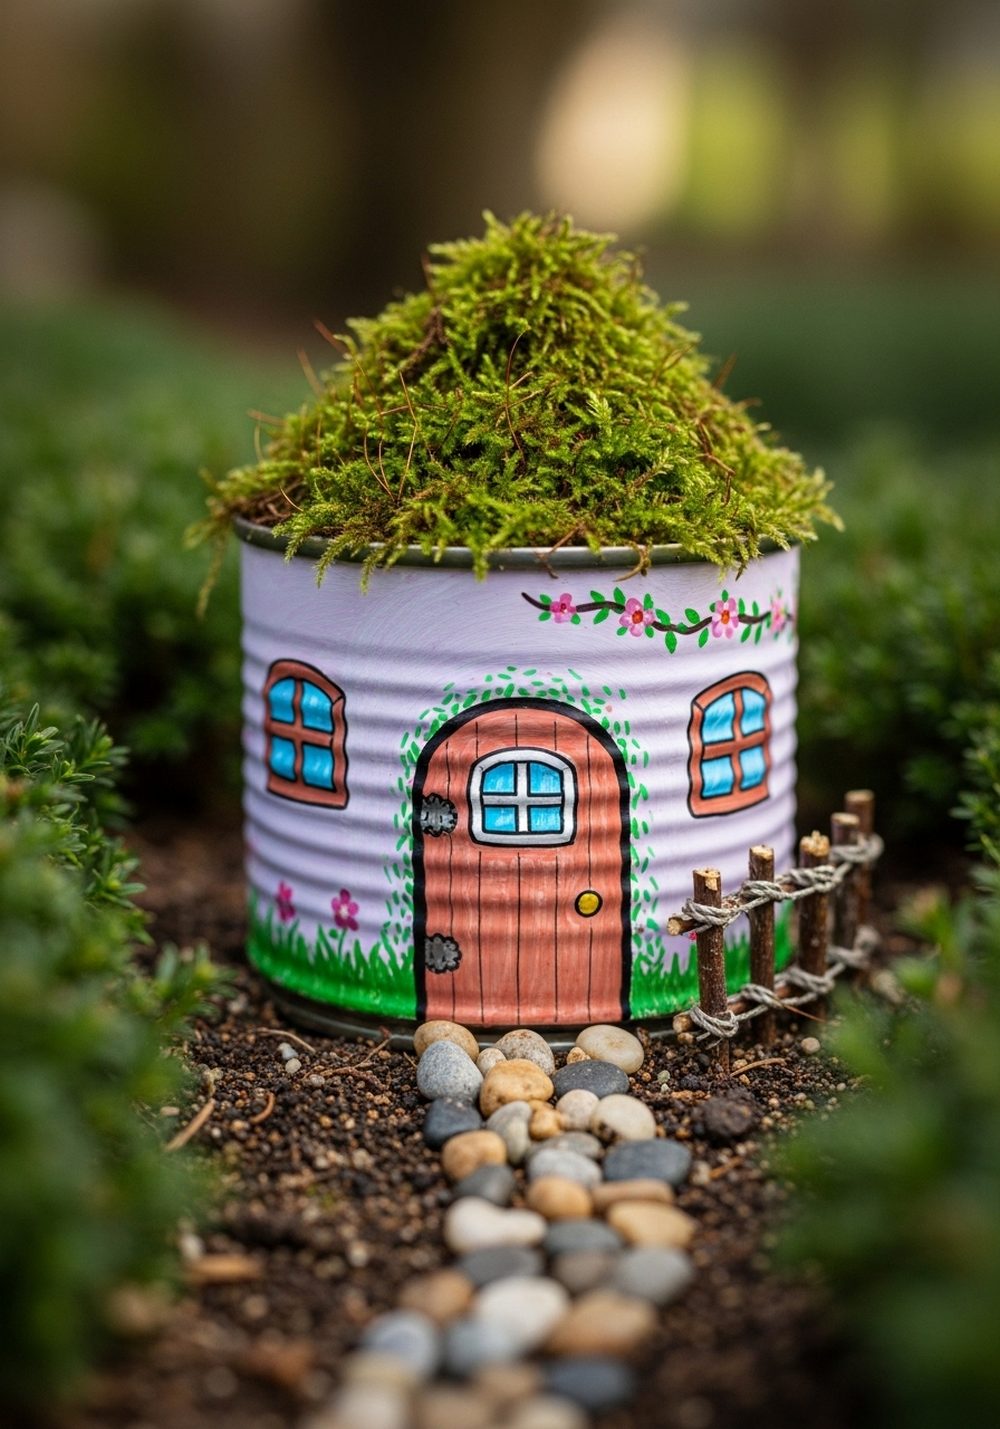
Tin cans make adorable little fairy houses that kids will treasure. Paint each can in soft cottage colours, then help children add windows, doors, and climbing vines with paint pens. Glue moss, bark, or tiny pebbles around the base and top for a natural roof and path. Nestle the finished fairy houses under shrubs, beside tree trunks, or in a dedicated fairy corner. They add a sweet, storybook feeling that encourages imaginative play every time kids visit the garden.
- Best For: Shady corners, under shrubs, or near a favourite tree.
- Budget Tip: Use natural materials like moss, twigs, and stones instead of store-bought miniatures.
- Styling Idea: Create a whole “village” with different colours and door shapes for each house.
- Practical Note: Seal the paint with a clear outdoor varnish to help it last longer.
- Extra Idea: Add tiny battery-operated string lights nearby for magical evenings.
Conclusion
Recycled tin can garden art is such a simple way to turn everyday rubbish into something colourful, useful, and full of memories. With a few basic supplies and a bit of supervision, kids can help design planters, feeders, lanterns, and whole little worlds in your outdoor space. Start with one idea that fits your garden and your children’s ages, then gradually build a collection. Before long, you’ll have a garden that feels uniquely yours—and theirs.
FAQs
1. Are tin can garden crafts safe for kids?
They can be very safe as long as an adult handles the risky parts. Always check for sharp rims and edges, sanding or covering them with tape if needed. Adults should also take care of drilling holes or punching designs. Once the cans are prepared, kids can focus on the fun, safer jobs like painting, filling, and arranging.
2. How can we decorate with tin cans on a very small balcony?
Choose ideas that go vertical, like rainbow planters on a rail, a small wind chime, or a mini vertical wall garden on one section of fence or wall. Hanging crafts and wall-mounted cans take almost no floor space. Keep the colour palette simple so the small area still feels calm and tidy rather than cluttered.
3. What if we’re renting and can’t drill into walls or fences?
Use freestanding options instead. You can place painted planters on shelves, stack bug hotel cans in a crate, or lean a wooden board with attached cans against a wall without fixing it permanently. Wind chimes and bird feeders can hang from over-door hooks, plant stands, or portable frames that move with you when you leave.
4. How do we stop tin can art from rusting too quickly outdoors?
A little rust can add charm, but you can slow it down by priming cans before painting and finishing with a clear outdoor sealer. Position them where they won’t sit in puddles of water and bring more delicate pieces indoors during very wet or frosty weather. Battery lanterns and fairy houses especially benefit from a bit of shelter.
5. What are the easiest tin can garden projects for beginners?
Rainbow painted planters and simple garden creatures are ideal starting points. They use basic painting skills, need minimal tools, and offer big visual impact right away. Once you’re comfortable, you can move on to slightly more involved projects like lanterns, wind chimes, or vertical gardens that require holes to be drilled.