
10 Decorated Milk Jug Watering Cans for Gardens
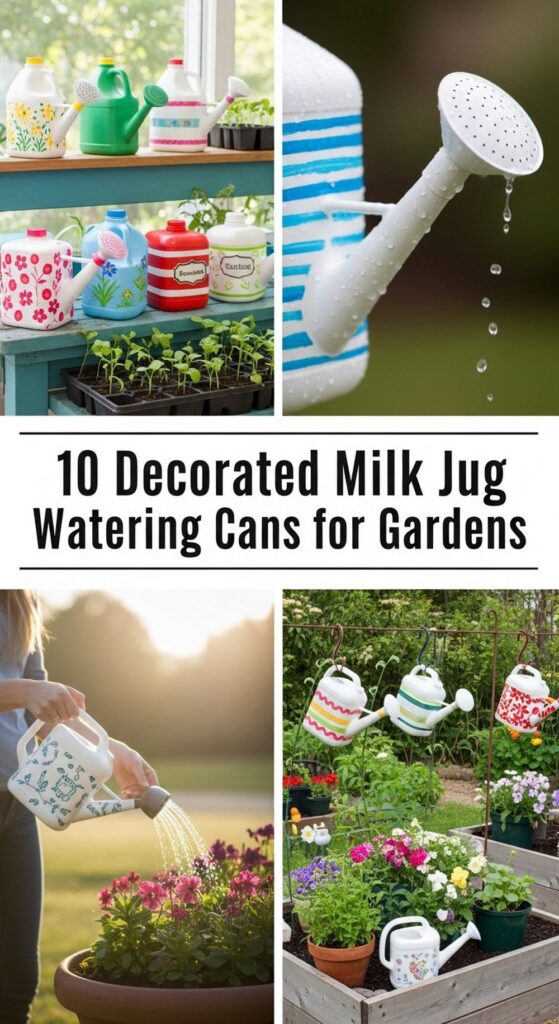
If you’re the kind of gardener who hates throwing away a perfectly good container, decorated milk jug watering cans are about to become your new favorite project. These humble jugs are light, easy to handle, and surprisingly stylish once you give them a little creative love.
In this post, you’ll find ten simple ways to turn empty milk jugs into eye-catching watering cans that double as garden decor. From pastel florals to kid-made designs, each idea is budget-friendly, beginner-friendly, and easy to customize. With a few paints, ribbons, and basic craft supplies, you can add personality, color, and fun to your watering routine and make even the most practical tools feel special.
Quick List
- Pastel Floral Painted Milk Jug Watering Can
- Chalkboard Label Herb-Themed Milk Jug
- Rustic Twine-Wrapped Milk Jug With Stenciled Motifs
- Mosaic Tile Decorated Milk Jug Watering Can
- Vintage Enamel-Style Painted Milk Jug With Floral Decals
- Nature-Inspired Leaf-Stamped Milk Jug Watering Can
- Boho Patterned Milk Jug With Beads and Charms
- Kids’ Handprint Art Milk Jug Watering Can
- Metallic Ombre Milk Jug Watering Can
- Seasonal Ribbon and Tag Milk Jug Watering Can
1. Pastel Floral Painted Milk Jug Watering Can
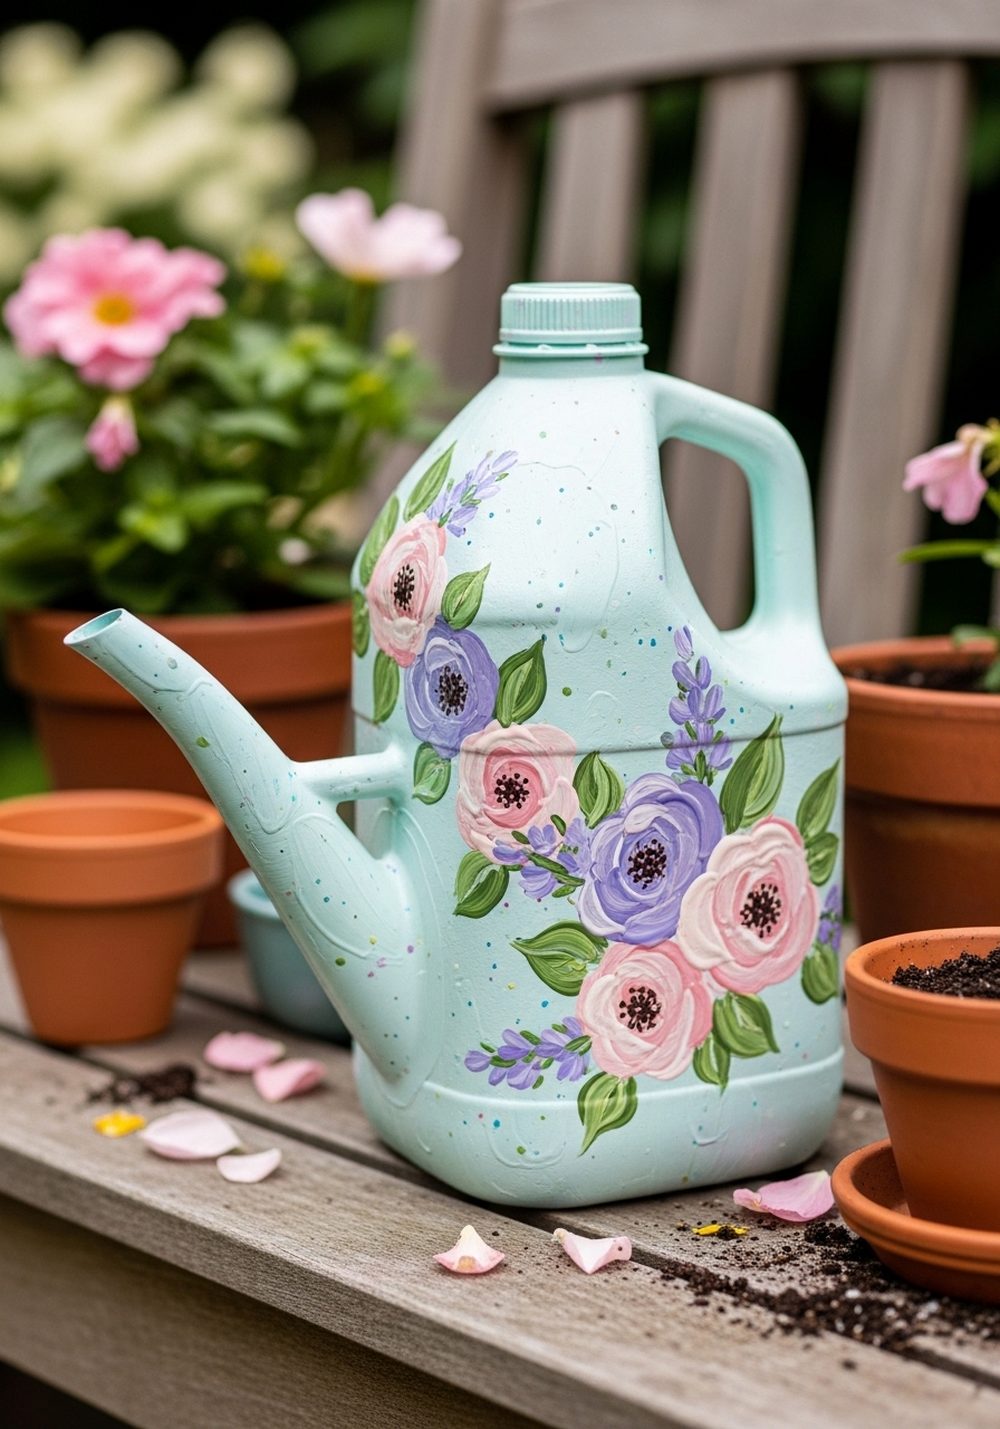
Give a plain milk jug a cottage-garden makeover with soft pastel florals. Clean and dry the jug, then lightly sand the outside so the paint sticks better. Start with a pale base coat, let it dry, and then add simple flower shapes in blush pink, lavender, and soft yellow. Outline petals loosely in white or a slightly darker shade for a hand-painted feel. Once the design is dry, seal it with a clear outdoor sealer so it withstands watering and sun.
- Best For: Romantic cottage gardens, front porch displays, and flower-heavy borders.
- Budget Tip: Use leftover craft paints and sample pots rather than buying new colors.
- Styling Idea: Coordinate the pastel shades with your pots, cushions, or door color.
- Practical Note: Keep the spout area free of thick paint so water flows smoothly.
- Care & Maintenance: Rinse gently and avoid harsh scrubbing to preserve the artwork.
2. Chalkboard Label Herb-Themed Milk Jug
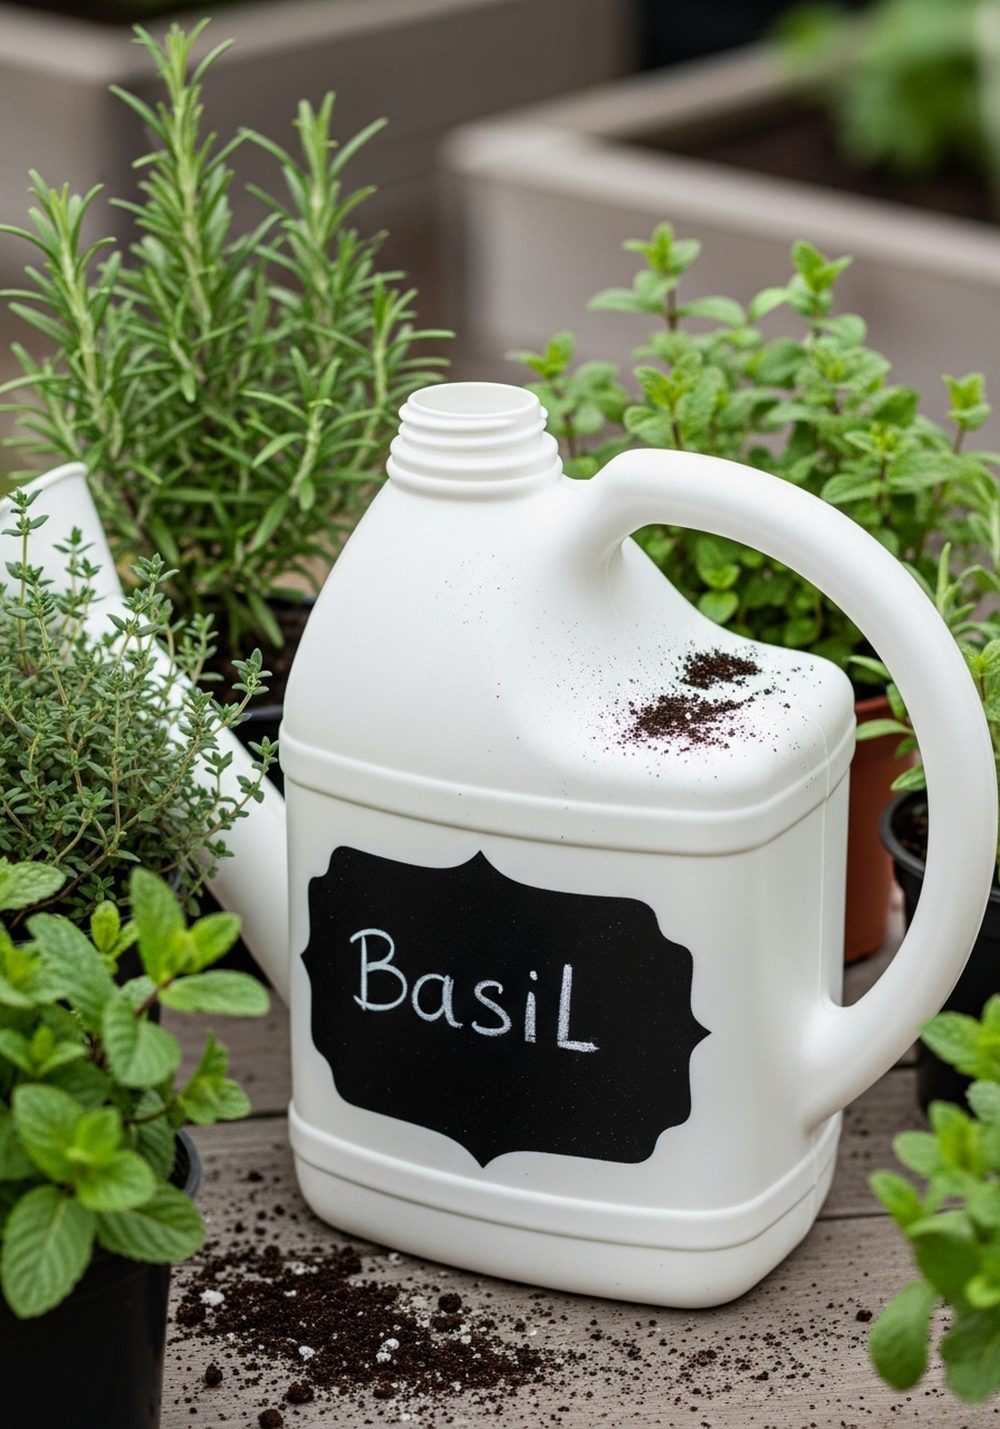
Turn your milk jug watering can into a handy garden label with a chalkboard panel. Paint the jug a simple solid color, then mask off a rectangle and fill it with chalkboard paint. Once cured, you can write the herb or plant you’re watering that day—basil, mint, or “seedlings only.” It’s playful and practical, especially if you keep different jugs for different fertilizers or plant zones. This idea looks right at home next to a kitchen door herb garden.
- Best For: Herb gardens, balcony planters, and organized gardeners.
- Budget Tip: A small pot of chalkboard paint goes a long way—share with a friend.
- Styling Idea: Add a thin border around the chalk area in white paint for a framed look.
- Practical Note: Use liquid chalk markers for clearer writing that wipes off cleanly.
- Care & Maintenance: Avoid soaking the chalkboard area; just wipe with a damp cloth.
3. Rustic Twine-Wrapped Milk Jug With Stenciled Motifs
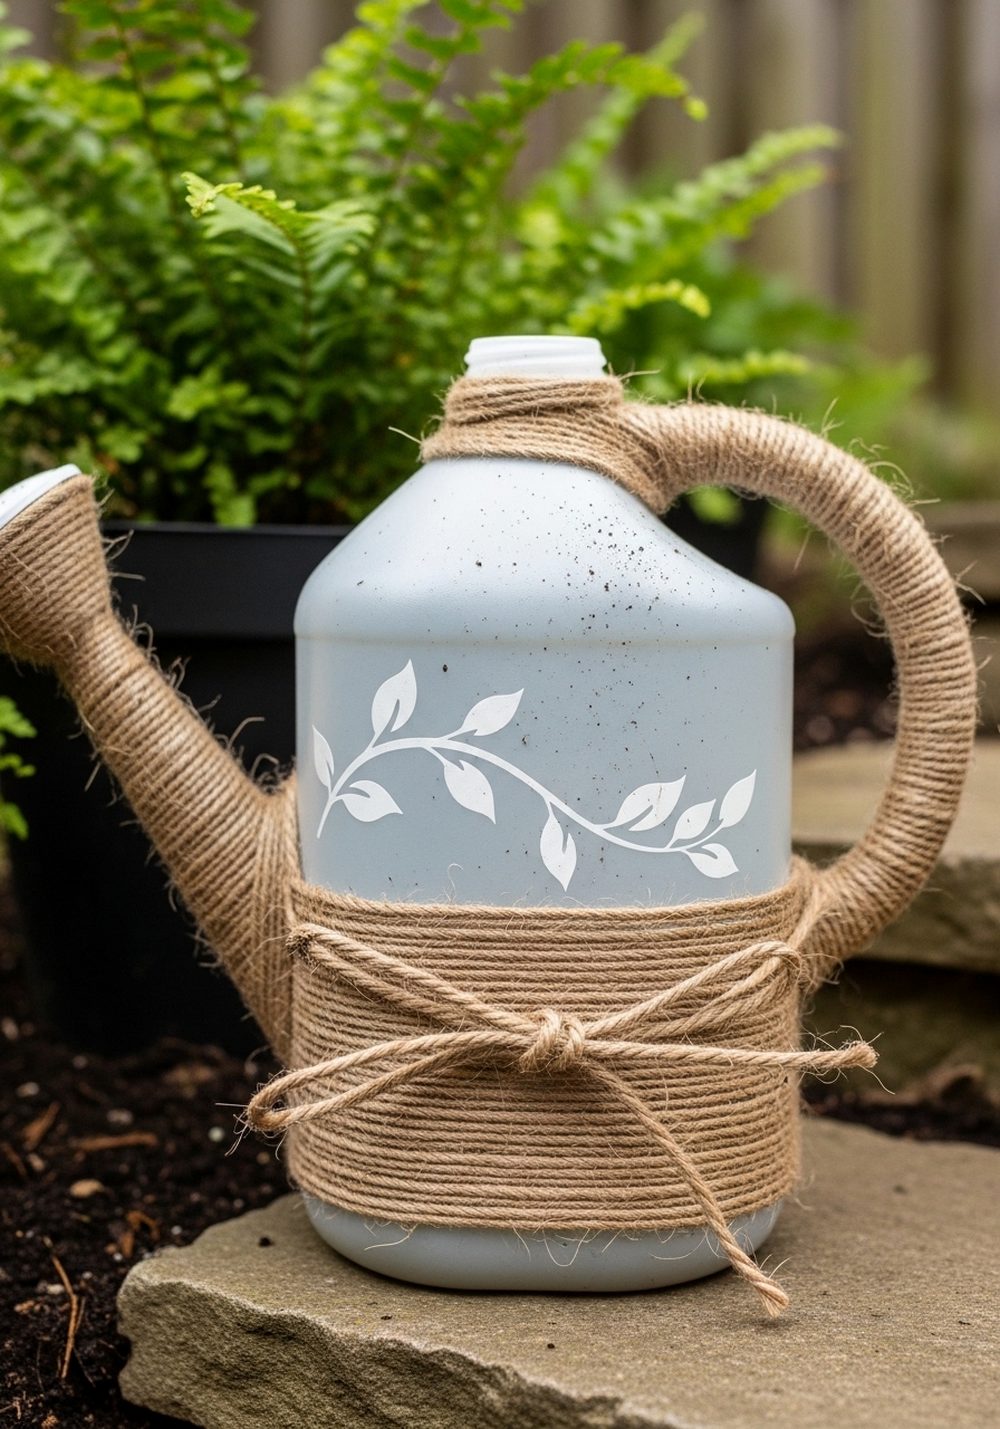
Create a rustic, farmhouse-style watering can by wrapping your milk jug in twine and adding a few stenciled details. Start by hot-gluing the end of the twine at the base, then wrap tightly upward, adding dots of glue every few centimeters. Leave part of the jug bare so you can stencil simple leaves, stars, or garden words like “Grow.” The mix of rough twine and clean shapes looks charming on stone steps or beside wooden raised beds.
- Best For: Country-style gardens, patios with lots of wood and stone.
- Budget Tip: Twine is very inexpensive, and stencils can be used on multiple projects.
- Styling Idea: Choose white or sage green paint for the stencils to keep it calm and rustic.
- Practical Note: Don’t wrap the spout or top opening so you can still pour easily.
- Care & Maintenance: Store out of heavy rain to keep the twine from going moldy.
4. Mosaic Tile Decorated Milk Jug Watering Can
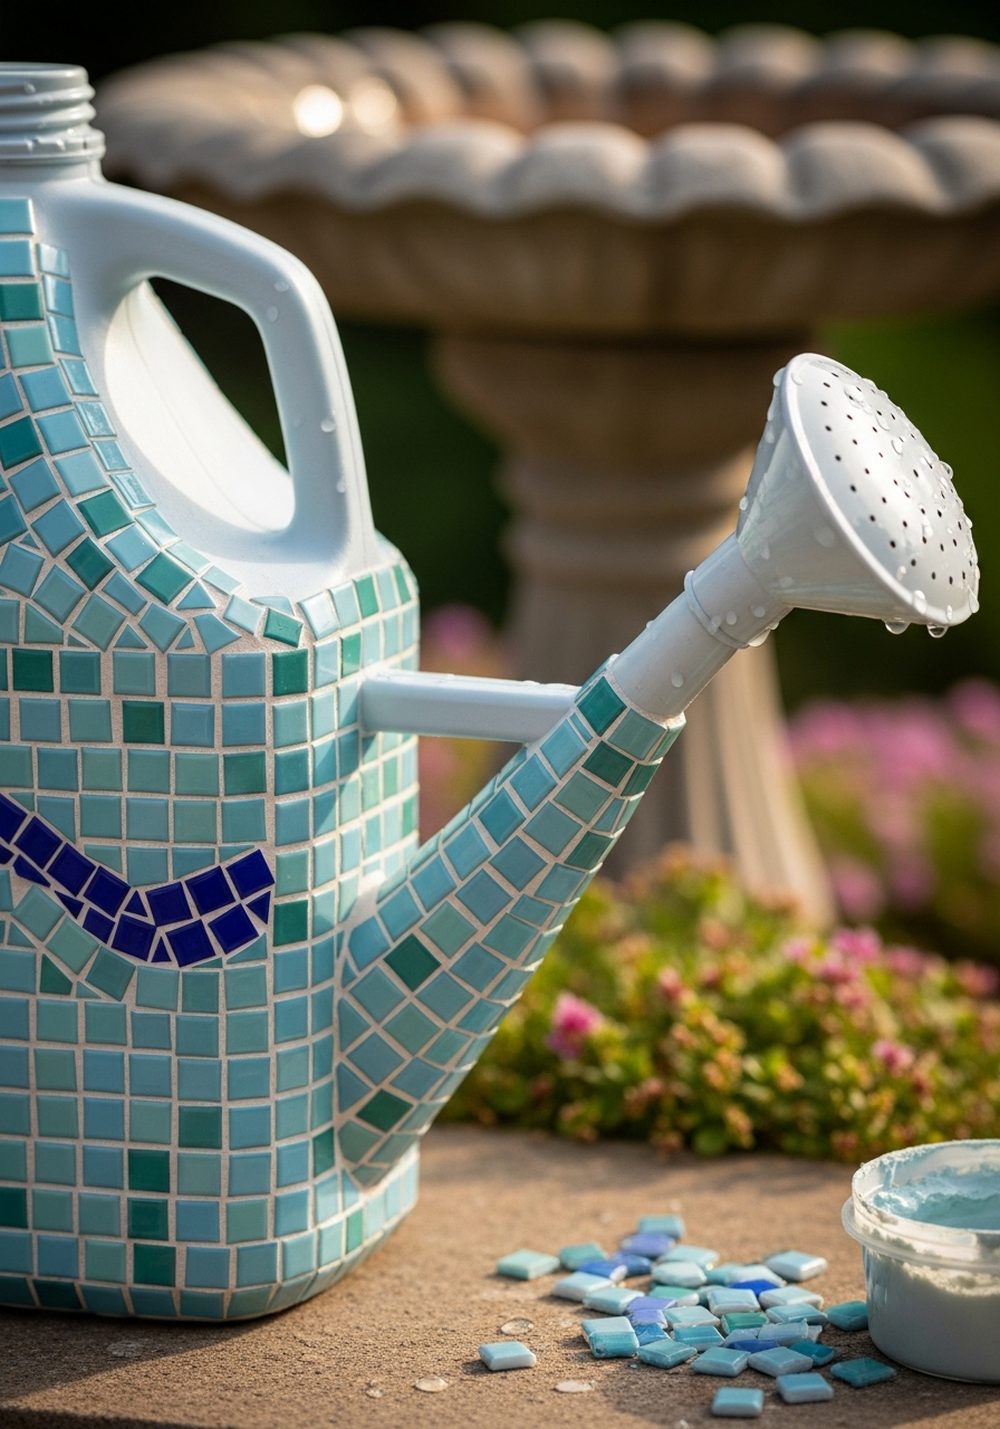
If you love a bit of sparkle, a mosaic panel on your milk jug watering can looks amazing in sunlight. Rough up the plastic where you’ll add tiles, then apply strong outdoor glue and press on small flat tiles, mirror pieces, or broken crockery. Once dry, grout lightly between them and wipe away the excess. The mosaic area becomes a little artwork you carry through the garden, catching the light as you water.
- Best For: Sunlit patios, modern gardens, and statement pieces near seating areas.
- Budget Tip: Use leftover tiles or broken plates rather than buying new.
- Styling Idea: Stick to one color family—blues, greens, or whites—for a coordinated look.
- Practical Note: Keep the mosaic on one side only so the jug stays light and easy to handle.
- Care & Maintenance: Rinse gently; check tiles occasionally and re-glue any loose pieces.
5. Vintage Enamel-Style Painted Milk Jug With Floral Decals
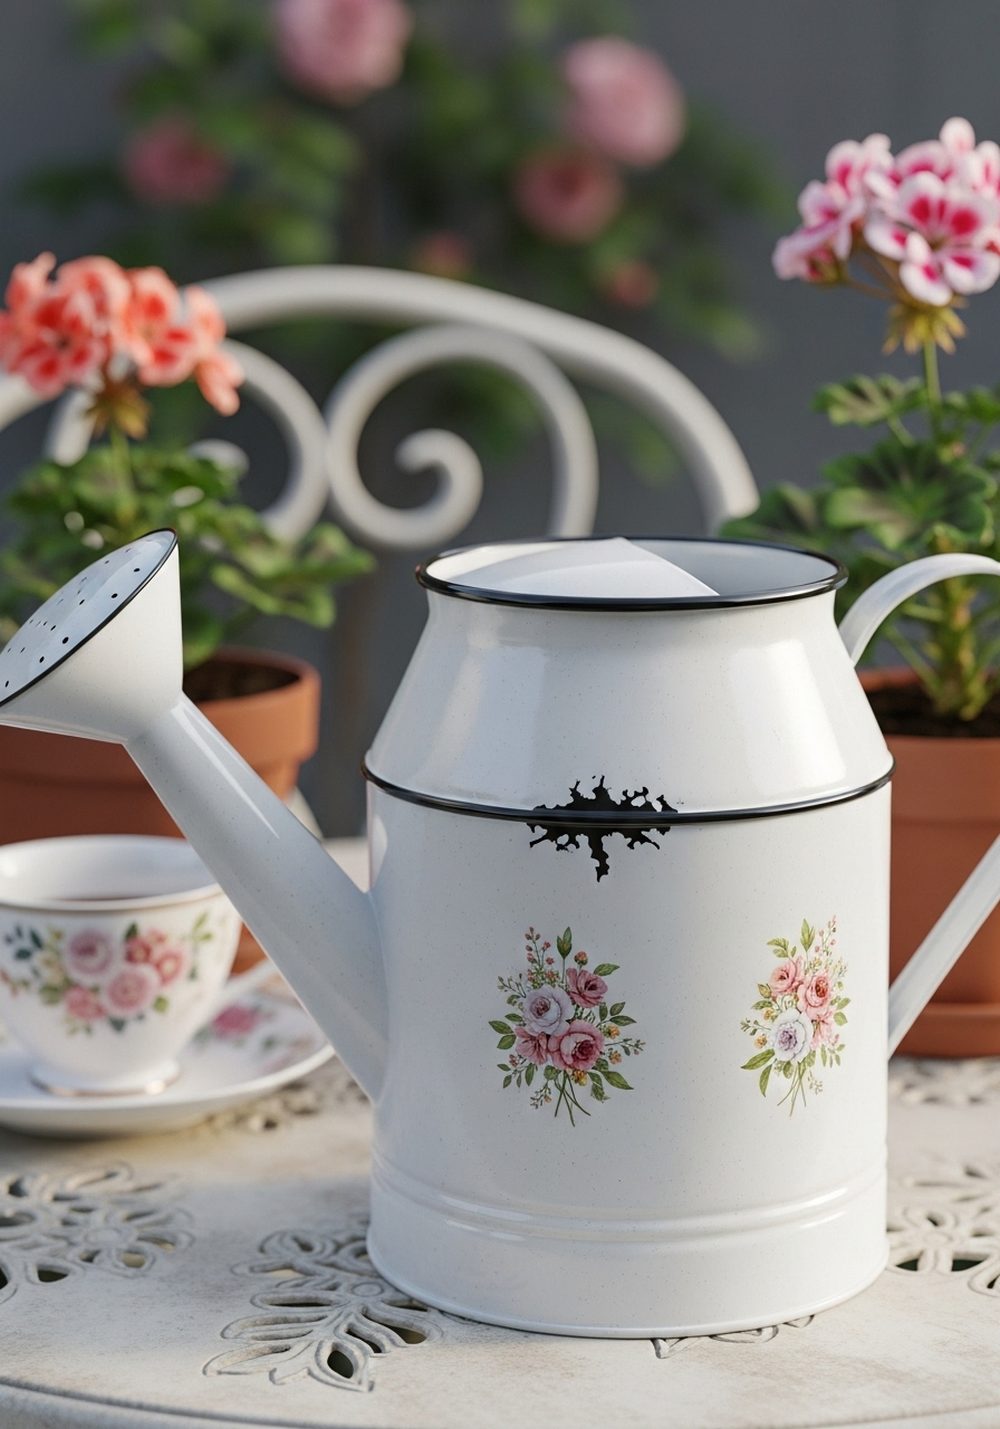
Fake the look of old enamelware using paint and simple decals. Paint the entire milk jug in cream or soft white, then carefully add a thin “rim” line around the top in black or navy. Once dry, stick on floral decals or transfer images and seal with a clear varnish. The result looks like a little vintage watering can, perfect next to a bistro set or hanging shelf of potted geraniums and herbs.
- Best For: Vintage-inspired gardens, patios, and balconies with metal furniture.
- Budget Tip: Printable decal paper or cheap floral stickers work surprisingly well.
- Styling Idea: Pair with striped cushions and classic red geraniums for a timeless feel.
- Practical Note: Avoid painting too thickly around the handle for a comfortable grip.
- Care & Maintenance: Store under cover to prevent yellowing of the “enamel” finish.
6. Nature-Inspired Leaf-Stamped Milk Jug Watering Can
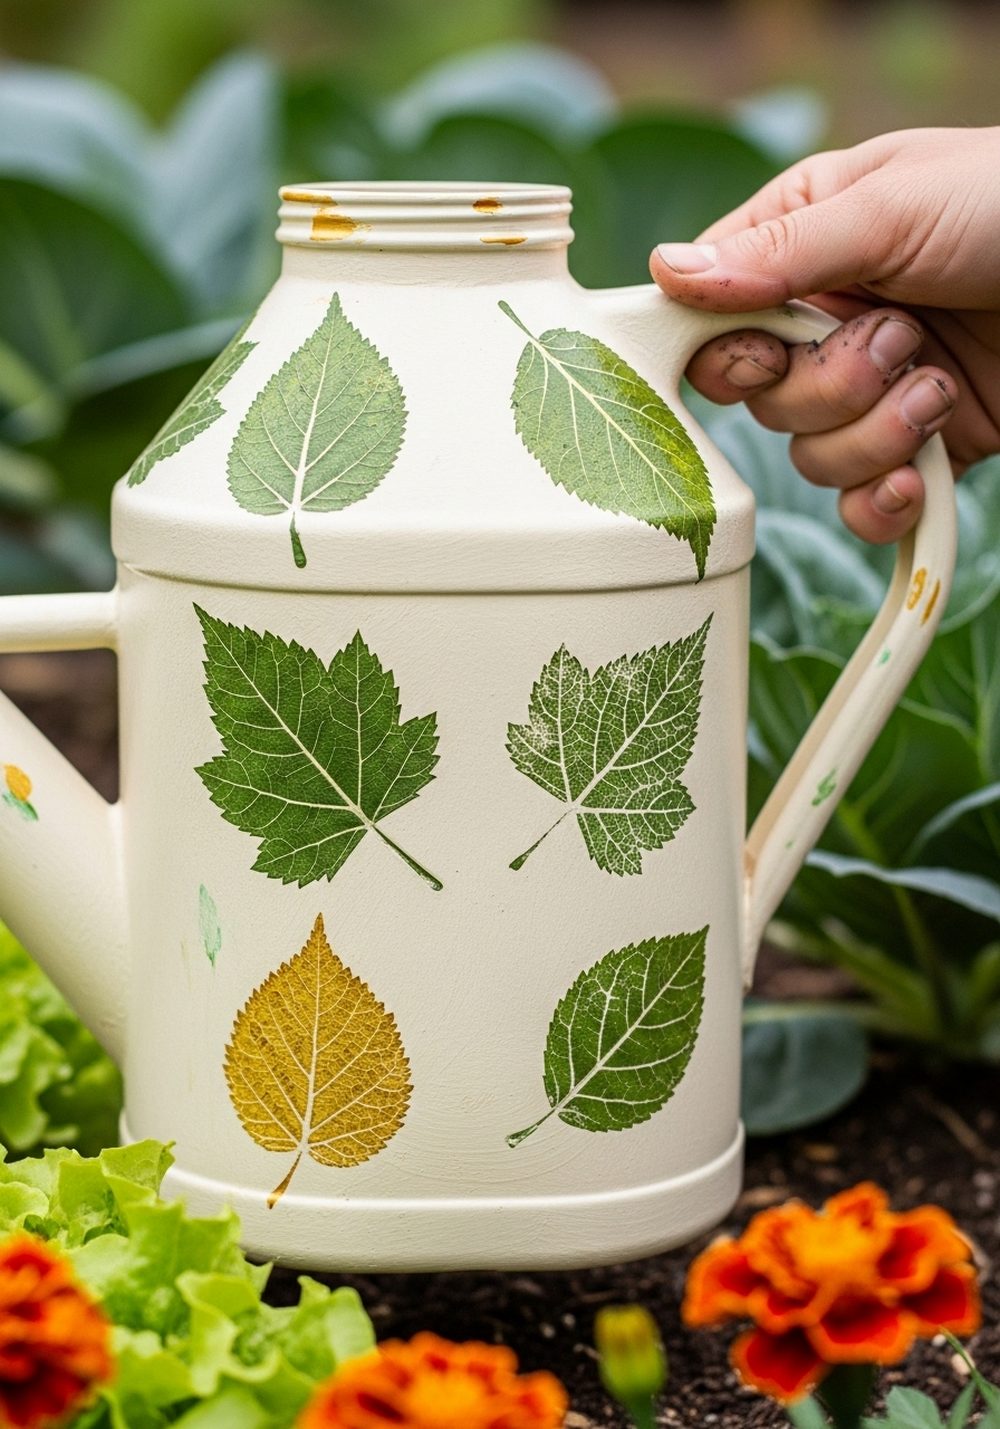
Bring the garden itself into the design by stamping real leaves onto your milk jug. Paint the jug a light base color, collect fresh leaves with clear vein patterns, and brush them with acrylic paint. Press firmly onto the jug to transfer the pattern. Repeat with different leaves and colors—greens, soft browns, even gold for an autumn feel. The finished watering can echoes the shapes of the plants you’re tending.
- Best For: Nature lovers, woodland corners, and veg patches.
- Budget Tip: Use leaves and paints you already have; no special tools needed.
- Styling Idea: Choose one seasonal palette—spring greens, autumn bronzes—for a cohesive mood.
- Practical Note: Test each leaf stamp on scrap paper before committing to the jug.
- Care & Maintenance: Seal with outdoor varnish to keep the prints crisp and rain-resistant.
7. Boho Patterned Milk Jug With Beads and Charms
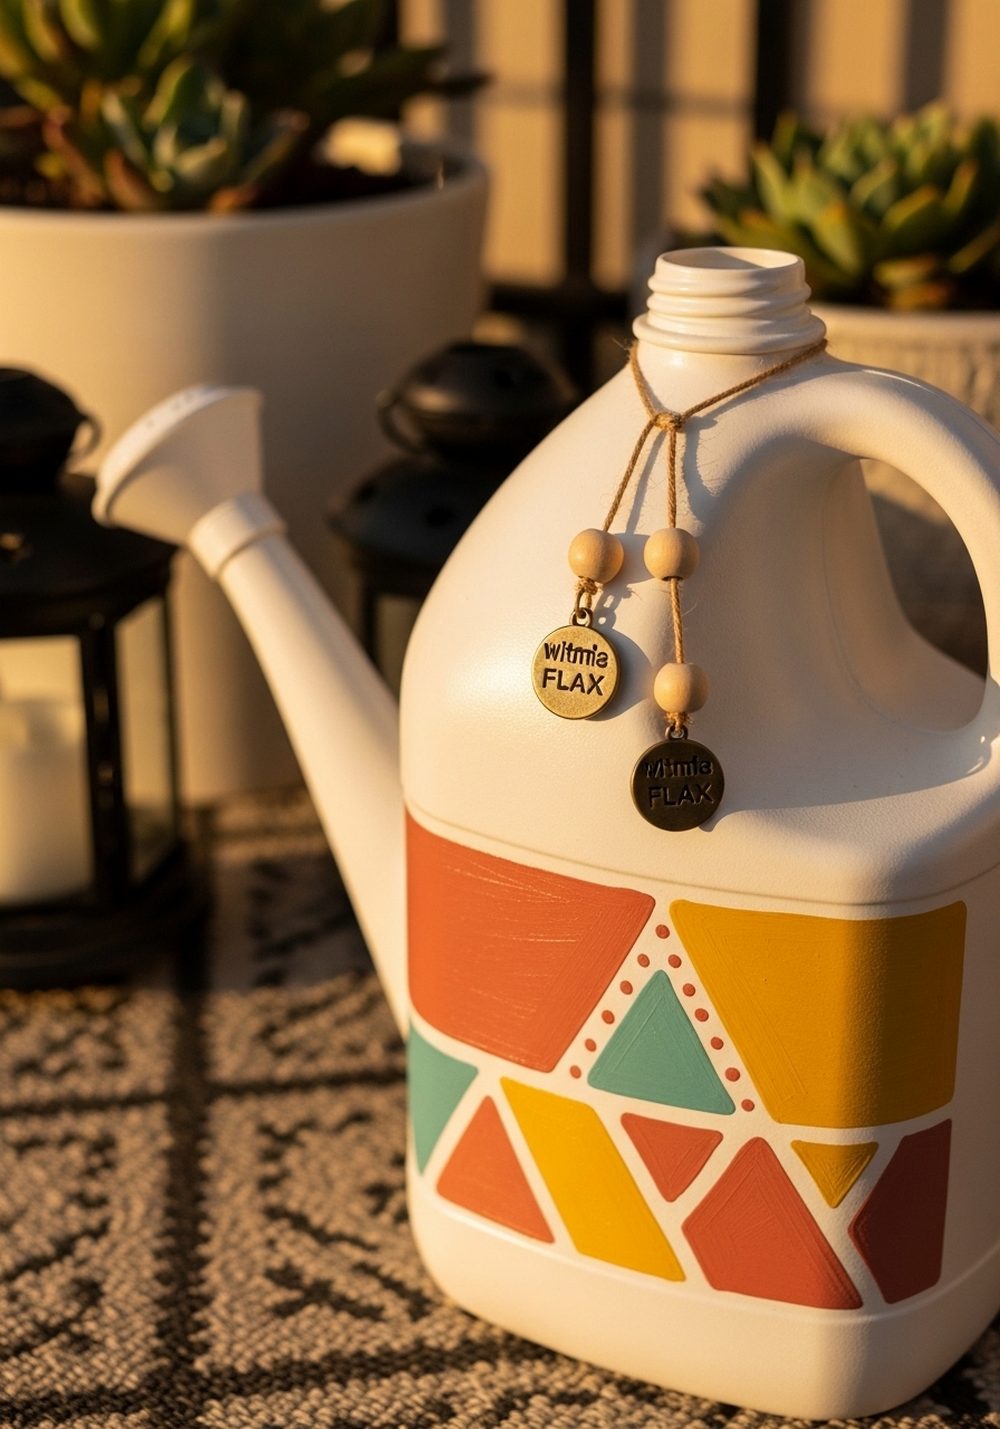
Give your milk jug watering can a boho twist with patterns and dangling details. Paint the jug in a warm neutral, then add stripes, triangles, or dots in earthy colors like terracotta, mustard, and teal. Tie thin twine around the neck and thread on wooden beads and tiny metal charms or shells so they jingle gently as you water. It looks lovely alongside patterned outdoor rugs, lanterns, and potted succulents.
- Best For: Relaxed, boho-style decks, small patios, and cozy seating corners.
- Budget Tip: Reuse beads from old jewelry and scraps of twine from other projects.
- Styling Idea: Repeat one of the jug’s colors in your cushions or plant pots.
- Practical Note: Keep beads short enough that they don’t swing into the water stream.
- Care & Maintenance: Store indoors in very wet weather to protect the beads and twine.
8. Kids’ Handprint Art Milk Jug Watering Can
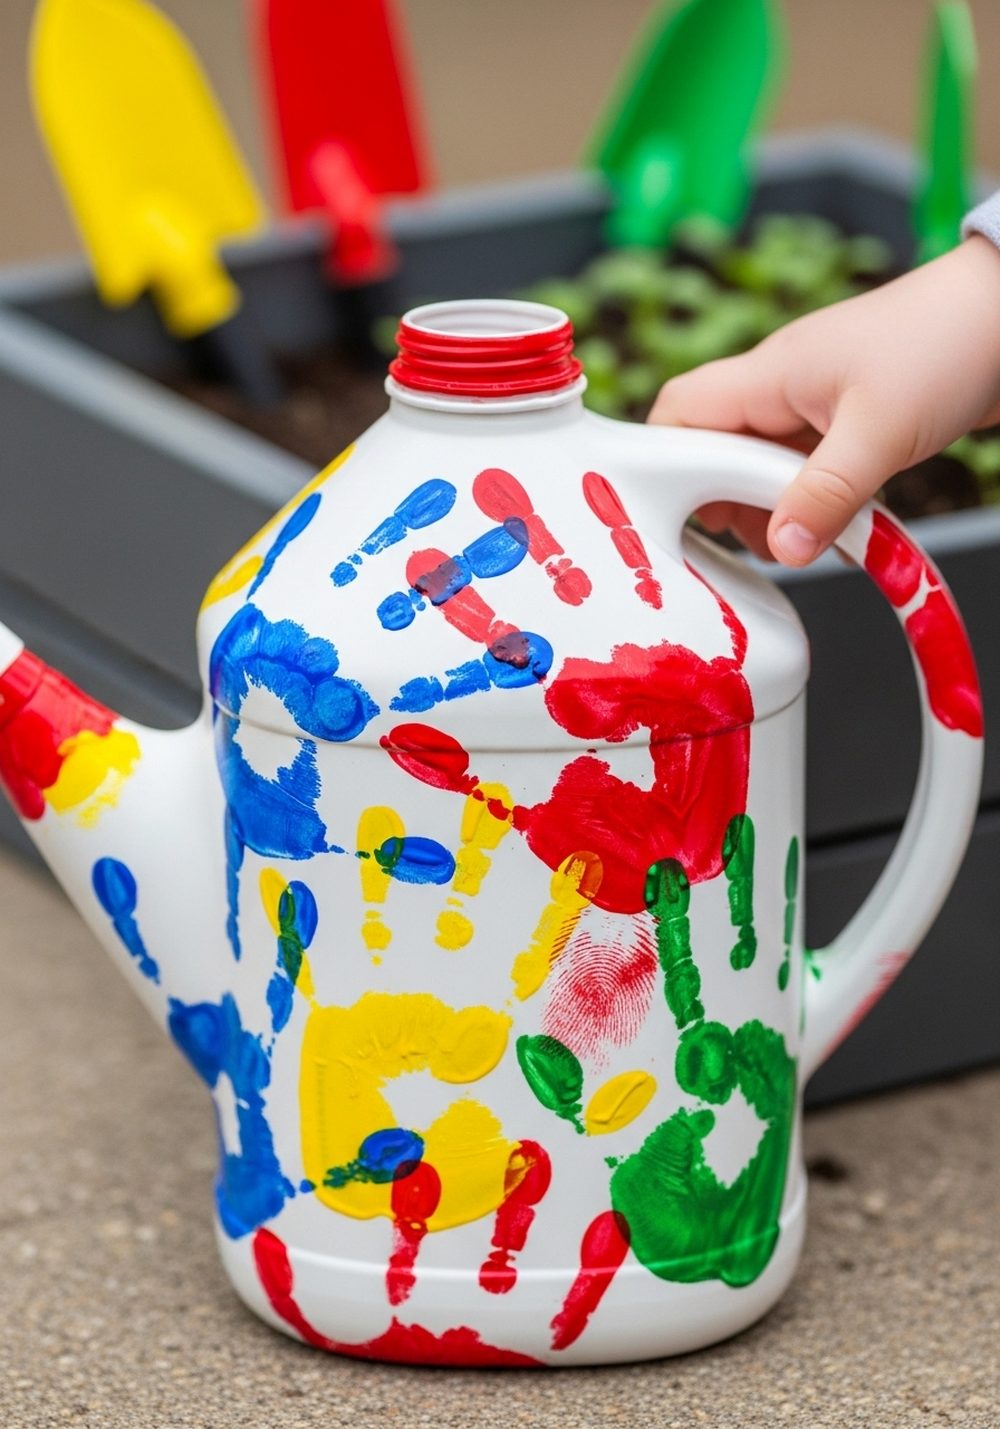
Turn watering the garden into a family tradition with a kids’ handprint watering can. Paint the jug a bright base color or leave it white, then let children press their painted hands around the sides. Add their names and the year in small letters near the bottom. This becomes a lovely memory piece that kids are proud to use, and it adds a splash of cheerful color to your garden corner or potting table.
- Best For: Family gardens, school plots, and children’s raised beds.
- Budget Tip: Use washable craft paints you already keep for kids’ projects.
- Styling Idea: Keep the rest of the area simple so the colorful handprints stand out.
- Practical Note: Supervise paint use and be sure the jug is fully dry before watering.
- Care & Maintenance: Seal with a clear non-toxic varnish once the paint is completely dry.
9. Metallic Ombre Milk Jug Watering Can
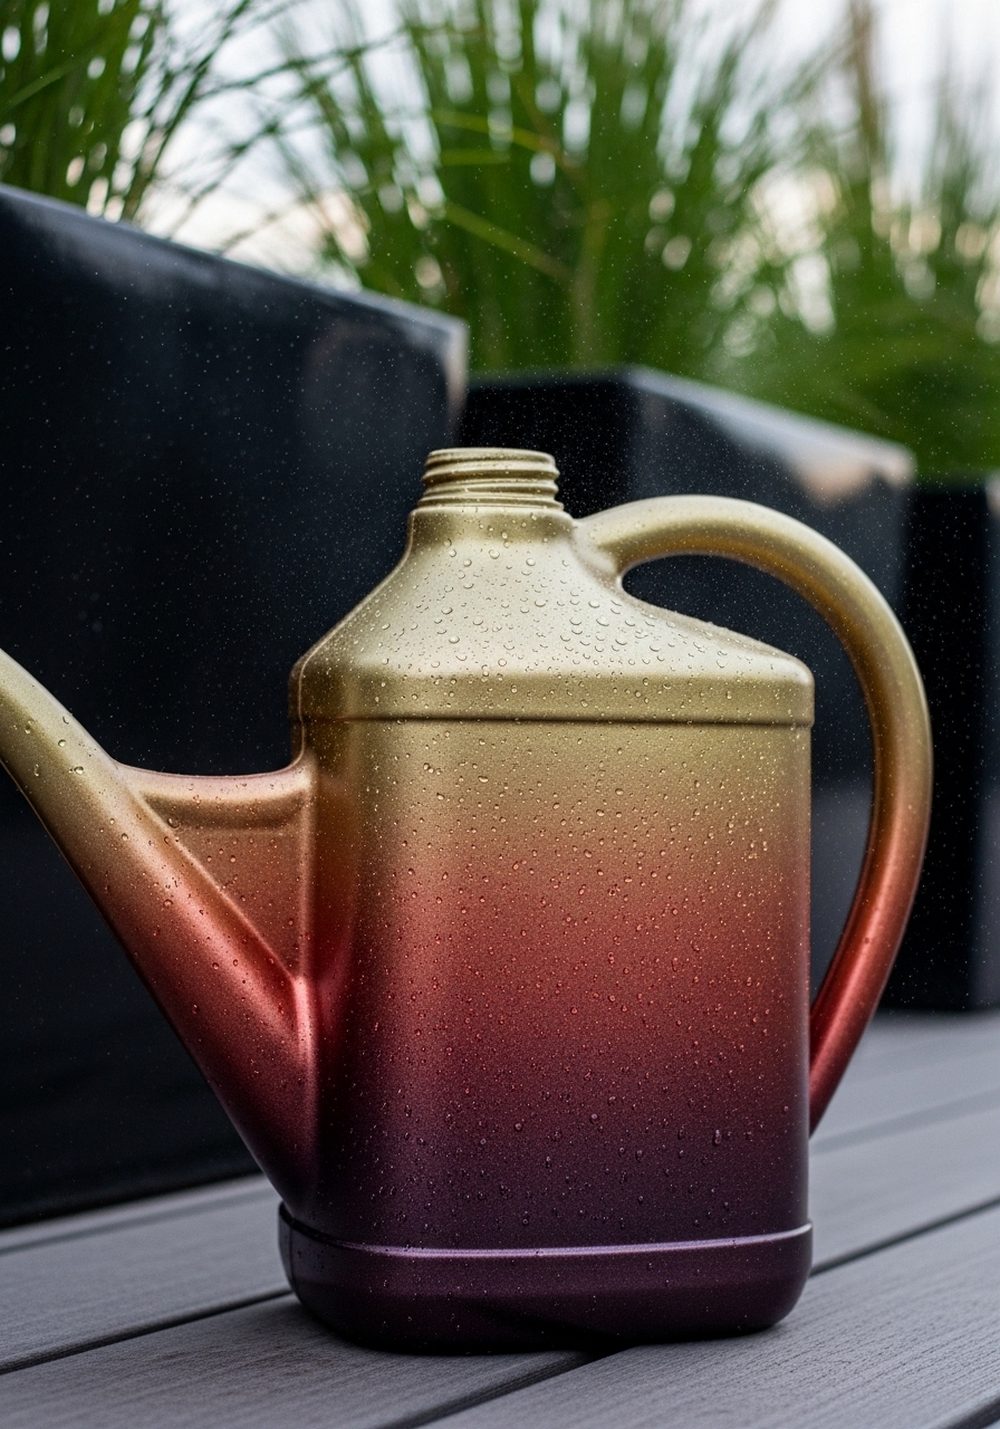
For a more modern look, try a metallic ombre effect. Spray the bottom of the jug with a deep bronze, then layer copper in the middle and gold at the top, blending where they meet. The gradient looks sophisticated and catches the light beautifully. This style works especially well in contemporary gardens with clean lines, dark planters, and ornamental grasses, adding just enough shine without feeling fussy.
- Best For: Modern decks, balcony gardens, and sleek outdoor spaces.
- Budget Tip: Use small cans of spray paint and keep them for other metallic projects.
- Styling Idea: Pair with black, grey, or white pots to let the metallic shine be the star.
- Practical Note: Spray in light coats outdoors and protect the handle area so it’s not too slippery.
- Care & Maintenance: Avoid leaving it in intense sun all day to reduce fading over time.
10. Seasonal Ribbon and Tag Milk Jug Watering Can
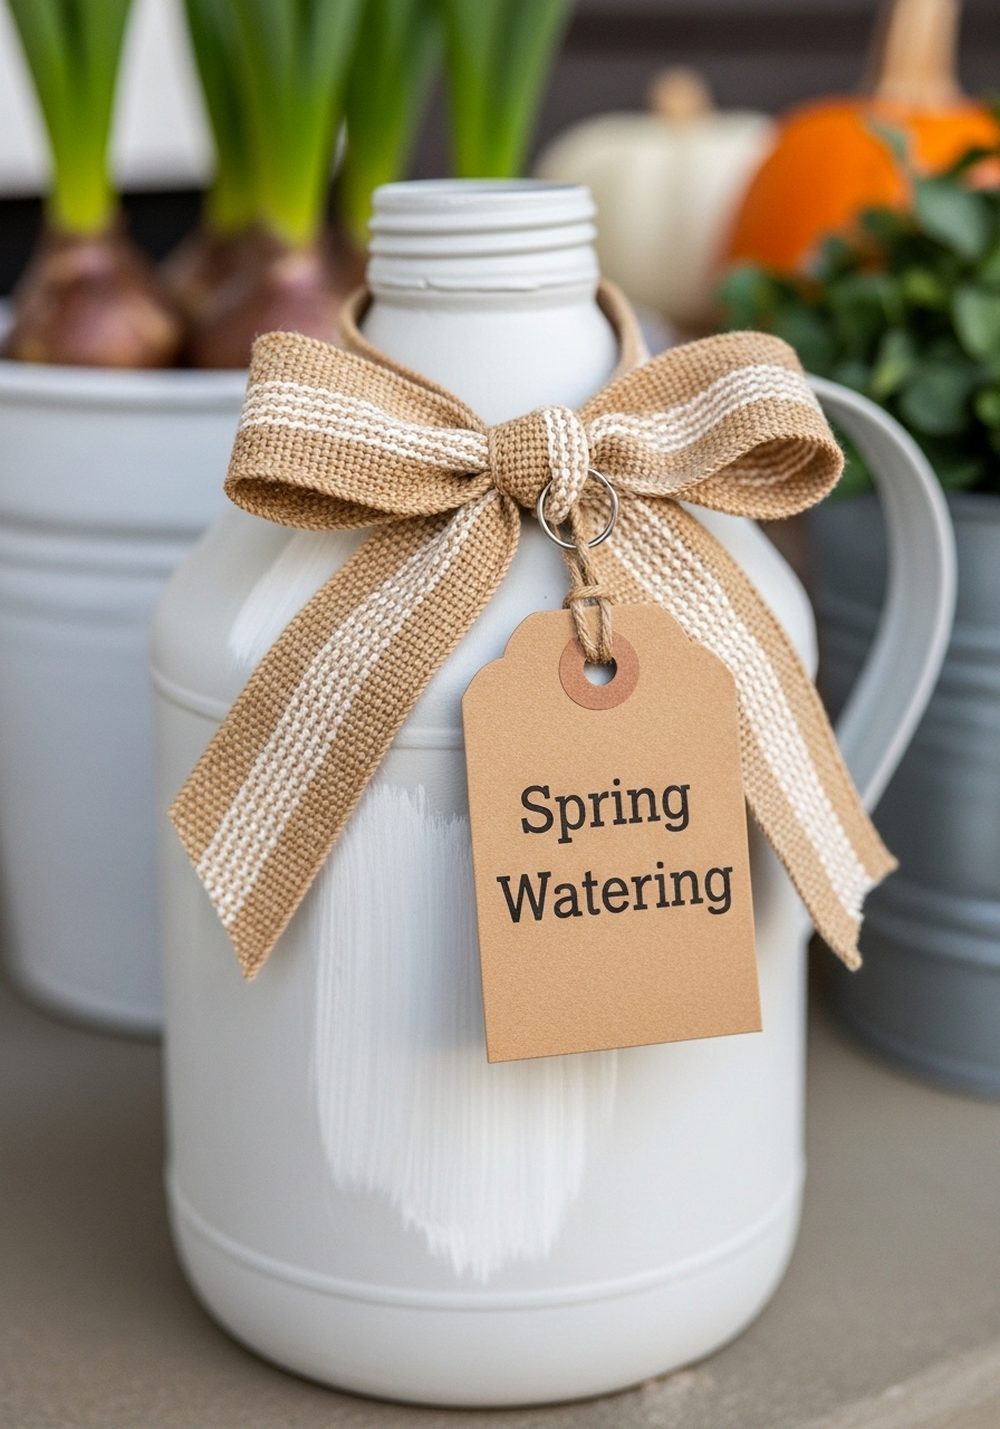
One simple base jug can feel new every season with interchangeable ribbons and tags. Paint the jug a neutral color like off-white or soft grey and seal it. Then keep a little stash of ribbons and tags: pastel for spring, bright for summer, rustic burlap for autumn, and red or plaid for winter. Tie the chosen ribbon around the neck and add a kraft tag with a seasonal message—“Spring Watering,” “Summer Blooms,” and so on.
- Best For: Front porches, entryways, and gardeners who like to decorate seasonally.
- Budget Tip: Save ribbon from gifts and reuse old tags rather than buying new ones.
- Styling Idea: Match each ribbon to a seasonal wreath or doormat for a coordinated look.
- Practical Note: Remove paper tags before watering to keep them from getting soggy.
- Care & Maintenance: Store ribbons and tags indoors in a box so they stay neat and dry.
Conclusion
Decorated milk jug watering cans prove that even the most ordinary containers can become charming garden accents with a little creativity. Whether you love vintage florals, rustic textures, or bold kid-made color, there’s an idea here that fits your style and space. Start by transforming just one empty jug, then slowly build a small collection that tells your garden’s story. Each time you water, you’ll enjoy not just healthier plants but a more personal, welcoming outdoor space.
FAQs
Q1. How can I decorate a milk jug watering can on a very small budget?
You can keep it simple with just one or two supplies. A single color of acrylic paint, some twine, or a sheet of stickers can transform a jug quickly. Focus on cleaning and prepping the jug well, then add one clear design feature—like a band of color, a chalkboard label, or a twine-wrapped handle—rather than buying lots of extras.
Q2. Are these decorated milk jug watering cans suitable for renters?
Yes, they’re perfect for renters because they’re lightweight, portable, and non-permanent. You can use them on balconies, patios, or shared spaces without installing anything. When you move, simply pack them along with your pots and tools. If a design gets damaged, you can easily repaint or make a new one from the next empty jug.
Q3. Will paint and decorations hold up outdoors in different weather?
Most designs last well if you use outdoor-safe acrylics or spray paints and finish with a clear sealer. To keep them looking fresh, store your decorated jugs under cover when not in use, especially during heavy rain or strong sun. Twine, ribbons, and paper tags will last longer if you bring them inside between waterings.
Q4. What’s the easiest design for complete beginners?
The chalkboard label jug and the kids’ handprint jug are both very forgiving. You’re essentially painting one solid base section and then adding simple details, so small mistakes won’t show. Stickers or decals over a single-color base are also beginner-friendly and give a polished look with very little effort.
Q5. Can I still use these milk jugs as regular watering cans without damaging the decor?
Absolutely. Just be gentle with how you handle and clean them. Avoid scrubbing painted or decorated areas with rough sponges, and don’t leave them soaking in water. If you’re worried about wear, keep one “fancy” jug mainly for display and light watering, and another more basic one for heavier, muddy jobs.
Q6. Are decorated milk jugs safe to use around edible plants?
As long as the jug is thoroughly cleaned and you use non-toxic, water-based paints and sealers on the outside, it’s safe for watering herbs and vegetables. Avoid decorating the inside of the jug or the spout where water flows. Keep all paints and glues on the outer surfaces so they don’t come into contact with the water you’re feeding your plants.


