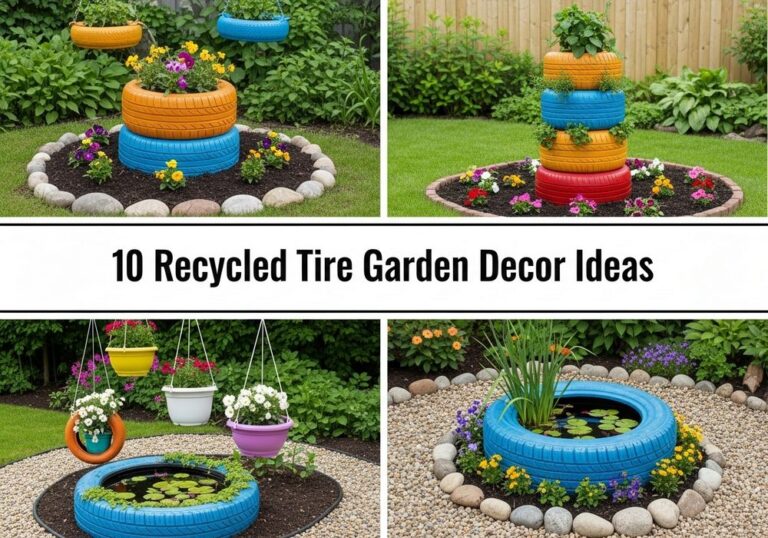
10 Bottle Cap Mosaic Garden Path Ideas That Look Surprisingly Expensive
If you’ve been saving bottle caps “for a project one day,” this is exactly the project. A bottle cap mosaic garden path is one of those clever DIYs that looks like custom designer work but can be made on a very normal budget. With the right colors, layout, and edging, those little plastic or metal circles suddenly feel like tiny luxury tiles underfoot.
In this post, you’ll find ten stylish bottle cap path ideas, from rainbow mosaics to chic monochrome patterns. Each idea includes simple guidance, budget tips, and styling suggestions so you can transform bare soil, worn grass, or dull pavers into a path that looks surprisingly expensive, completely unique, and very you.
Quick List
- Classic Rainbow Bottle Cap Mosaic Path
- Chic Monochrome Bottle Cap Herringbone
- Mediterranean Tile–Inspired Bottle Cap Medallions
- Ocean Wave Bottle Cap Garden Path
- Flower Bloom Bottle Cap Stepping Stones
- Faux Persian Rug Bottle Cap Runner
- Jewel-Toned Bottle Cap Border Inlays
- Rustic Bottle Cap And Gravel Mix Path
- Glow-In-The-Dark Bottle Cap Star Path
- Minimalist Neutral Bottle Cap Grid Path
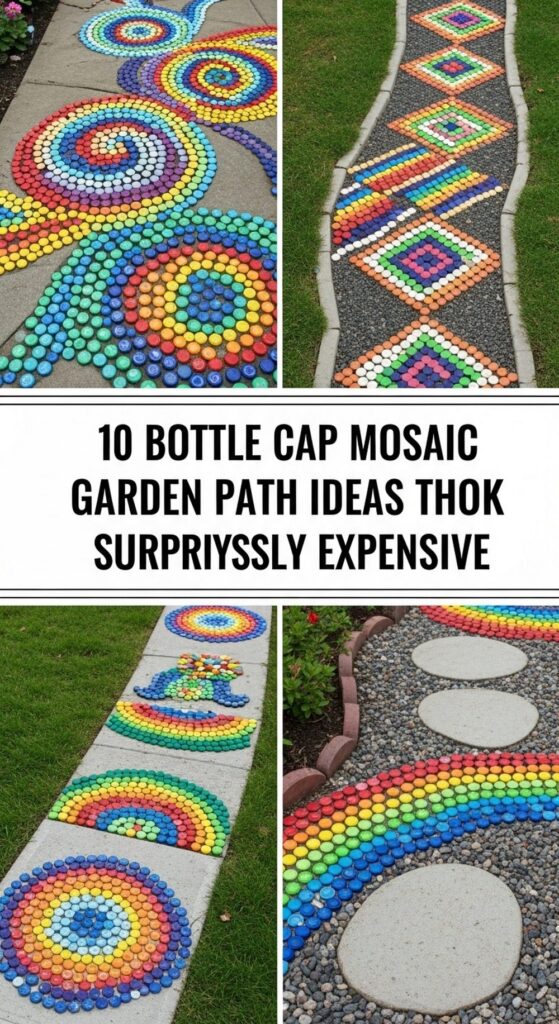
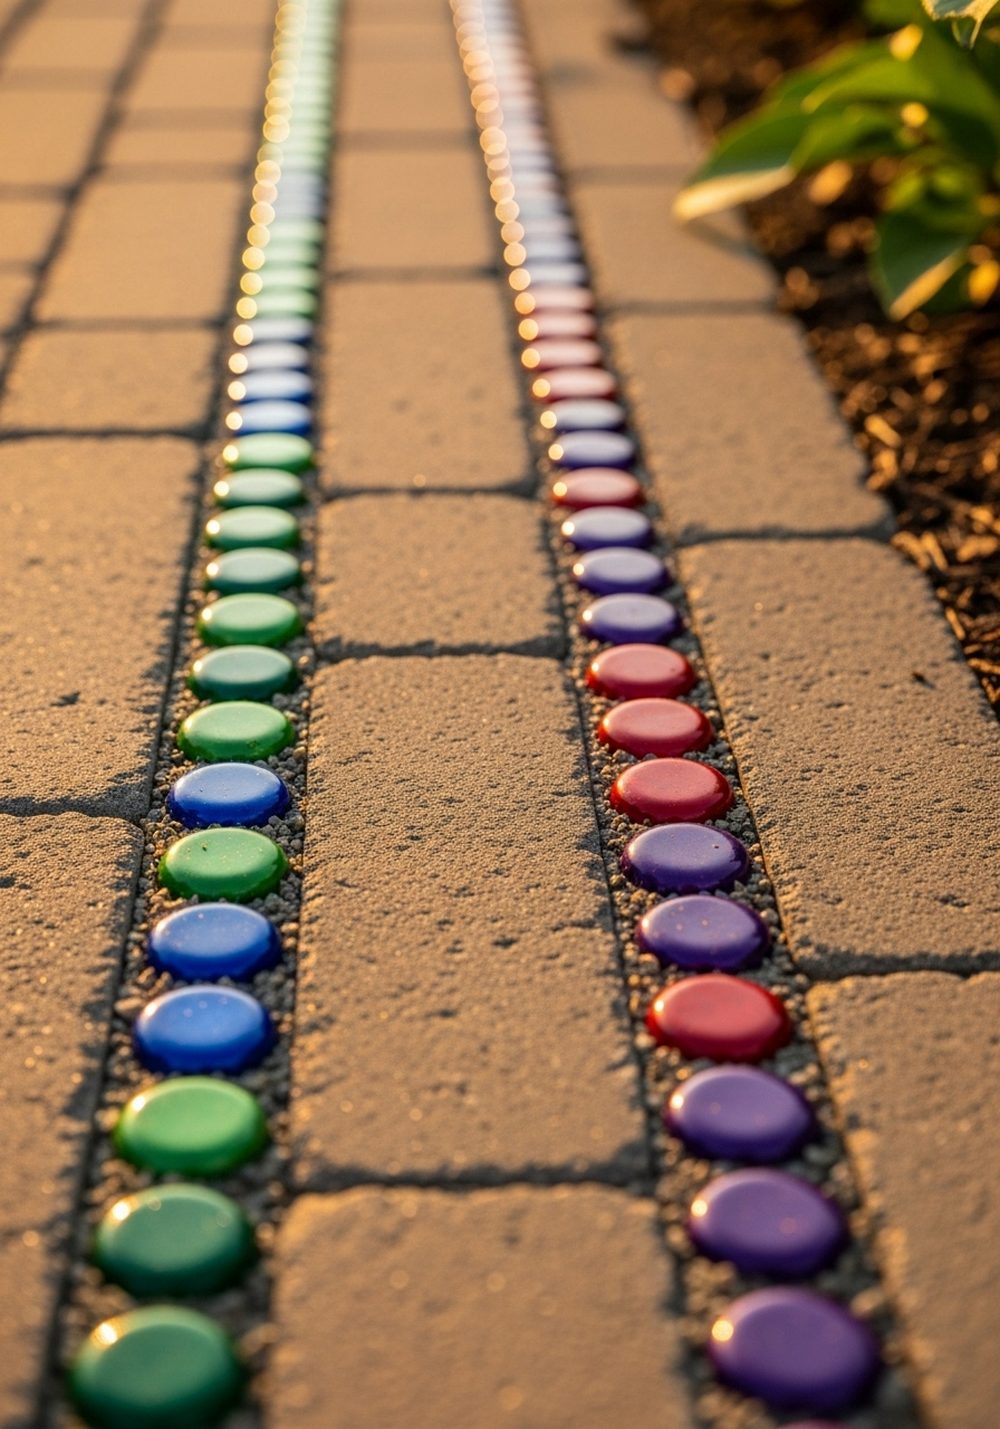
1. Classic Rainbow Bottle Cap Mosaic Path
Turn a simple walkway into a joyful rainbow that looks like artisan tile work. Sort your caps by color, then lay them in bands that softly fade from red through orange, yellow, green, blue, and purple along your path. Set them into a shallow bed of sand or mortar, tamp them flat, and add a neat brick or stone edge. The clean curves and precise color transitions make this path feel surprisingly high-end and custom-made.
- Budget Tip: Collect caps over time, ask friends or local cafes, and build the path in short sections.
- Styling Idea: Pair your rainbow path with mostly green planting for a gallery-like backdrop.
- Practical Note: Keep cap tops level with the surface so the path is safe and easy to walk on.
- Care & Maintenance: Sweep occasionally and rinse with a hose to keep the colors bright.
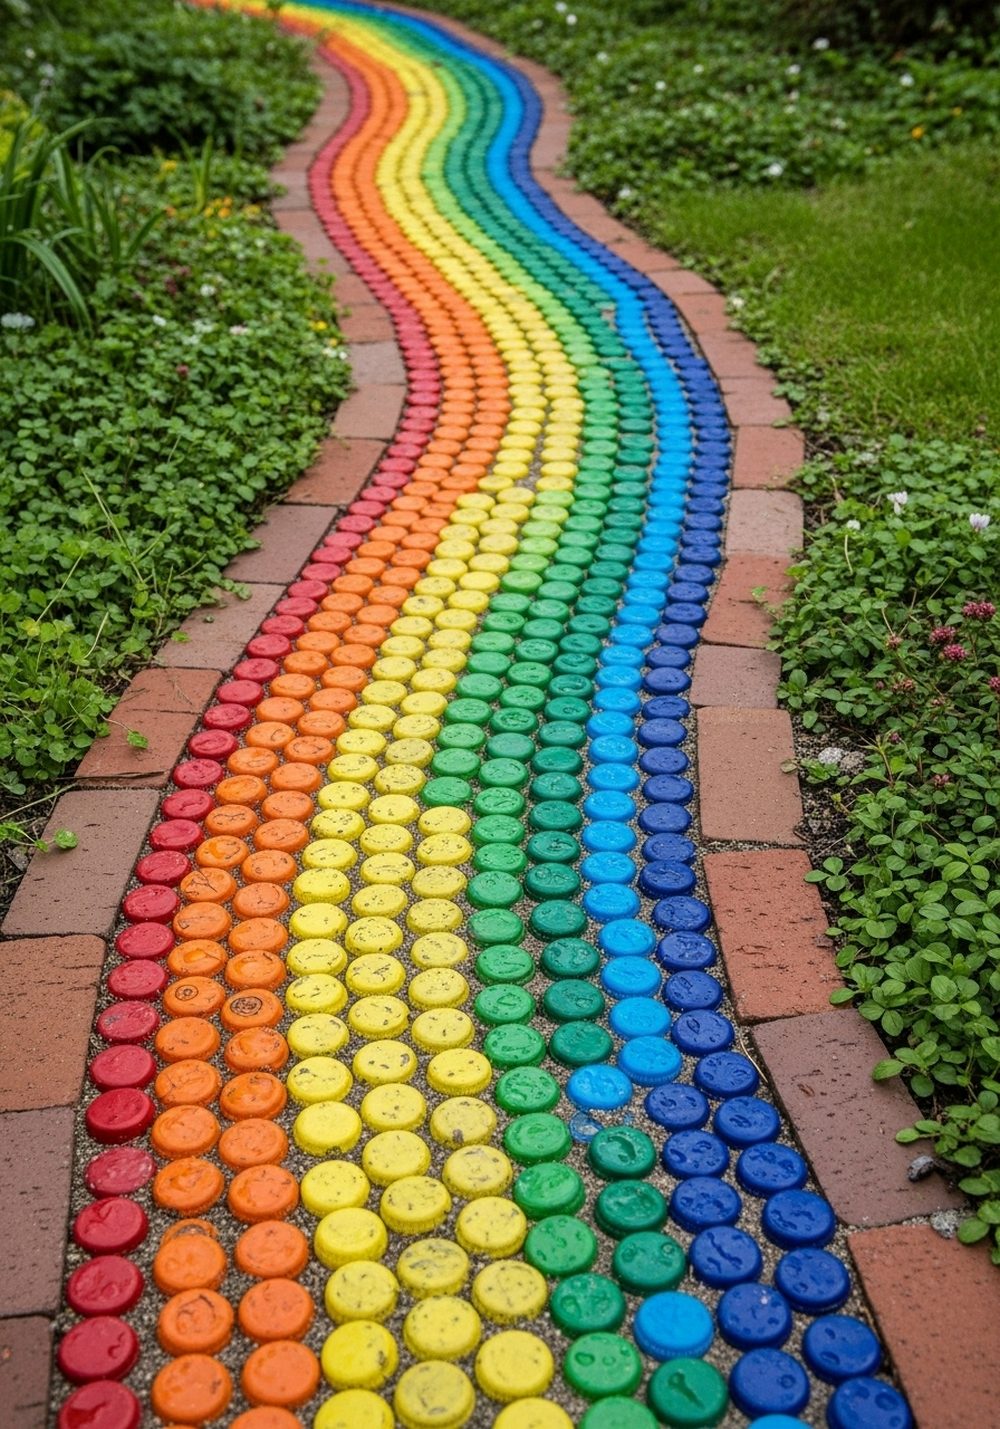
2. Chic Monochrome Bottle Cap Herringbone
If you love a modern, designer look, go monochrome. Choose caps in black, white, grey, and silver, then lay them in a crisp herringbone pattern inside a framed path of pavers or timber. The zigzag design immediately feels like a high-end floor, especially when surrounded by neat gravel or straight planting lines. Keeping the colors limited makes it hard to tell that the “tiles” are actually recycled caps.
- Best For: Contemporary gardens, side paths, and small courtyards.
- Budget Tip: Repaint mismatched caps with outdoor spray paint in just one or two tones.
- Styling Idea: Add black metal lanterns or planters to echo the graphic look.
- Practical Note: Use a straight board as a guide to keep your herringbone rows aligned.
3. Mediterranean Tile–Inspired Bottle Cap Medallions

Create small, round mosaic “tiles” along your path that look like expensive Mediterranean insets. Use caps in cobalt blue, terracotta, mustard, and white to form repeating circular motifs. Set each medallion into pale gravel, stepping stones, or a compacted sand path so they stand out like jewelry. Repeating the same pattern every metre or so keeps the look cohesive and stylish, not busy.
- Best For: Garden entrances, patio edges, and sunny courtyards.
- Budget Tip: Focus caps only in the medallions and keep the rest of the path simple gravel.
- Styling Idea: Echo the colors with terracotta pots, blue-glazed planters, or a tiled bistro table.
- Care & Maintenance: Refresh any faded caps with a quick coat of outdoor paint every few years.
4. Ocean Wave Bottle Cap Garden Path

For a calming, spa-like feel, design your bottle cap mosaic as flowing ocean waves. Collect caps in blues, greens, and white, and arrange them in wavy stripes that curl down the path. The gentle movement of the pattern makes the walkway feel like a resort feature rather than a DIY project. Surround it with grasses, hostas, or succulents to complete the coastal mood.
- Best For: Garden paths that curve naturally and shady areas needing a bright focal point.
- Budget Tip: Limit your palette to three main colors so you can reuse many common cap shades.
- Styling Idea: Add driftwood, white pebbles, or rope accents to lean into the seaside feel.
- Practical Note: Plan the wave shapes on paper or with chalk before setting caps permanently.
5. Flower Bloom Bottle Cap Stepping Stones

Instead of one continuous mosaic, create stepping stones that each hold a bottle cap flower design. Fill shallow concrete molds or pavers with caps laid out as petals, centers, and leaves in soft pastels or bold brights. Place the finished stones through grass, thyme, or mulch for a playful yet polished path. Because each circle looks like its own piece of art, the overall design feels handcrafted and special.
- Best For: Informal lawns, children’s play areas, and cottage-style gardens.
- Budget Tip: Make a few stones at a time as you collect enough caps.
- Styling Idea: Choose one color family (like pinks and corals) to keep the blooms coordinated.
- Practical Note: Ensure the stone tops sit just above the soil so they don’t disappear under growth.
6. Faux Persian Rug Bottle Cap Runner

This is the showstopper: a bottle cap “rug” that runs along your garden or patio like a luxury hall runner. Use rich reds, navy, cream, and gold caps to copy the layout of a traditional Persian rug: a central motif, repeating borders, and small detailing. Set the caps into mortar or concrete so the surface is firm and long-lasting. The detailed pattern absolutely disguises the humble materials.
- Best For: Main garden walkways, patio entrances, and spaces you want to wow guests.
- Budget Tip: Keep the path narrow to reduce the number of caps and materials needed.
- Styling Idea: Pair with classic wooden furniture, lanterns, and lush potted plants for a cozy “outdoor living room.”
- Care & Maintenance: Seal the finished surface to protect colors and make cleaning easier.
7. Jewel-Toned Bottle Cap Border Inlays
If committing to a full mosaic feels like too much, dress up an existing path with bottle cap borders. Lay caps in jewel tones—emerald, sapphire, ruby, amethyst—into slim channels along the edges of your pavers or concrete. The result is like inlaid glass or tile trim, which instantly elevates a plain path. Because the caps are tightly packed and framed, the look reads as intentional and expensive.
- Best For: Straight paths, driveway edges, and patio outlines.
- Budget Tip: Only decorate the borders and leave the center plain stone or gravel.
- Styling Idea: Repeat the jewel tones in cushions, plant pots, or a painted garden bench.
- Practical Note: Use a narrow trowel to press caps firmly into mortar so they stay flush and secure.
8. Rustic Bottle Cap And Gravel Mix Path
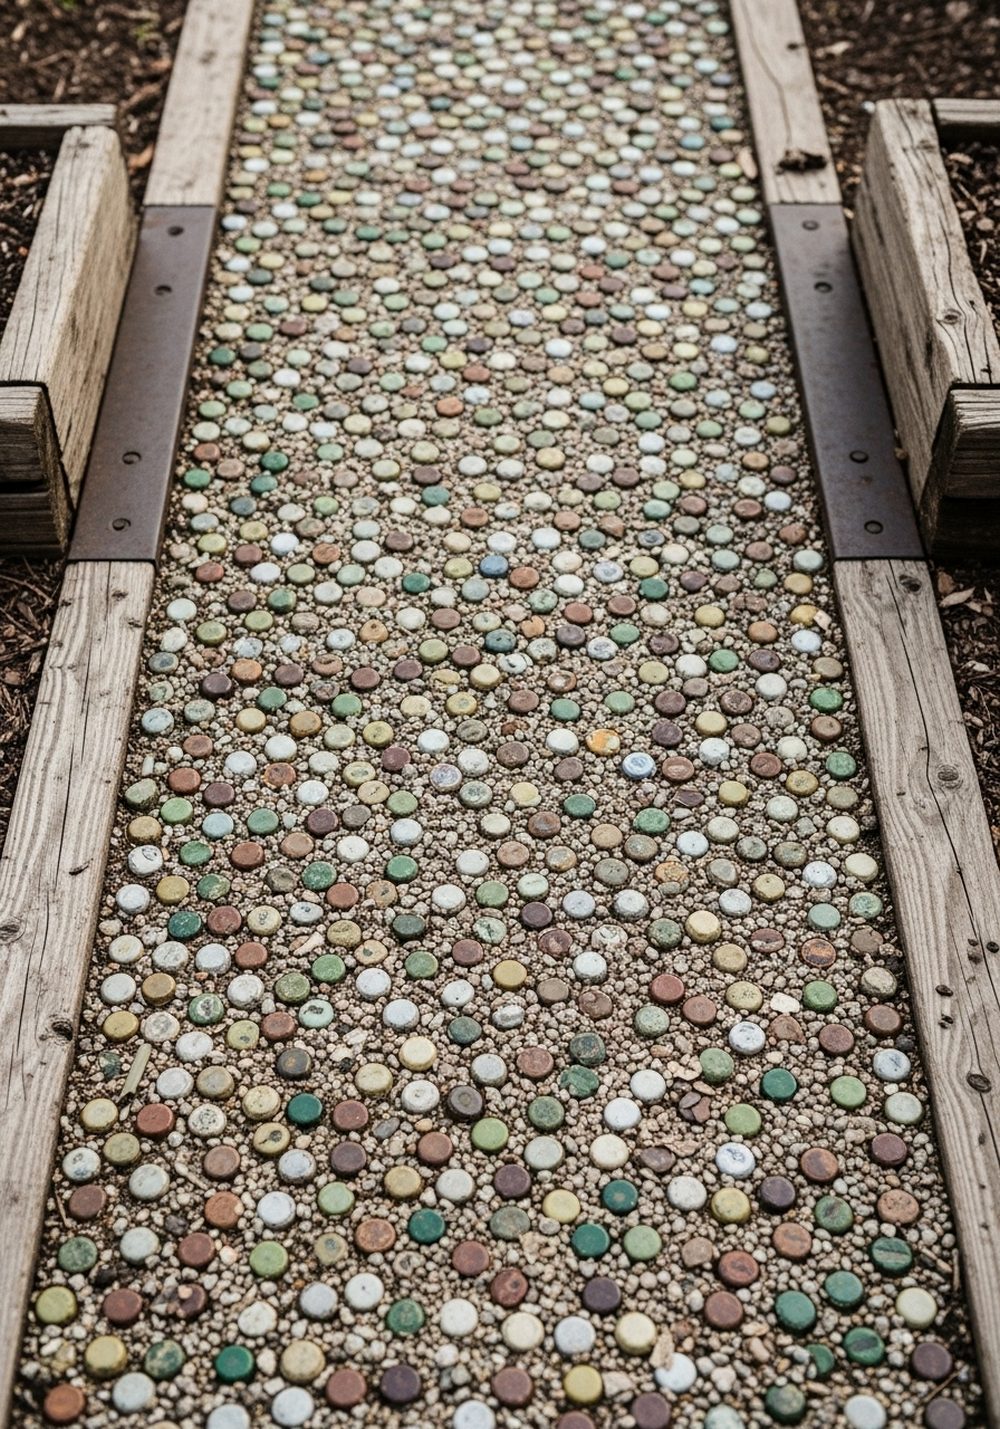
For a more subtle look, mix bottle caps straight into a gravel path so they appear like tiny, colorful pebbles. Stick to a muted palette—greens, browns, creams, and rusts—so the path resembles a boutique terrazzo surface rather than a kid’s craft. The blend of textures feels natural and rustic but still surprisingly refined, especially when framed with timber sleepers or rough stone.
- Best For: Cottage gardens, vegetable garden paths, and informal backyard walkways.
- Budget Tip: Use mostly gravel and just enough caps to add interest and color.
- Styling Idea: Combine with wooden raised beds, galvanized watering cans, and simple wire arches.
- Care & Maintenance: Rake occasionally to redistribute gravel and keep caps visible and level.
9. Glow-In-The-Dark Bottle Cap Star Path

Turn your night-time garden into something magical by arranging bottle caps as stars and simple constellations. Paint selected caps with glow-in-the-dark outdoor paint and set them into dark gravel or concrete stepping stones. By day, your path looks tidy and graphic; by dusk, soft glowing shapes appear underfoot. Add a few low solar lights to amplify the effect without losing the subtlety.
- Best For: Evening gardens, side paths, and spaces used for outdoor dinners.
- Budget Tip: Use glow paint only on certain “stars” and leave the rest plain.
- Styling Idea: Pair with string lights overhead and soft planting to create a fairy-tale mood.
- Practical Note: Test your glow caps in the dark before fixing them permanently to check brightness and spacing.
10. Minimalist Neutral Bottle Cap Grid Path

For a calm, expensive-looking finish, create a strict grid of bottle caps in neutral tones. Choose whites, beiges, greys, and soft taupes, then set them in neat rows inside rectangular path sections framed by pavers or timber. The even spacing and tight palette make the path look like designer mosaic tile. Combined with clean-edged beds and simple plants, it feels more architectural than crafty.
- Best For: Modern gardens, courtyards, and narrow side walkways.
- Budget Tip: Spray mismatched caps with one or two neutral colors to unify them.
- Styling Idea: Add square planters, straight hedges, and simple outdoor furniture to echo the geometry.
- Care & Maintenance: Brush sand or fine gravel into gaps to keep caps stable and the grid lines crisp.
Conclusion
A bottle cap mosaic garden path is a clever way to turn everyday leftovers into something that looks delightfully high-end. With the right color choices, patterns, and edging, these ten ideas can transform bare ground or plain pavers into a standout feature that leads guests through your garden in style. Start with a small border, stepping stone, or short section of path, build your confidence, and let your imagination (and your cap collection) grow from there.
FAQs
Q1. Can I make a bottle cap mosaic path on a very small budget?
Yes. Begin with a small section, like a border or just a few stepping stones, rather than a full path. Collect caps from your own kitchen, friends, and local cafés, and use affordable materials like sand, compacted soil, or budget pavers as the base. You can always extend the design later as you gather more caps and supplies.
Q2. Is a bottle cap path suitable for renters who need non-permanent decor?
It can be. Instead of fixing caps into concrete, create removable stepping stones or trays filled with bottle cap mosaics that simply sit on top of gravel or soil. When you move, you can lift and take them with you. Just make sure the pieces are heavy and flat enough that they don’t wobble underfoot.
Q3. Will a bottle cap path hold up in bad weather?
A well-made path can be surprisingly durable. Use an outdoor-appropriate base (like compacted sand, mortar, or concrete), seat caps firmly, and, if desired, seal the surface to protect colors and keep water out of gaps. In very hot or harsh climates, choose caps and paints that are UV-resistant and expect some gentle fading over time, which often adds character.
Q4. Are bottle cap mosaics safe to walk on?
They can be safe as long as the caps are firmly embedded and sit level with the path surface. Avoid sharp metal edges, fill gaps well, and test the path with flat shoes before regular use. For areas used by children or older family members, keep designs fairly smooth and avoid steep slopes or loose caps.
Q5. What’s the easiest bottle cap path idea for beginners?
Stepping stones and simple borders are the most forgiving. You can work on one stone or small strip at a time, practice your patterns, and adjust as you go. If something doesn’t look right, it’s easy to remake a single piece instead of redoing a whole path. Once you’re comfortable, you can move on to larger mosaics like rugs or waves.
Q6. How do I keep the design looking stylish rather than messy?
Limit your color palette, repeat shapes or patterns along the path, and frame your mosaic with neat edging like bricks or timber. Keeping plants well-trimmed along the sides and sweeping the surface regularly also helps. Most importantly, treat the caps as if they were tiny tiles—plan your layout first, then place them carefully for a polished, expensive-looking finish.