10 Fun Painted Flower Pot Ideas For Any Style Garden
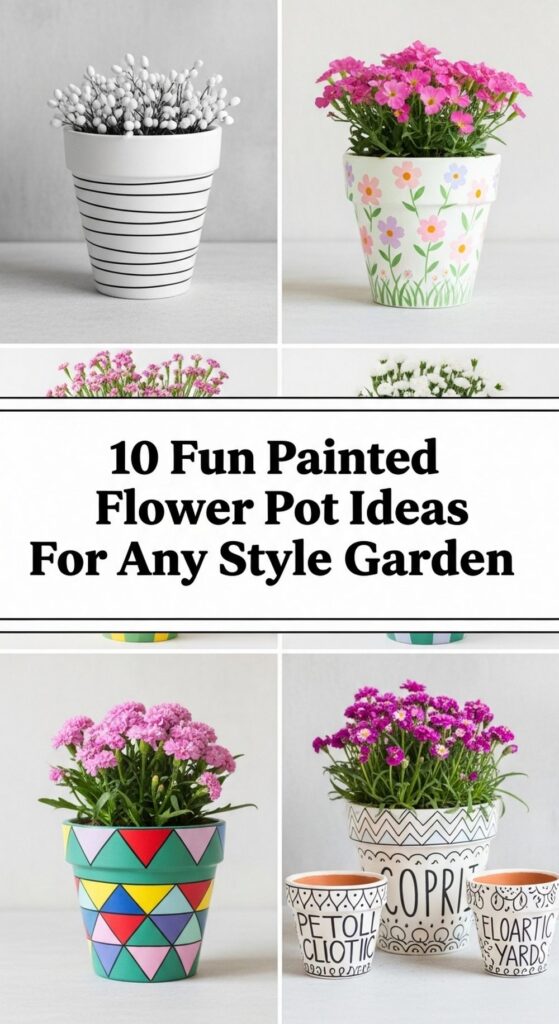
If your garden is feeling a little plain but you don’t want to buy a ton of new furniture or decor, painted flower pots are a perfect place to start. With just a few basic supplies and some imagination, you can turn simple terracotta or plastic pots into little works of art.
Whether you’re a home gardener, balcony plant lover, renter, or complete beginner, these ideas will help you match any vibe: modern, rustic, boho, playful, or minimalist. You’ll find easy projects you can finish in an afternoon, along with budget-friendly tips to stretch your paint and supplies. Pick one or two styles, grab a brush, and get ready to give your plants a seriously stylish new home.
Quick List
- Bold Color Block Pots
- Black & White Patterned Pots
- Ombre Gradient Planters
- Hand-Painted Wildflower Pots
- Terracotta Rainbow Dipped Pots
- Chalkboard Label Herb Pots
- Mediterranean Tile-Inspired Pots
- Minimalist Monochrome Pots
- Galaxy Night Sky Pots
- Kids’ Doodle & Handprint Pots
1. Bold Color Block Pots

Color block pots are an easy way to add instant energy to your garden without needing fancy painting skills. Use masking tape to divide your pot into big sections, then fill each area with a different bold color like mustard, teal, coral, or navy. Once the paint is dry, peel off the tape to reveal crisp lines and a modern, graphic look. These work brilliantly grouped together on steps, shelves, or a balcony ledge, especially with simple green plants that let the colors shine.
- Best For: Modern patios, small balconies, and renters who want strong pops of color.
- Budget Tip: Use tester paint pots or leftover wall paint to keep the cost low.
- Styling Idea: Stick to 3–4 colors that repeat across several pots for a coordinated, designer feel.
- Practical Note: Seal with a clear outdoor sealer if the pots will sit in full sun or rain.
2. Black & White Patterned Pots

Black and white patterned pots are simple to paint but look surprisingly chic. Start with a white-painted pot, then grab a thin brush or paint pen and add easy patterns: dots, stripes, zigzags, tiny crosses, or grids. Mix patterns across a group of pots, keeping the black-and-white palette consistent so everything feels intentional. They look especially striking with lush green foliage, creating a calm yet stylish contrast that works with almost any decor style, from Scandinavian minimalism to eclectic boho.
- Best For: Indoor plant shelves, windowsills, and neutral-toned patios.
- Budget Tip: Use inexpensive white acrylic paint and a single black paint pen for all your designs.
- Styling Idea: Arrange three pots together with different heights for a mini “art gallery” of patterns.
- Care & Maintenance: Wipe gently with a damp cloth; avoid harsh scrubbing on painted lines.
3. Ombre Gradient Planters

Ombre planters give your pots a soft, dreamy look, as if the color is melting from dark to light. Choose one color and blend it from a deeper shade at the base to a pale version near the top. You can do this with a sponge or dry brush, lightly working the paint where two shades meet. Group a few ombre pots in the same color family for a calm, coordinated corner that looks beautiful with flowering plants or trailing greenery.
- Best For: Romantic gardens, cozy patios, and soft, feminine balcony corners.
- Budget Tip: Mix white paint into your chosen color to create lighter shades instead of buying multiple tins.
- Styling Idea: Combine blue ombre pots with white flowers for a fresh, coastal feel.
- Practical Note: Practice blending on a scrap surface first so you get comfortable with the technique.
4. Hand-Painted Wildflower Pots

If you love cottage gardens or whimsical decor, hand-painted wildflower pots are a charming choice. Start with a light-colored base coat, then use small brushes to paint little flowers, leaves, and stems all around the pot. Think daisies, lavender, forget-me-nots, or simple invented flowers. The beauty is in the small details and the slightly imperfect, hand-drawn look. When planted with herbs or real wildflowers, these pots look like miniature meadows wrapped around your plants.
- Best For: Cottage-style gardens, front porches, and giftable plant arrangements.
- Budget Tip: Use a basic brush set and a few key colors; mix shades on a palette to extend them.
- Styling Idea: Keep the background soft (cream or pale blue) so the flowers really stand out.
- Extra Idea: Add a tiny painted bee, butterfly, or ladybird on one side as a sweet little surprise.
5. Terracotta Rainbow Dipped Pots

Rainbow dipped pots give classic terracotta a playful, colorful twist. Leave the top half of each pot natural, then dip or paint the bottom portion in a vibrant shade, letting a crisp line separate the two. Make each pot a different color to create a rainbow row along a windowsill, step, or railing. The warm terracotta on top helps anchor the design, so even bright colors still feel grounded and garden-friendly.
- Best For: Cheerful family gardens, balconies, and kids’ spaces.
- Budget Tip: One small pot of each color goes a long way; share paint with a friend for more variety.
- Styling Idea: Line them up in color order (like a rainbow) for maximum happy impact.
- Practical Note: Let dipped sections dry fully before watering to avoid drips and smudges.
6. Chalkboard Label Herb Pots

Chalkboard label pots are both decorative and incredibly practical, especially for herb lovers. Paint a simple rectangle of chalkboard paint on each pot, or paint the whole pot and leave a small area framed out. Once dry, you can write the herb names in chalk or chalk marker and change them whenever you switch plants. The black panels look sleek against fresh green herbs and make your windowsill or kitchen counter feel like a tiny stylish herb bar.
- Best For: Indoor herb gardens, kitchen windows, and renters who love flexible labels.
- Budget Tip: One small tin of chalkboard paint will cover several pots; use cheap terracotta.
- Styling Idea: Pair with neutral or white pots and wooden trays for a simple, rustic-modern look.
- Care & Maintenance: Wipe off chalk with a damp cloth and let dry before rewriting.
7. Mediterranean Tile-Inspired Pots

Mediterranean tile pots bring a sunny, holiday feel to even the smallest outdoor space. Start with a white or pale blue base, then use a fine brush to paint repeating patterns in deep cobalt, soft turquoise, and warm yellow. Think of the motifs you’d see on old courtyard tiles: little flowers, curls, diamonds, and borders. Group these pots with lavender, olives, or rosemary, and suddenly your patio feels like a tiny corner of a Greek island or Spanish courtyard.
- Best For: Sun-drenched patios, courtyard-style gardens, and balconies with lots of light.
- Budget Tip: Focus on one or two colors if you don’t want to buy many paint shades.
- Styling Idea: Combine with white outdoor cushions and natural woven baskets to complete the Mediterranean look.
- Practical Note: Use an outdoor sealer to help protect intricate designs from fading.
8. Minimalist Monochrome Pots

Minimalist monochrome pots are ideal if you prefer a clean, calm look. Paint each pot in a single neutral shade such as charcoal, soft grey, beige, or white, keeping the finish matte and simple. The focus shifts to the shapes of your plants, so structural foliage like snake plants, rubber plants, and monsteras look particularly striking. A row of monochrome pots instantly tidies up a busy corner and makes your greenery feel intentional and curated.
- Best For: Modern homes, small apartments, and anyone who loves a clutter-free vibe.
- Budget Tip: Choose one versatile neutral paint and use it on multiple pots in different sizes.
- Styling Idea: Mix heights and shapes, but keep the color family consistent for a sleek, gallery-like effect.
- Care & Maintenance: Clean with a soft cloth to avoid shiny patches on the matte finish.
9. Galaxy Night Sky Pots

Galaxy pots are playful and dramatic, perfect if you want your plants to feel a little magical. Start with a dark base coat, then dab on layers of blues, purples, and a touch of pink with a sponge. Flick tiny specks of white paint to create stars, and add a few brighter clusters as “galaxies.” At night, pair them with fairy lights or candles so the metallic or bright areas softly catch the glow. They’re a fun conversation starter in any garden.
- Best For: Evening entertaining spaces, teen-friendly gardens, and quirky balcony corners.
- Budget Tip: Use metallic paints sparingly as accents so a small pot lasts for many designs.
- Styling Idea: Pair with white or pale flowering plants to mimic stars against a night sky.
- Extra Idea: Add a thin band of glow-in-the-dark paint to make the stars shine after sunset.
10. Kids’ Doodle & Handprint Pots

Kids’ doodle and handprint pots bring personality and memories into your garden. Paint the pots a light base color, then let children add handprints, smudges, doodles, and simple shapes using bright, washable paints. The results are imperfect, joyful, and completely unique. Plant easy, sturdy flowers or herbs inside and display them somewhere prominent, so kids can see their art growing along with their plants. These make lovely keepsakes and gifts for grandparents too.
- Best For: Family gardens, school or community projects, and sentimental gifts.
- Budget Tip: Use basic washable craft paints; protect the finished design with a clear, non-toxic sealer.
- Styling Idea: Group several kids’ pots together for a playful, rainbow-colored corner.
- Practical Note: Choose hardy plants that can handle a bit of extra “help” from little hands.
Conclusion
With just a few pots, some paint, and a little spare time, you can completely change the personality of your garden, balcony, or windowsill. These painted flower pot ideas work for every style, from bold and modern to soft and whimsical, and most can be done on a very small budget. Start with one style that speaks to you, experiment on a single pot, and watch your outdoor space slowly turn into a colorful, creative reflection of you.
FAQs
1. Do I need special paint for flower pots?
For the best results, use acrylic or masonry paint that’s suitable for outdoor use. On terracotta or concrete pots, a primer helps the color stick better and last longer. If your pots will live outside in sun and rain, finish with a clear outdoor sealer to protect your designs.
2. How can I decorate pots on a tight budget?
Start with cheap terracotta or even old plastic pots you already own. Buy a few basic paint colors and mix your own shades, or use leftover wall paint. Simple designs like color blocking, stripes, or dipped bottoms use less paint and still look stylish.
3. Are painted pots safe for my plants?
Yes, as long as you keep drainage holes open and avoid painting the inside of the pot where roots sit directly. If you’re worried, you can slip a plain nursery pot inside your painted one. Just make sure excess water can still escape to prevent root rot.
4. What painted pot styles work best for renters?
Renters often benefit from portable, non-permanent decor. Smaller pots like chalkboard herb pots, monochrome sets, or black-and-white patterned designs are ideal, because you can move them easily and take them with you when you leave. Use trays underneath to protect floors or railings.
5. How do I make sure my painted pots survive the weather?
Choose paints designed for outdoor use and always let each layer dry fully. A clear, UV-resistant sealer will help prevent fading and peeling. In very harsh climates, consider bringing your painted pots into a sheltered area over winter, or use them indoors during the coldest months.
6. Which idea is easiest for complete beginners?
Color block pots, dipped pots, and simple black-and-white patterns are great starter projects. They don’t require perfect brush control, and any small mistakes often blend into the design. Begin with one or two pots, keep the designs simple, and you’ll quickly gain confidence to try more detailed styles.