10 Kid-Friendly Recycled Garden Craft Ideas For A Weekend

If you’ve got a free weekend, a pile of “junk” waiting to be recycled, and kids with energy to burn, this list is for you. These simple garden crafts turn everyday rubbish into colourful, useful decorations that children can proudly show off outdoors.
Using things like tin cans, plastic bottles, cardboard tubes, and worn-out shoes, you’ll create playful planters, lanterns, markers, and more. Every idea is gentle on the budget, easy to adapt to different ages, and designed to be finished in a day or two. Best of all, your outdoor space ends up feeling more personal, creative, and full of stories you made together. Let’s turn your recycling bin into a weekend garden adventure.
Quick List
- Painted Tin Can Rainbow Herb Pots
- Plastic Bottle Flower Fence
- Rock Bug Family Garden Markers
- DIY Jar Lantern Path
- Cereal Box & Stick Mini Scarecrows
- Toilet Roll Seed Starter Forest
- Bottle Cap Stepping Stone Discs
- Old Boot Planter Parade
- Pallet Bug Hotel Hideaway
- Upcycled Bird Feeder Buffet
1. Painted Tin Can Rainbow Herb Pots

Give old food tins a second life as cheerful herb pots kids can paint and proudly line up outside. Clean and smooth the cans, add drainage holes with adult help, then let children decorate them with stripes, dots, simple patterns, or their names. Fill with potting mix and easy herbs like mint, basil, or chives. When grouped on a crate or windowsill, the mix of bright colours and fresh green leaves instantly lifts the whole garden and invites kids to touch, smell, and taste.
- Best For: Small patios, balconies, or windowsills with limited space.
- Budget Tip: Use leftover wall paint or sample pots and free tins from your own recycling.
- Styling Idea: Stick to one colour family (pastels, brights, or earth tones) for a coordinated look.
- Practical Note: Sand any sharp edges and supervise making drainage holes for safety.
- Care & Maintenance: Water gently and turn cans weekly so plants grow evenly towards the light.
2. Plastic Bottle Flower Fence
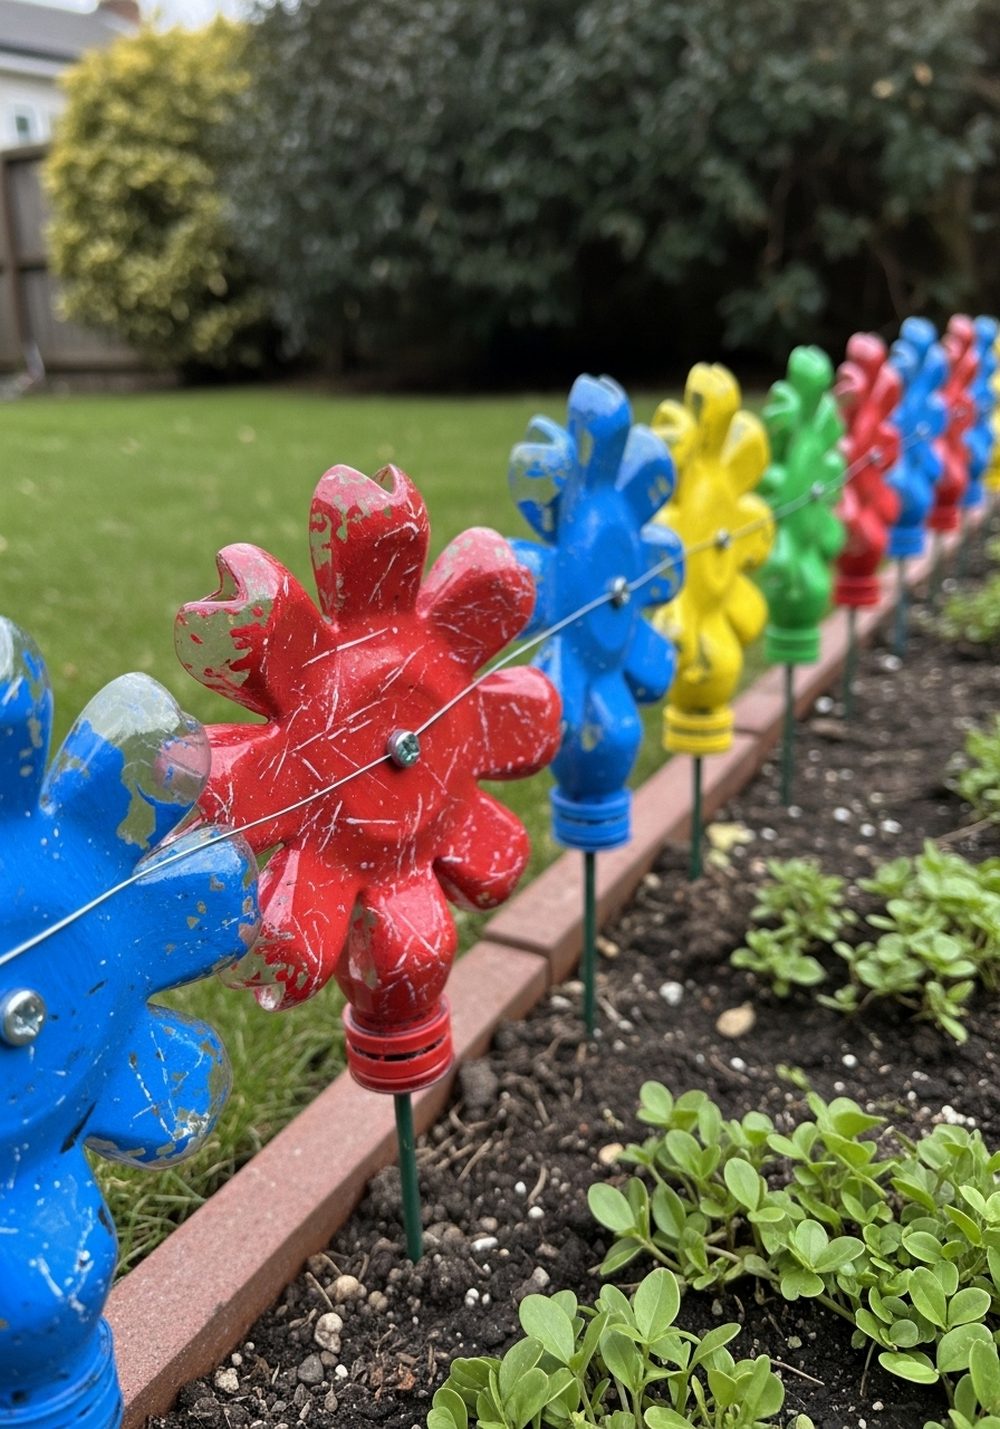
Turn a stash of plastic bottles into a row of colourful “flowers” that edge your beds like a storybook border. Adults can cut the bottles into petal shapes, then kids paint or marker the petals in bright, bold colours. Slip the bottles onto short sticks or canes and push them into the soil to mark out a path or frame a small bed. The transparent plastic glows in the sunlight and adds a playful, almost sculptural feel to the garden.
- Best For: Framing vegetable beds or defining play zones in family gardens.
- Budget Tip: Collect bottles over a few weeks from family and friends before crafting.
- Styling Idea: Paint in rainbow order or choose one colour per bed for a tidy, modern look.
- Practical Note: Pre-cut bottle shapes for younger kids and always handle scissors or knives yourself.
- Care & Maintenance: Rinse off mud and refresh paint every season if colours begin to fade.
3. Rock Bug Family Garden Markers
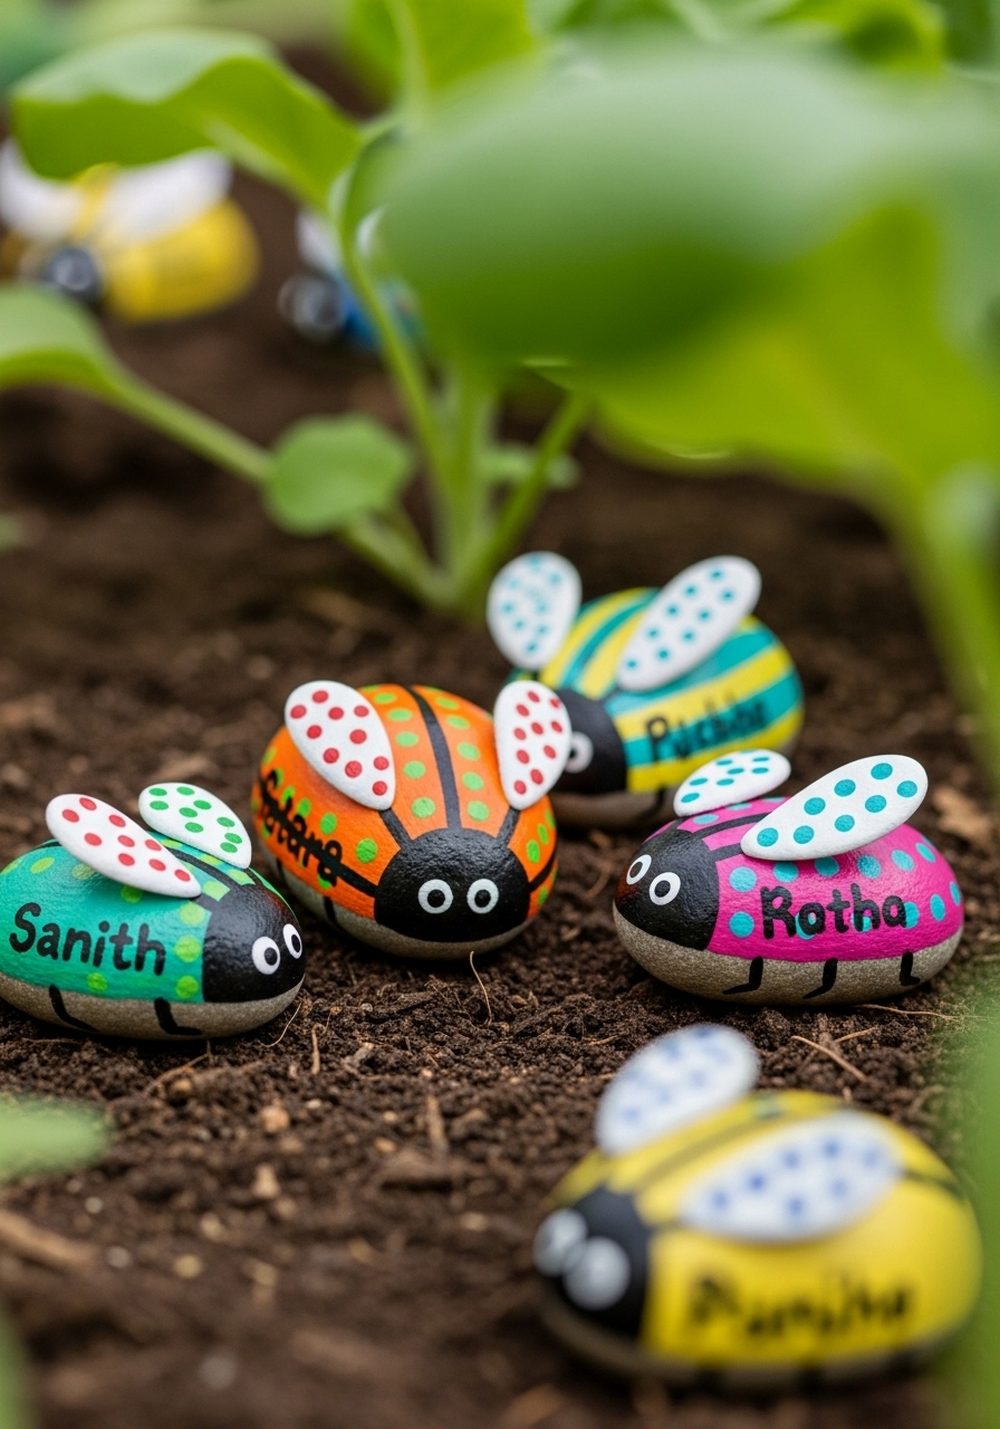
Smooth stones become a friendly bug family that also labels your plants. Have kids wash and dry the rocks, then paint them as ladybirds, bees, or fantasy bugs with simple dots and stripes. Once dry, write the plant names on their backs with a paint pen or permanent marker. Nestle each bug at the base of its plant, half on soil and half on mulch. The mix of natural rock texture and bright colours is charming and makes it easy for kids to remember what’s growing where.
- Best For: Herb patches and small veggie beds kids help look after.
- Budget Tip: Collect stones on a walk and use leftover craft paints you already own.
- Styling Idea: Choose two or three bug designs and repeat them for a cute, coordinated “family.”
- Practical Note: Seal with clear outdoor varnish if you live in a rainy climate.
- Extra Idea: Let kids make one “mystery bug” with no label and secretly plant a surprise crop.
4. DIY Jar Lantern Path
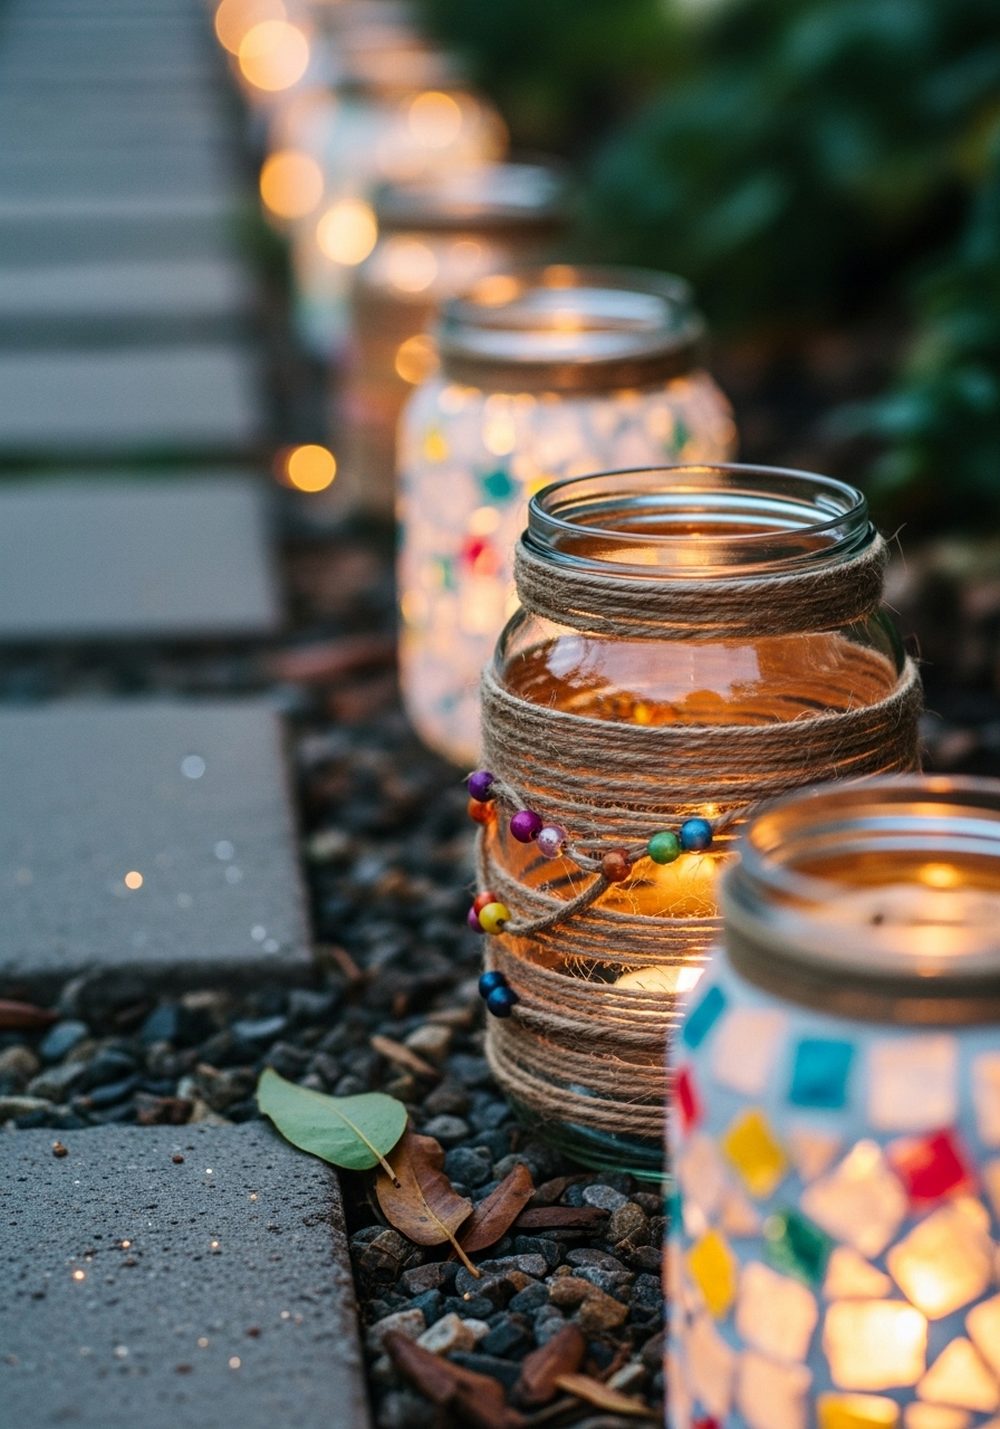
Old jam and sauce jars can quickly become magical lanterns that light a garden path or table. Clean and dry the jars, then let kids decorate them with tissue paper, glass paint, or simple twine wraps and beads. Pop in LED or solar tealight candles (avoid real flames with children) and arrange them along a path, on steps, or clustered on a table. As dusk falls, the jars glow softly, turning your outdoor space into a cosy evening hideout.
- Best For: Evening barbecues, sleepovers, or family nights in the garden.
- Budget Tip: Save jars over time and buy a multi-pack of LED tealights to reuse.
- Styling Idea: Choose cool blues and greens for a calm look or warm oranges and reds for a campfire feel.
- Practical Note: Use battery or solar lights only, and place jars where kids won’t trip over them.
- Care & Maintenance: Store jars inside when not in use to protect decorations from weather.
5. Cereal Box & Stick Mini Scarecrows
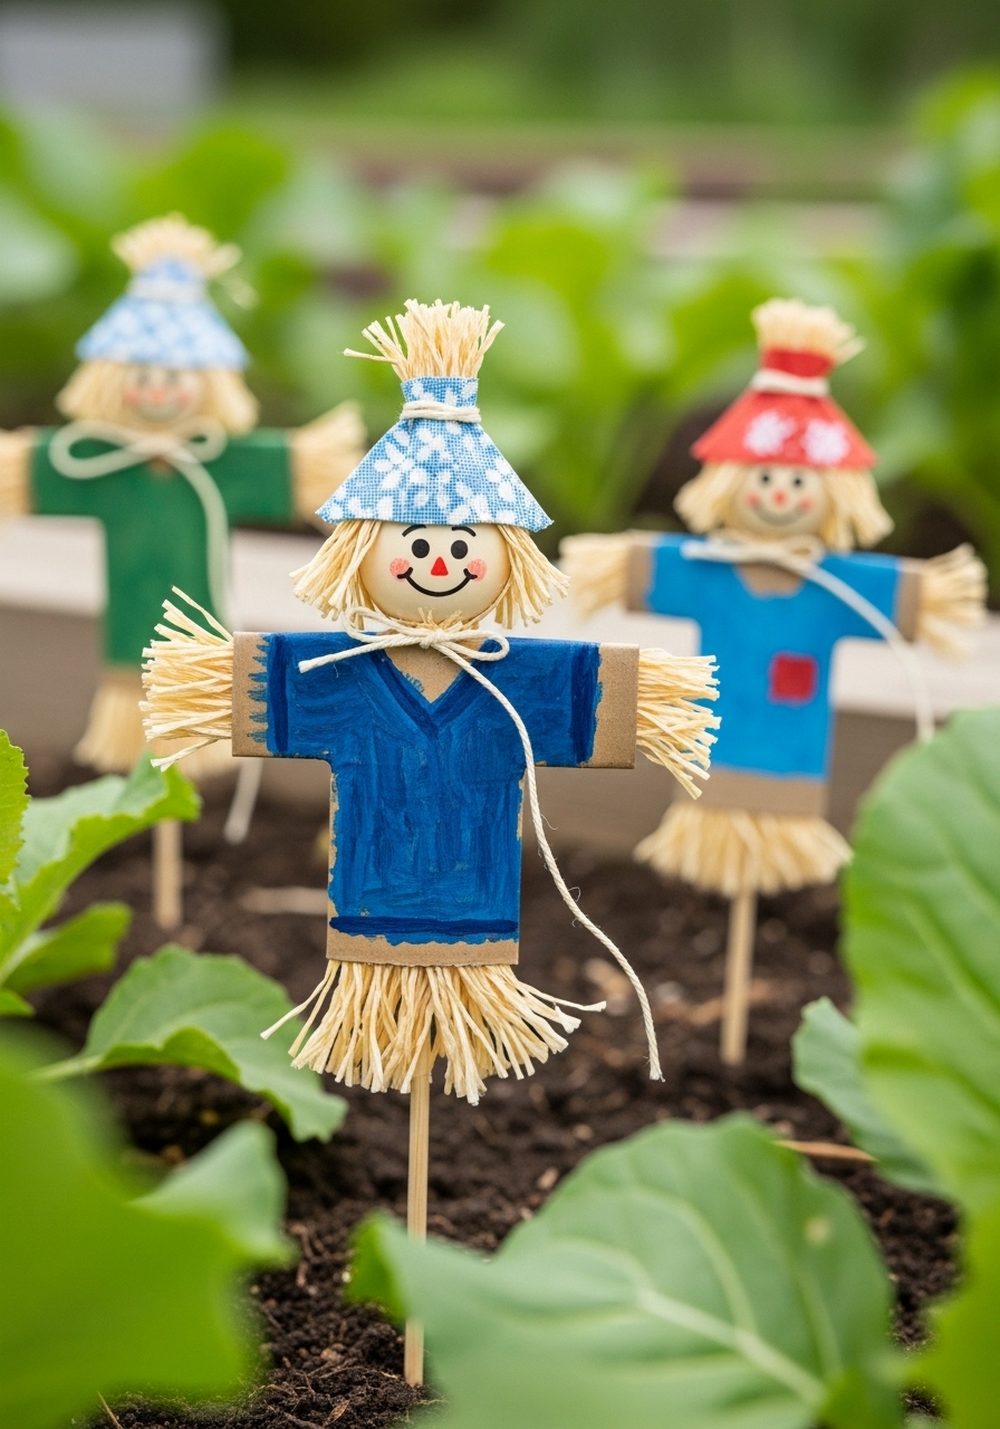
Instead of a big, heavy scarecrow, make a whole gang of mini ones from cereal boxes and twigs. Kids cut shirt and trouser shapes from cardboard, colour them with paints or markers, and add simple drawn faces. Tape or tie the outfits to garden sticks and tuck them into pots or beds, so little scarecrows peek out between leaves. They may not scare many birds, but they add fun, childlike character and make kids feel like the garden has tiny guardians.
- Best For: Veggie patches or pots kids regularly visit and help water.
- Budget Tip: Use old cereal boxes, scrap fabric, and sticks collected from the garden.
- Styling Idea: Give each scarecrow a theme—sports shirt, superhero, or favourite colours.
- Practical Note: Waterproof with clear tape or outdoor varnish if you want them to last longer.
- Extra Idea: Swap their “clothes” seasonally for a Halloween, spring, or summer version.
6. Toilet Roll Seed Starter Forest
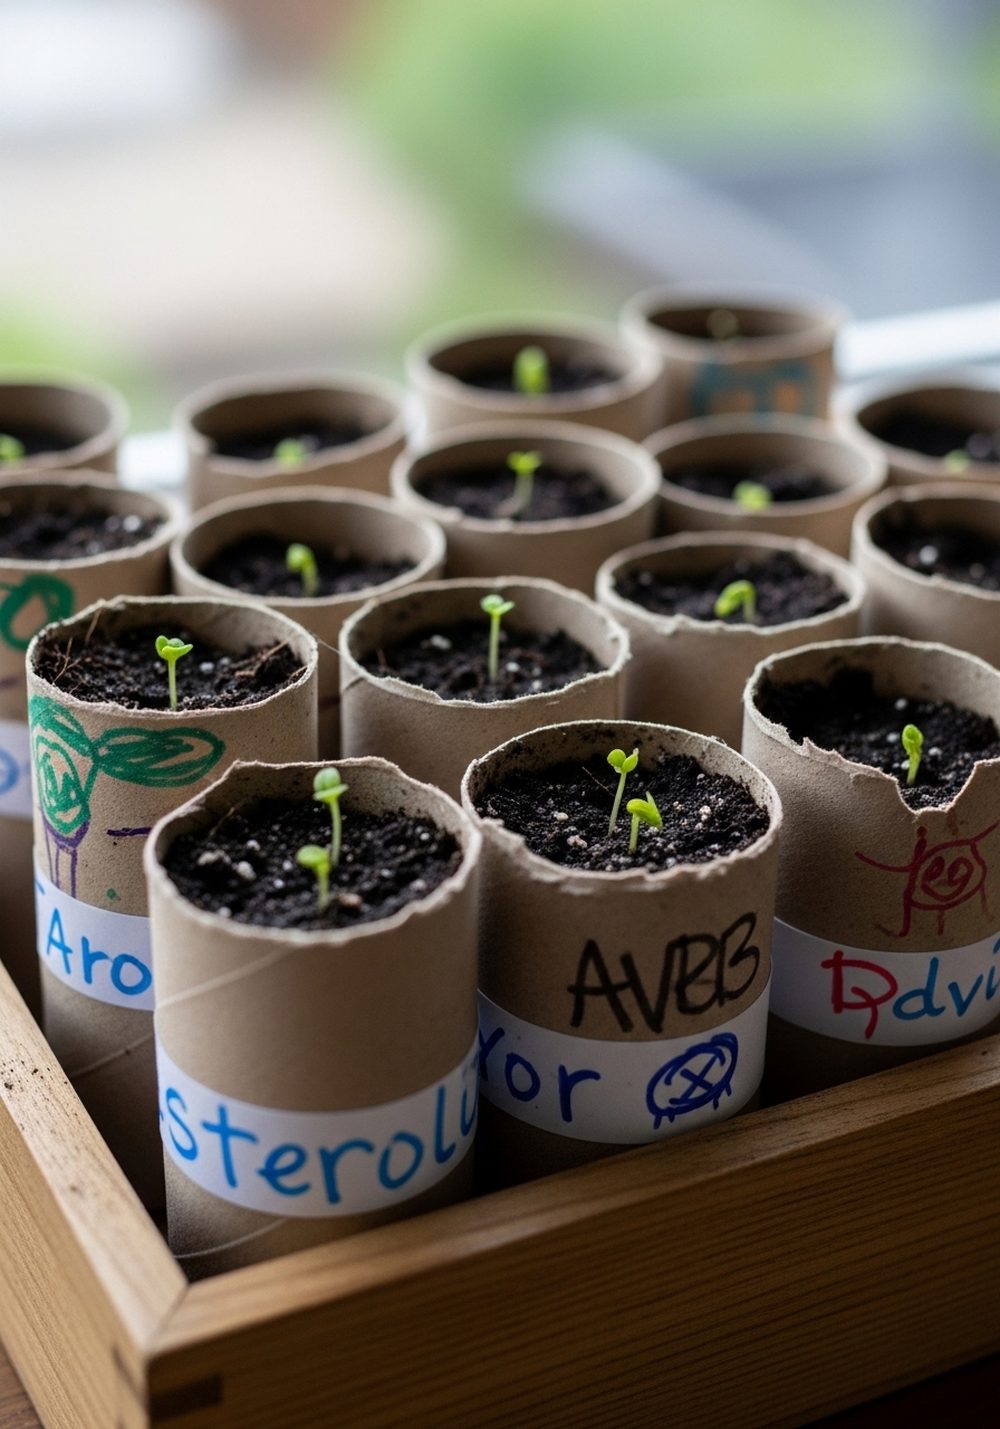
Toilet paper rolls become perfect little seed pots that look adorable grouped together like a tiny forest. Cut each tube in half, fold one end to make a base, then fill with seed compost. Kids can draw faces or patterns on the outside, then sow easy seeds such as peas, sunflowers, or marigolds. Stand the rolls snugly in a shallow tray so they stay upright. As seedlings pop up, the collection looks like a crowd of characters rising from the soil.
- Best For: Starting seeds indoors on a windowsill or in a sheltered corner.
- Budget Tip: Collect rolls for a few weeks and reuse any shallow food trays as bases.
- Styling Idea: Let each child design a “character row” with matching colours or themes.
- Practical Note: Plant the whole tube into the ground once roots are strong; the cardboard will break down.
- Care & Maintenance: Keep the compost just moist, not soaking, so tubes don’t collapse too quickly.
7. Bottle Cap Stepping Stone Discs
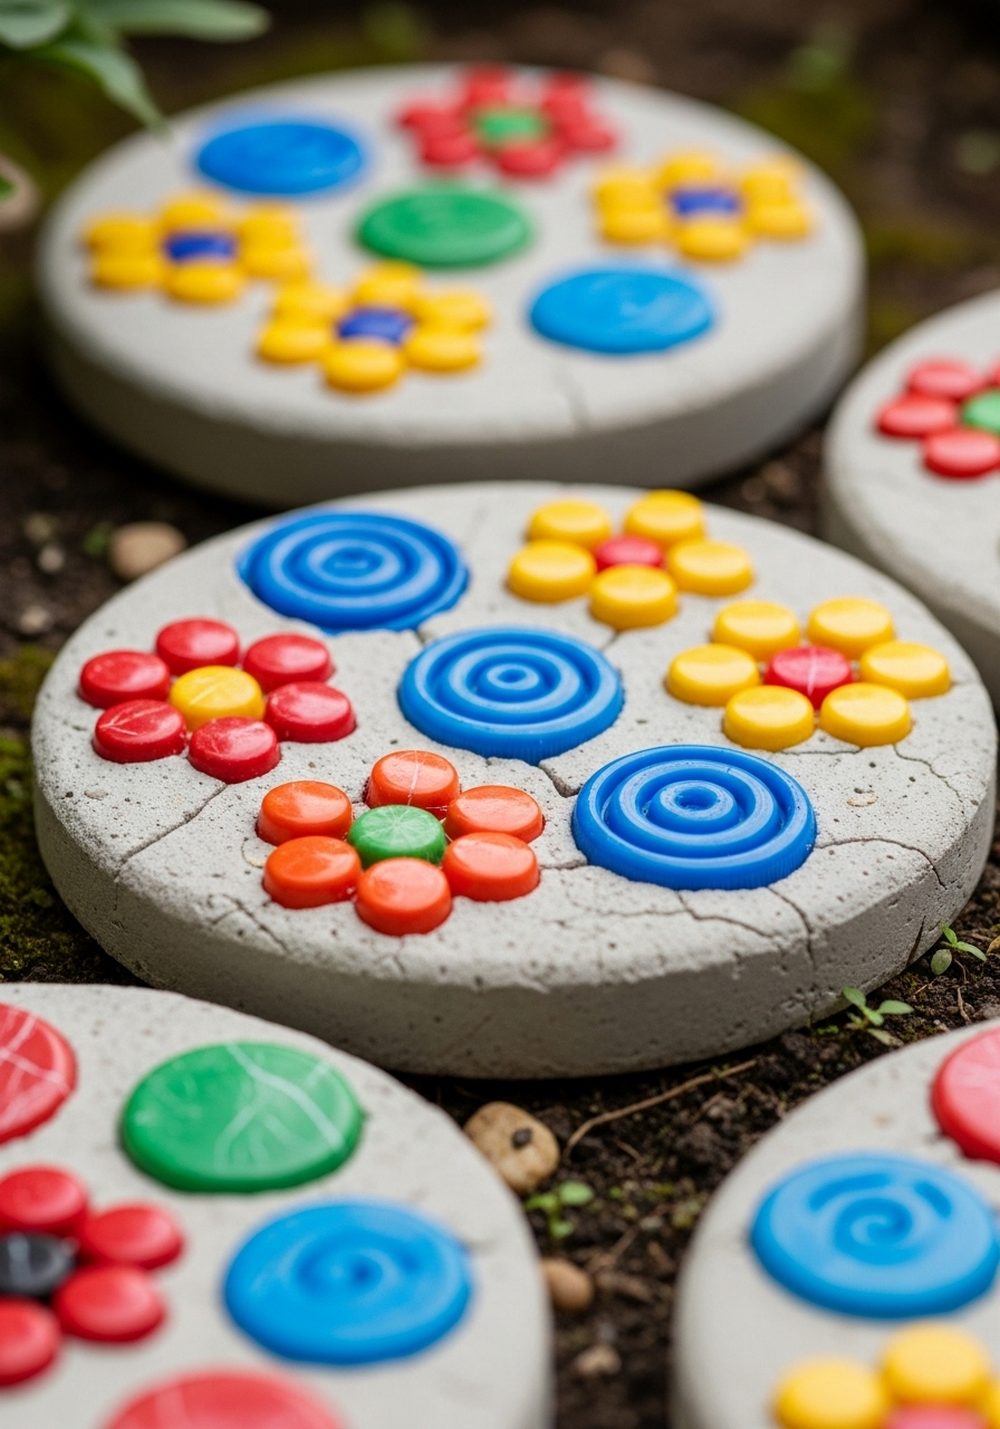
Give bottle caps a bright second life by pressing them into small stepping stone discs. Adults can mix a simple cement or ready-mix concrete and pour it into shallow molds like old plastic trays or large lids. Kids press clean caps into the surface in patterns—spirals, hearts, or random rainbows. Once set and popped out, the discs can be laid between plants or to form a mini path. The smooth concrete and glossy caps create a playful, mosaic-style feature underfoot.
- Best For: Path edges, play corners, or as stepping stones between beds.
- Budget Tip: Use recycled lids and trays as molds and only a small bag of mix.
- Styling Idea: Choose two or three cap colours per disc for a neater, more graphic look.
- Practical Note: Adults should handle cement and supervise the whole pouring process.
- Care & Maintenance: Let stones cure fully before walking on them and brush off mud now and then.
8. Old Boot Planter Parade
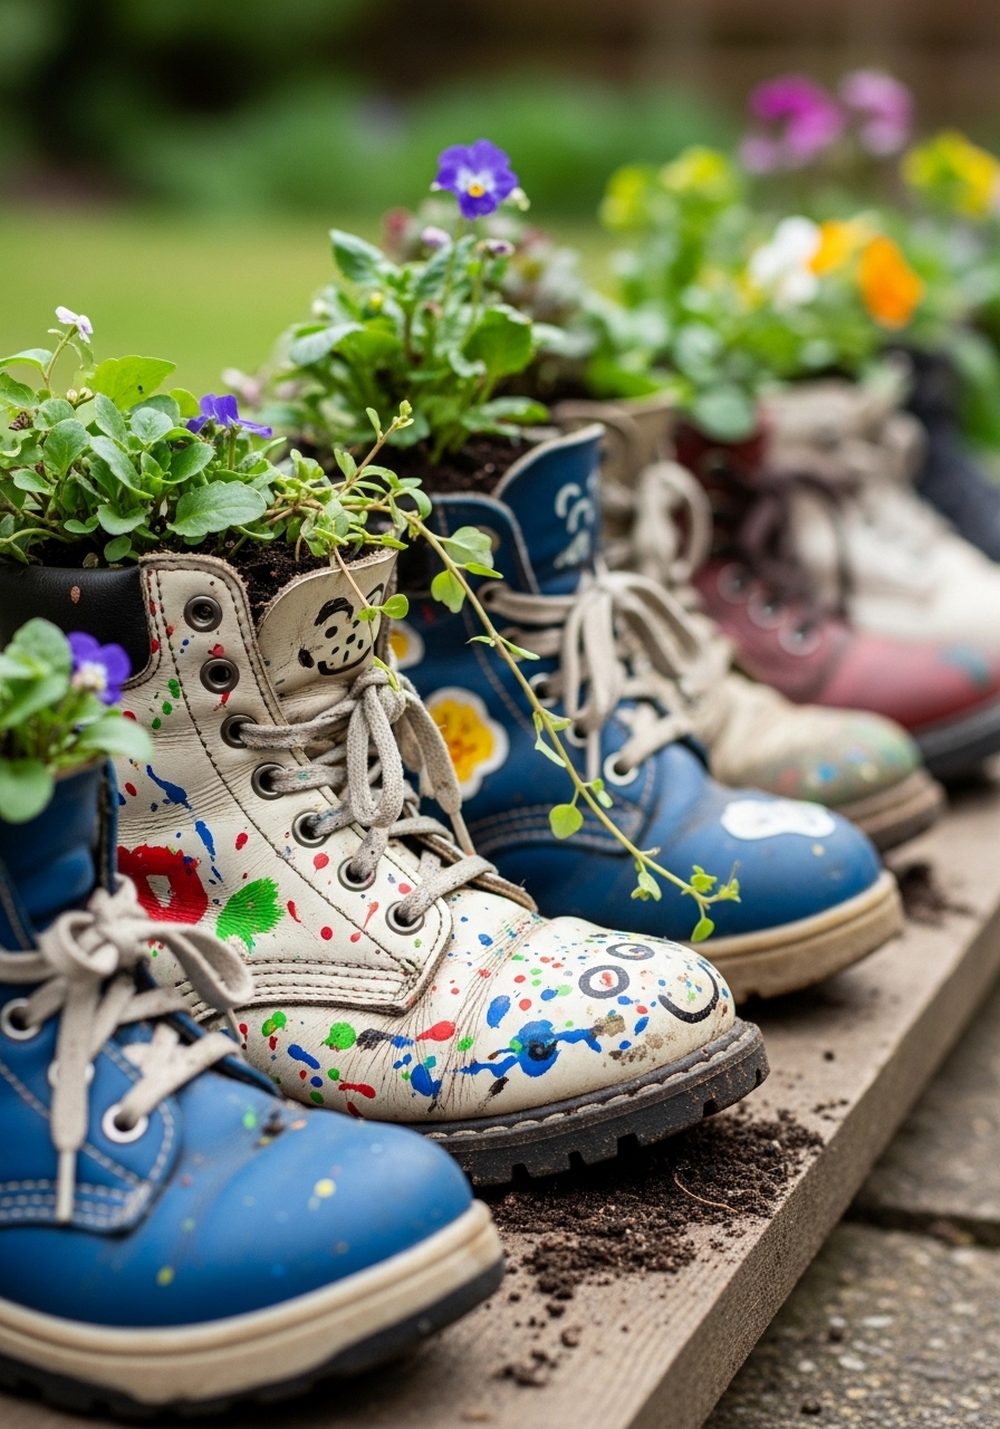
Those outgrown boots and trainers don’t have to go straight to the bin. Punch a few drainage holes in the soles, fill with potting mix, and let kids choose small flowers or trailing plants to tuck inside. Line the shoes along a path, step, or fence base, and you’ve got a quirky parade that makes everyone smile. The mix of worn fabrics or scuffed leather with fresh greenery tells a lovely story of growing feet and growing plants.
- Best For: Front steps, balcony edges, or near a back door.
- Budget Tip: Use old footwear from the family and inexpensive annuals or cuttings.
- Styling Idea: Group boots by colour or height, or mix completely for a playful jumble.
- Practical Note: Place them on a tray if you’re renting and want to avoid marks on surfaces.
- Care & Maintenance: Water gently and refresh the soil and plants each season as needed.
9. Pallet Bug Hotel Hideaway
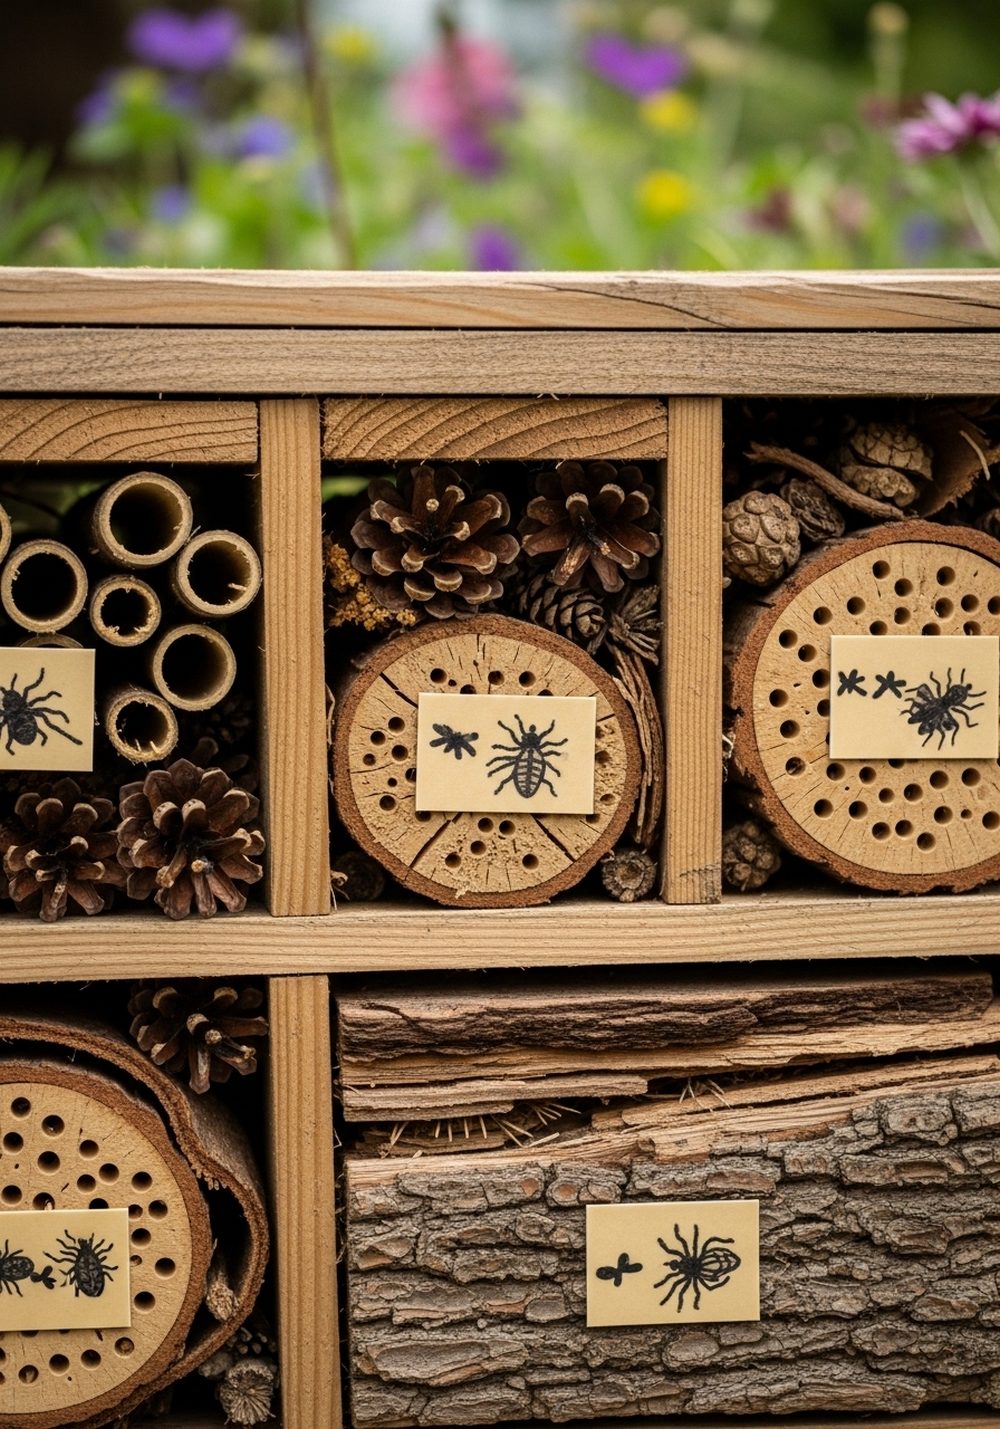
A worn pallet can become a wonderful bug hotel that kids help fill and decorate. Stand the pallet upright or lay it on its side, securing it safely. Children can pack each gap with bamboo pieces, pinecones, bark, straw, and hollow stems to create cosy rooms for beneficial insects. Add simple painted signs or little leaf shapes on the front. The finished structure looks rustic and decorative, while also inviting pollinators and ladybirds that help keep the garden healthy.
- Best For: A quiet garden corner where it can stay undisturbed.
- Budget Tip: Ask local shops for a free pallet and collect filling materials on nature walks.
- Styling Idea: Paint just the frame in a muted colour so the natural fillings stand out.
- Practical Note: Make sure the pallet is stable and secure, and avoid pressure-treated wood if possible.
- Care & Maintenance: Top up materials every year or two as they break down.
10. Upcycled Bird Feeder Buffet
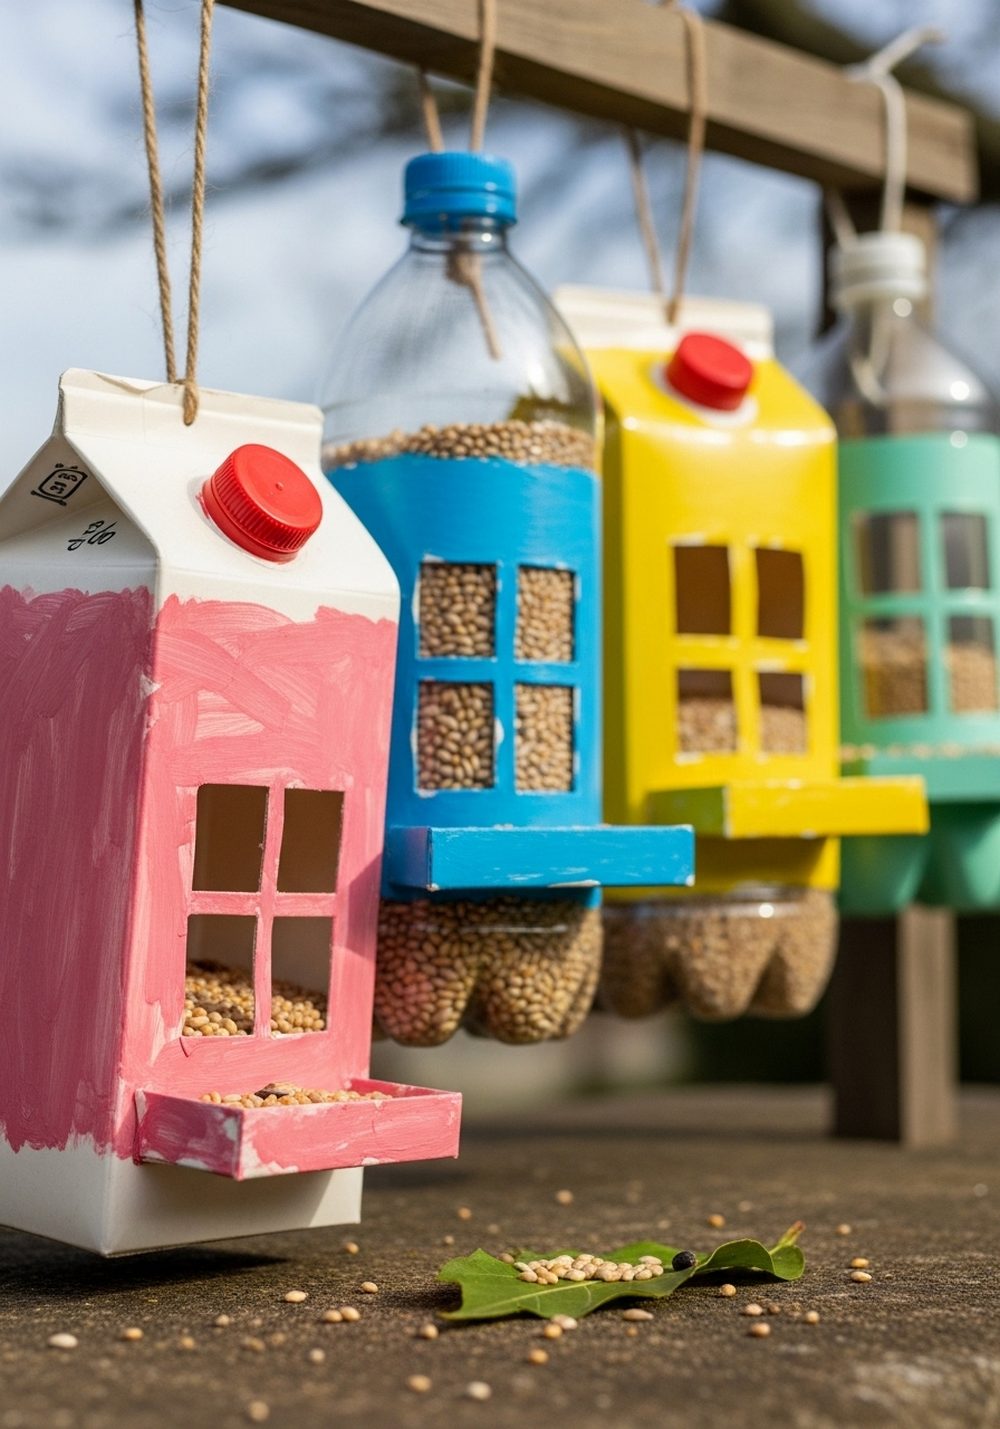
Turn milk cartons and plastic bottles into a colourful bird feeding station kids will love watching. Adults help cut openings, then children paint or decorate the outside and add string or twine for hanging. Fill with seeds and hang feeders at varying heights from a tree, pergola, or simple wooden frame. The mix of shapes, colours, and fluttering visitors brings the whole garden to life and gives kids a gentle introduction to local wildlife.
- Best For: Gardens or balconies with a nearby tree, railing, or sturdy hooks.
- Budget Tip: Use household cartons and bottles and buy simple bulk birdseed.
- Styling Idea: Stick to natural greens and browns for a woodland feel, or go full rainbow for fun.
- Practical Note: Hang feeders where cats can’t easily reach and clean them regularly.
- Care & Maintenance: Empty out damp seed, wash containers, and refill little and often.
Conclusion
With a weekend, a few basic supplies, and your recycling bin, you can transform your garden into a playful, personal space that children helped to create. These crafts are simple enough to finish in a day, yet special enough to keep on enjoying all season. Start with one or two ideas that fit your space and time, then add more as you go. Before long, your garden will be full of colour, stories, and memories you made together outdoors.
FAQs
1. How can I keep these recycled crafts budget-friendly?
Focus on using what you already have: cans, jars, bottles, cardboard, old shoes, and leftover paint. Plan one or two projects per weekend instead of buying lots of supplies at once. Basic items like potting mix, seeds, and LED tealights are inexpensive and go a long way when shared across several crafts.
2. Are these garden crafts suitable for renters?
Yes. Most of these ideas are portable and non-permanent. Tin can pots, jar lanterns, boot planters, and bird feeders can all be taken with you when you move. If you’re worried about marks, use trays under planters and avoid screwing anything into walls or fences without permission.
3. What can very young children safely help with?
Toddlers and younger kids can handle washing jars, painting, sticking tissue paper, filling pots with soil, and gently sowing seeds. Adults should do all cutting, drilling, and cement mixing. Set up a clear “grown-up tools” zone and keep sharp items well out of reach, so little ones can join in safely.
4. How do I make sure these crafts survive outdoors?
Choose outdoor-friendly paints or seal finished pieces with a clear outdoor varnish. Try to place delicate crafts under eaves or in sheltered spots, and bring cardboard-based decorations in during heavy rain. Hardwearing items like stones, pallets, and concrete stepping discs will naturally last longer outside.
5. Will these decorations harm plants or wildlife?
Used thoughtfully, they can actually help. Bug hotels and bird feeders support wildlife, while markers and seed starters help plants. Avoid tiny loose plastic pieces that could blow away, use safe paints, and clean feeders regularly. If something breaks, repair or recycle it promptly so it doesn’t become litter in the garden.
6. What are the easiest ideas to start with if we’re new to crafting?
Begin with painted tin can pots, rock bug markers, or toilet roll seed starters. They use very simple techniques, depend on everyday materials, and give quick results that kids can see growing or glowing within days or weeks. Once everyone is confident, you can move on to stepping stones, bug hotels, and bird feeders.