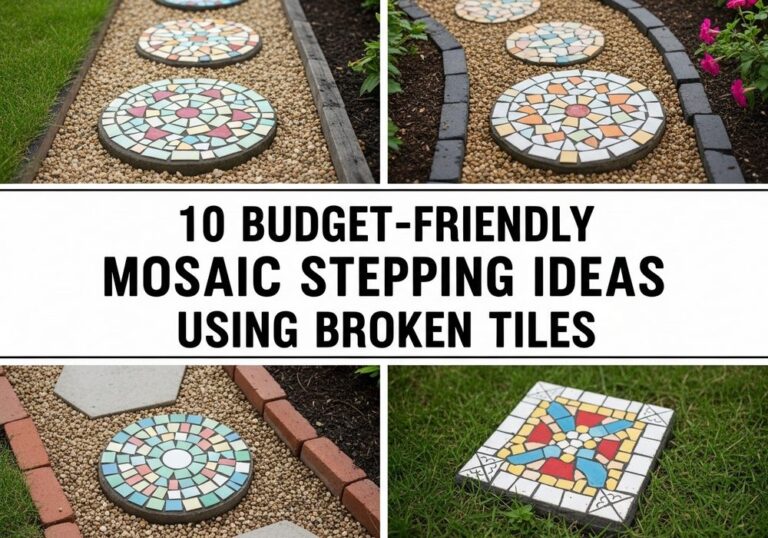
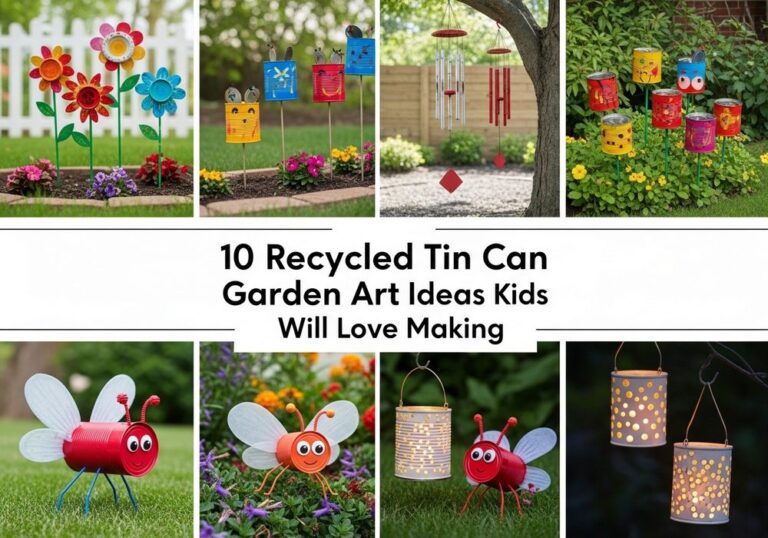
14 Recycled Tin Can Herb Planters

If you love fresh herbs but don’t love wasting good containers, recycled tin cans are about to become your new favorite garden decor trick. They’re cheap, easy to collect from everyday groceries, and surprisingly stylish once you give them a little paint, twine, or clever labeling.
In this post, you’ll find fourteen creative ways to turn humble cans into charming herb planters for patios, balconies, porches, and tiny yards. Each idea focuses on simple styling, realistic layouts, and budget-friendly touches so your outdoor space feels more welcoming, personal, and green without any complicated DIY skills.
Quick List
- Color-Pop Painted Tin Can Herb Row
- Hanging Tin Can Herb Rail On The Fence
- Rustic Twine-Wrapped Tin Can Trio
- Chalkboard-Labelled Tin Can Herb Bar
- Magnetic Tin Can Herb Garden On A Metal Panel
- Tiered Crate Stand With Tin Can Herbs
- Windowsill Tin Can Herb Ledge
- Tin Can Herb Ladder Display
- Boho Macrame Hanging Tin Can Planters
- Tin Can Herb Centerpiece For Outdoor Dining
- Kids’ Doodle Tin Can Herb Corner
- Tin Can Herb Planters On Balcony Railing
- Vintage-Style Tin Can Herb Mix By The Door
- Tin Can Herb Gift Station On The Patio
Color-Pop Painted Tin Can Herb Row

Line up a cheerful row of painted tin cans along a low wall, step, or ledge and fill each one with a different herb. Use bright, solid colors or simple stripes so the cans read as a fun, unified collection rather than clutter. The sleek metal looks lovely against fresh green leaves, and a repeating color palette pulls everything together. Just remember to drill drainage holes and set the cans on a tray or saucers if they sit near walls.
- Best For: Patios, balcony ledges, or the top of raised beds.
- Budget Tip: Use leftover wall paint or tester pots instead of buying new.
- Styling Idea: Stick to three colors repeated to keep it chic, not chaotic.
- Practical Note: Group thirstier herbs (like mint) together so watering is easier to manage.
Hanging Tin Can Herb Rail On The Fence

Turn a plain fence into a vertical herb bar by fixing a slim metal rail or wooden batten across it and hanging your tin cans from hooks or clips. The cans sit in a neat line, freeing up floor space while giving you herbs at easy reach. Mix trailing herbs with upright ones for texture, and keep the rail around eye level so you can snip sprigs quickly on your way back indoors.
- Best For: Small yards with limited ground space.
- Budget Tip: Upcycle an old curtain rod or towel rail as the hanging bar.
- Styling Idea: Paint all cans one calm color, then use simple tags for variety.
- Practical Note: Make sure the fence gets at least a few hours of sun for happy herbs.
Rustic Twine-Wrapped Tin Can Trio

Wrap your tin cans in jute twine or natural rope for an instant rustic, cottage-style look. A trio of herbs clustered on a small side table or step feels warm and relaxed, especially next to a wooden bench or woven cushions. The texture of the twine softens the shiny metal and makes even very simple cans look intentional and decorative.
- Best For: Porches, steps, and cozy seating corners.
- Budget Tip: One ball of twine often wraps several cans; secure with dots of strong glue.
- Styling Idea: Tie a small leftover bow of twine around the top edge for a finished look.
- Care & Maintenance: Keep the twine dry where possible so it doesn’t mildew in constant moisture.
Chalkboard-Labelled Tin Can Herb Bar

Paint tin cans with chalkboard paint or matte black paint and add hand-written labels for each herb. Line them up on a narrow shelf or console table outside to create a mini “herb bar.” The dark cans make the greens pop and the chalk labels feel both practical and stylish. It’s especially handy if family or guests want to know which herb is which at a glance.
- Best For: Patio walls, narrow porches, or by the back door.
- Budget Tip: One small tin of chalkboard paint covers lots of cans.
- Styling Idea: Keep labels simple—just the herb names in clean lettering.
- Practical Note: Wipe and re-label easily if you rotate herbs through the season.
Magnetic Tin Can Herb Garden On A Metal Panel

If you have a metal wall, old locker door, or a sheet of metal fixed to the wall, turn it into a moveable herb display. Attach strong magnets to your tin cans (or use magnetic tape plus extra glue) and arrange them like a living collage. You can slide cans around as they grow, or group them by how much sun they need. It feels modern, playful, and surprisingly space efficient.
- Best For: Side yards, modern courtyards, or balcony walls with metal panels.
- Budget Tip: Start with a few cans first and add more magnets over time.
- Styling Idea: Use mostly neutral cans, then add one or two bright accent colors.
- Practical Note: Test each magnet thoroughly so the cans feel secure and safe.
Tiered Crate Stand With Tin Can Herbs

Stack a few wooden crates at different angles to create a tiered plant stand, then line each crate shelf with tin can herbs. This instantly adds height and layers to a flat patio or balcony corner. Stagger taller herbs toward the back and lower, trailing herbs at the front so every plant can be seen. The mix of weathered wood and metal cans feels artisan but relaxed.
- Best For: Bare patio corners that need height and structure.
- Budget Tip: Use second-hand crates or ask local shops for spare ones.
- Styling Idea: Keep can colors soft and natural to match the crate wood.
- Practical Note: Secure the crates together if your area gets strong winds.
Windowsill Tin Can Herb Ledge

Turn the outside of a window into a tiny herb station by adding a simple ledge or using an existing sill. A row of matching tin cans with compact herbs instantly softens hard lines and brings life right up to the glass. From indoors, you get a leafy view; from outdoors, it reads as a charming mini garden strip. Ensure the ledge is deep and strong enough before you load it up.
- Best For: Small homes and apartments with sun-facing windows.
- Budget Tip: Keep cans unpainted and simply add small stick-in labels.
- Styling Idea: Use all one herb (like basil) for a bold, unified look.
- Practical Note: Water carefully so runoff doesn’t stain walls or drip onto neighbors.
Tin Can Herb Ladder Display

Lean a simple wooden ladder against a wall and use the rungs to hold tins filled with herbs. You can hook the cans on with wire or rest them on narrow planks attached across the rungs. The ladder creates a vertical garden without any complicated drilling, and it’s easy to rearrange or move. Herbs at different heights add a lush, tiered backdrop to any seating area.
- Best For: Renters who want vertical interest without permanent fixtures.
- Budget Tip: Sand and reuse an old ladder instead of buying a new plant rack.
- Styling Idea: Mix shiny metal cans with a few painted ones for contrast.
- Practical Note: Position the ladder securely and away from regular walkways.
Boho Macrame Hanging Tin Can Planters

Give your tin cans a boho twist by hanging them in simple macrame-style holders made from cord or string. Suspend them from a porch beam, pergola, or sturdy hook so herbs dangle at different heights. The soft cords and swinging cans create a gentle, breezy feeling, especially when paired with lanterns and textured cushions below. Choose herbs that don’t grow too heavy so your hangers stay comfortable.
- Best For: Covered porches or pergolas with beams to hang from.
- Budget Tip: Use cotton string or leftover yarn to knot basic plant hangers.
- Styling Idea: Keep cords neutral and let the green herbs be the color.
- Care & Maintenance: Check hook strength and hanger knots regularly, especially after rain.
Tin Can Herb Centerpiece For Outdoor Dining

Instead of one big vase in the middle of your outdoor table, arrange a row or cluster of tin can herb planters as a living centerpiece. Mix heights and leaf shapes so it feels full but not fussy, and leave enough space for plates and dishes. Guests can pinch a sprig of basil or mint straight from the table, which adds scent, freshness, and a lovely informal feel to outdoor meals.
- Best For: Patios with a dedicated outdoor dining table.
- Budget Tip: Use a simple tray or spare plank as a base rather than a fancy runner.
- Styling Idea: Stick to silvery metal cans for a clean, modern look.
- Practical Note: Choose herbs with soft, non-spiky leaves to keep the table comfortable.
Kids’ Doodle Tin Can Herb Corner

Invite children to decorate the cans with paint pens, stickers, or simple brush strokes, then plant kid-friendly herbs like mint or chives. Arrange the finished cans in a low corner where young gardeners can reach them easily and join in watering. The playful artwork turns your herb display into a family project and makes the corner feel joyful, especially alongside a small bench or garden stool.
- Best For: Family gardens and shared courtyards.
- Budget Tip: Upcycle mismatched cans and let kids’ art unify them.
- Styling Idea: Pair doodle cans with plain pots nearby so the look doesn’t overwhelm.
- Practical Note: Supervise drainage hole drilling and any sharp edges before kids handle cans.
Tin Can Herb Planters On Balcony Railing

Use railing brackets, metal rings, or sturdy wire to fix tin cans safely along the balcony rail. Herbs spill slightly over the edge, softening metal bars and making your balcony feel lush without sacrificing floor space. From indoors, you’ll see a line of greenery at eye level, which instantly improves the view. Focus on compact herbs so the cans don’t become too heavy or unbalanced.
- Best For: Very small balconies where floor space is precious.
- Budget Tip: Start with just three cans and expand the row gradually.
- Styling Idea: Paint cans in soft, muted tones that blend with your building’s exterior.
- Practical Note: Always secure brackets tightly and test the weight before letting go.
Vintage-Style Tin Can Herb Mix By The Door

Cluster a mix of tin cans in varying heights beside your front or back door to create a welcoming herb display. Add simple “vintage-style” touches like muted colors, hand-drawn labels, or faux retro designs. A mixture of tall herbs like rosemary and bushy ones like parsley makes the grouping feel full and generous. Every time you step outside, you’ll be greeted with scent and soft green texture.
- Best For: Entry porches or steps that need a friendly focal point.
- Budget Tip: Use diluted paint washes to give new cans a worn-in look.
- Styling Idea: Pop the cans into a shallow crate or tray to visually tie them together.
- Care & Maintenance: Rotate the cluster occasionally so all plants get some sun.
Tin Can Herb Gift Station On The Patio

Dedicate a small table or bench to a line of tin cans planted with baby herbs, ready to give away. Add simple tags where you can write herb names or small notes before gifting them to friends, neighbors, or dinner guests. The display looks charming even on ordinary days, and when you send someone home with a can, you’re sharing both decor and homegrown flavor.
- Best For: Social patios where you host friends and family.
- Budget Tip: Fill cans with small cuttings or seedlings rather than large plants.
- Styling Idea: Keep can designs simple so the tags become the main decorative touch.
- Practical Note: Top each can with a thin layer of gravel to keep soil from spilling in transit.
Conclusion
Recycled tin cans prove that you don’t need expensive planters to create a beautiful, character-filled herb garden. With a little paint, twine, clever hanging, and simple styling, these everyday containers turn into charming decor pieces that also earn their keep in the kitchen. Start with one small cluster or row of cans, see how it transforms your space, and then build your own little herb world can by can, corner by corner.
FAQs
1. How can I make tin can herb planters on a very tight budget?
Rinse and save cans from everyday groceries instead of buying containers. Use leftover house paint, sample pots, or even permanent markers for simple designs. If you don’t have saucers, set cans on old tiles or plastic lids to catch drips. Start with cuttings from friends or small herb seedlings rather than mature plants to keep costs low.
2. Are tin can planters safe and durable for outdoor use?
Yes, as long as you drill drainage holes and smooth any sharp edges first. Over time, cans may develop a bit of rust, which many people like for a rustic look. If you prefer a cleaner finish, seal the outside with a clear outdoor varnish. Check occasionally that the bottoms haven’t weakened and replace cans if they start to corrode too much.
3. What if I’m renting and can’t damage walls or railings?
Choose non-permanent setups like ladder displays, crate stands, or trays of cans on tables and window ledges. For railings, use removable brackets that clamp rather than screw into place. Freestanding plant stands and stacked crates give you height and interest without any drilling, so you can take everything with you when you move.
4. Which herbs work best in small tin cans?
Compact, shallow-rooted herbs are ideal. Try parsley, chives, thyme, oregano, and smaller varieties of basil and mint. Avoid very woody or deep-rooted plants in the smallest cans, or upgrade them to larger containers once they mature. Whatever you plant, use good-quality potting mix and water regularly, as small cans dry out faster.
5. How do I stop my tin can herb display from looking cluttered?
Pick a simple color palette and repeat it across cans instead of decorating each one completely differently. Group cans on trays, in crates, or on shelves so they feel like one planned feature, not random pieces scattered about. Leave a little breathing space around your main display and avoid mixing too many different decor styles in one small area.