10 Tin Can Flower Planter Ideas For Rustic Outdoor Charm
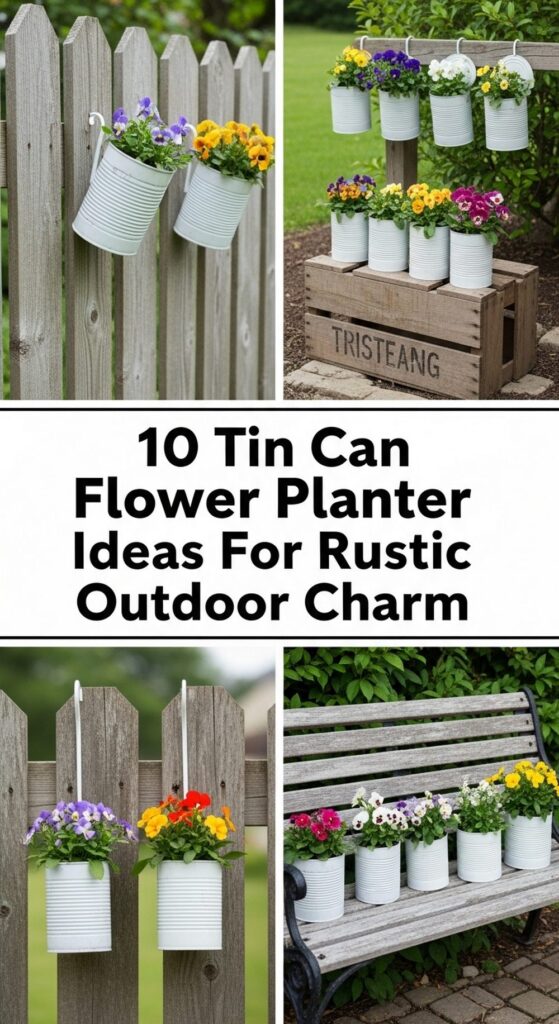
If you’ve been saving empty tins “just in case,” this is their moment. Tin cans are the perfect starting point for charming, rustic garden decor that costs almost nothing and instantly adds personality to your outdoor space. With a little paint, twine, and creativity, they transform into sweet, vintage-style planters.
Whether you garden on a balcony, porch, or full backyard, these tin can flower planter ideas will help you bring more color, texture, and warmth to your space. You’ll find easy, beginner-friendly projects you can finish in an afternoon, using simple tools and materials you probably already have at home.
Quick List
- Pastel Painted Tin Can Porch Planters
- Jute-Wrapped Tin Can Herb Trio
- Hanging Tin Can Fence Garden
- Crate Of Tin Can Wildflower Pots
- Numbered Tin Can Stair Planters
- Punch-Hole Tin Can Lantern Planters
- Vintage Label Tin Can Flower Row
- Tiered Tin Can Tower Planter
- Rail-Hung Tin Can Balcony Planters
- Enamel-Style White Tin Can Rose Pots
1. Pastel Painted Tin Can Porch Planters

Give old tins a soft, cottage feel with pastel paint and simple flowers. Clean and dry your cans, drill drainage holes in the base, then paint them in chalky pastel shades like mint, blush, and soft yellow. Once dry, fill with potting mix and plant cheerful blooms such as pansies or petunias. Line them along your steps, porch rail, or a low wall for an instant, welcoming splash of color that feels gentle and homely.
- Best For: Front steps, porches, and entryways that need a friendly touch.
- Budget Tip: Use leftover wall paint or tester pots instead of buying special craft paint.
- Styling Idea: Keep the palette soft and unified for a calm, romantic look.
- Practical Note: Add a layer of small stones at the bottom for drainage if the cans are deep.
2. Jute-Wrapped Tin Can Herb Trio

Turn simple tins into warm, rustic planters by wrapping them in jute twine. After cleaning and drilling drainage holes, coat the outside of each can with a thin layer of glue and tightly wrap twine or sisal rope from bottom to top. Plant herbs like basil, thyme, and rosemary for fragrance and fresh picking. Group three cans together on a crate or small table to create a cozy herb corner with lots of texture and natural charm.
- Best For: Small patios, balconies, or kitchen doors where you want herbs within reach.
- Budget Tip: Save supermarket tins and buy a single roll of jute to cover several cans.
- Styling Idea: Tie a simple bow around each can or add small wooden tags for plant names.
- Care & Maintenance: Water carefully at the base to avoid soaking the twine and causing mold.
3. Hanging Tin Can Fence Garden
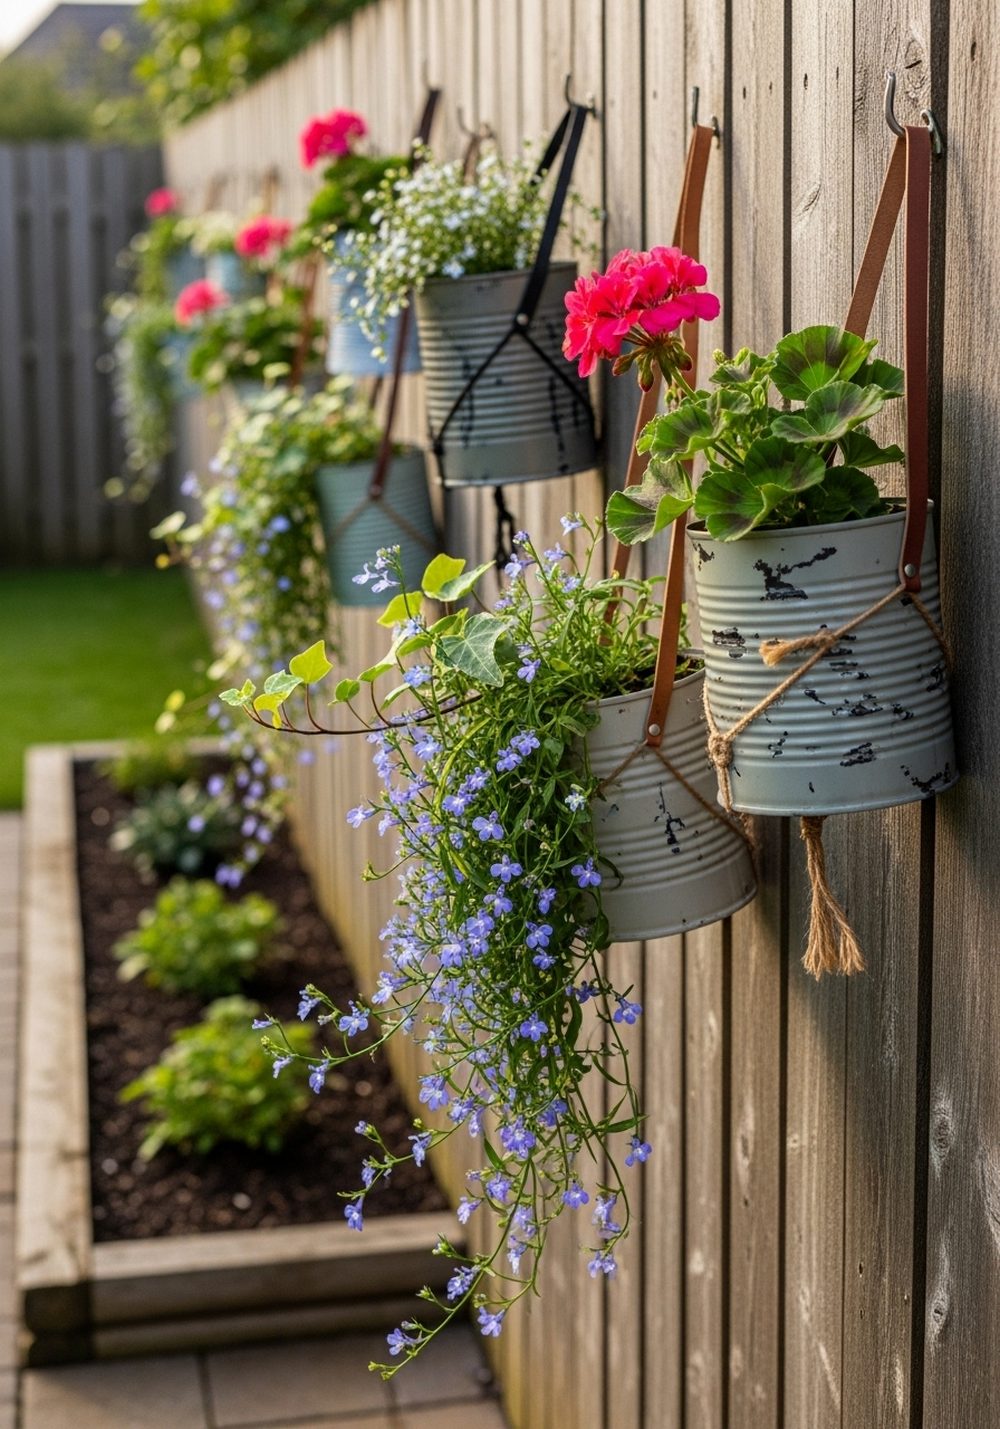
Make a plain fence feel like a rustic feature wall with hanging tin can planters. Punch two holes near the top rim of each can, thread with sturdy twine or wire, and plant trailing or upright flowers. Hang them at different heights along a wooden fence, trellis, or even a balcony wall. The mix of metal, flowers, and aged wood creates a charming, handmade look that’s perfect for small gardens and rented spaces.
- Best For: Bare fences, sheds, or balcony walls that need vertical interest.
- Budget Tip: Start with just a few cans and add more as you collect them.
- Styling Idea: Stick to a limited color scheme, like whites and reds, for a harmonious display.
- Practical Note: Make sure your fixings are strong enough and check them after heavy winds or rain.
4. Crate Of Tin Can Wildflower Pots
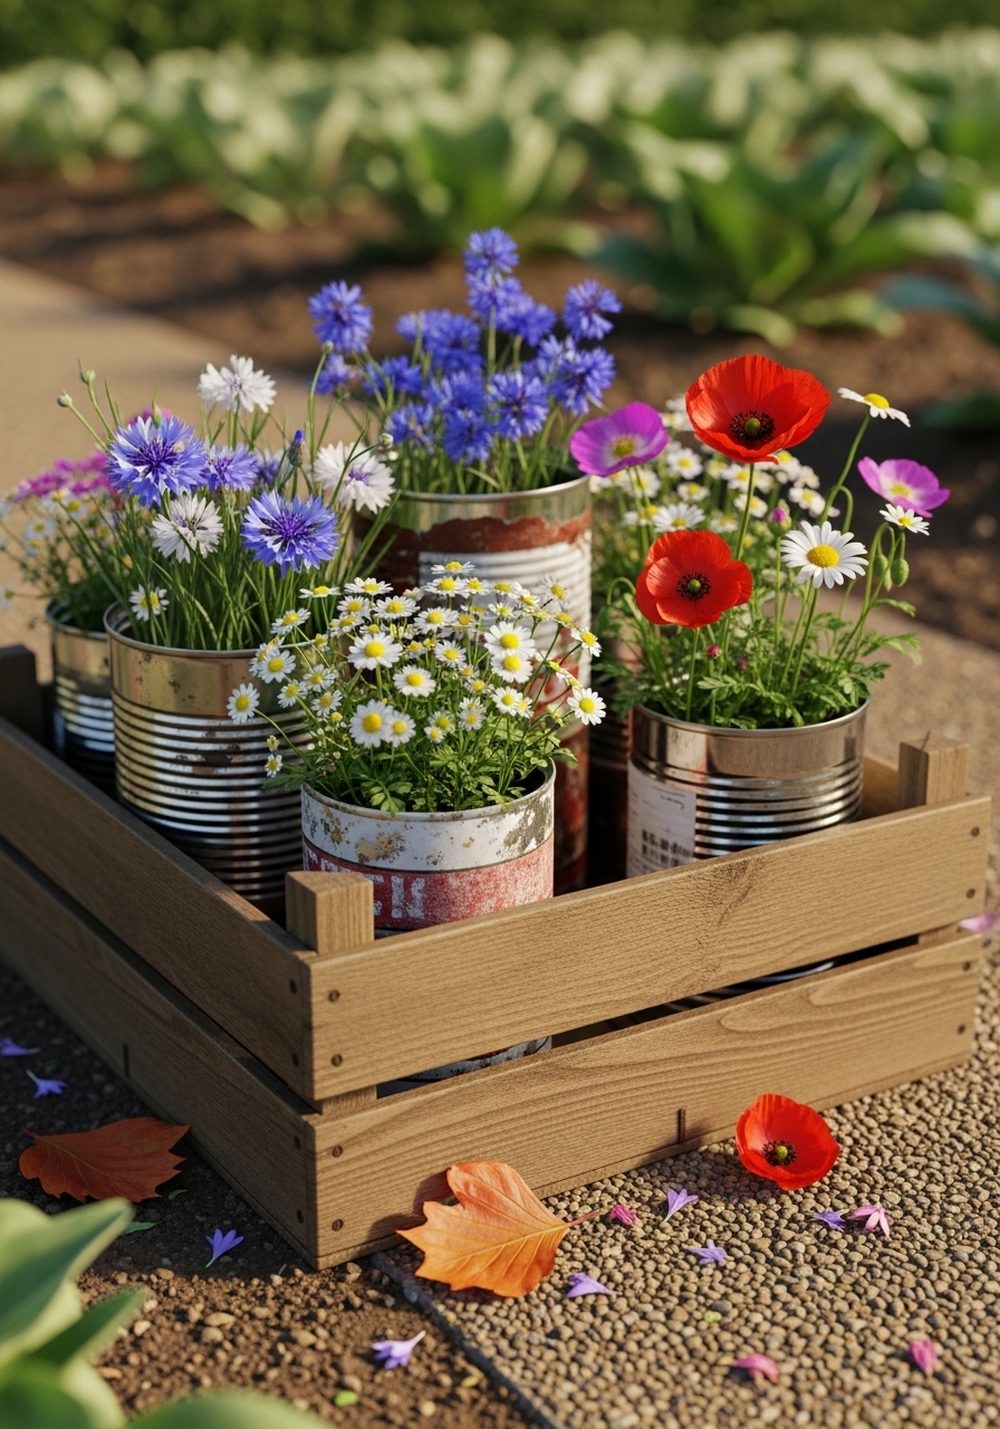
Create a portable mini-meadow by grouping tin cans inside a wooden crate. Leave some cans in their natural metal or lightly sand them for a distressed look. Fill each one with potting mix and sow a different wildflower mix, or plant ready-grown seedlings. Nestle the cans tightly in an old crate, fruit box, or small wooden tray. The combination of mixed flowers and worn wood feels relaxed, rustic, and effortlessly pretty.
- Best For: Patio corners, beside a bench, or near a back door.
- Budget Tip: Use inexpensive mixed wildflower seeds for a full, varied display.
- Styling Idea: Choose a crate with printed sides or a faint logo for extra vintage character.
- Practical Note: Line the bottom of the crate with plastic or a tray to protect surfaces from drips.
5. Numbered Tin Can Stair Planters

If you have steps outside, turn them into a charming display with numbered tin cans. Paint cans in neutral shades like white, cream, or grey, then hand-paint or stencil numbers on the front. Fill each can with a compact plant and arrange them up the stairs in order. The numbers add a playful, slightly industrial touch, and the repetition of shapes and colors makes even simple flowers look stylish and deliberate.
- Best For: Garden steps, porch stairs, or low stone steps.
- Budget Tip: Use a single paint color for all cans and add numbers with a cheap black marker or stencil.
- Styling Idea: Pair bold numbers with simple white flowers for a crisp, Scandinavian-inspired look.
- Practical Note: Place heavier cans on lower steps to avoid tipping if bumped.
6. Punch-Hole Tin Can Lantern Planters

Combine soft candlelight and flowers with punch-hole lantern planters. Using a nail and hammer, carefully punch small patterns into clean tins (chill them with water inside first to help keep their shape). Paint if you like, then add a shallow layer of soil and small trailing flowers near the rim. Place a tealight or battery-powered candle in the center. At dusk, the light glows through the holes while leaves spill softly over the sides.
- Best For: Evening patios, outdoor dining tables, and garden gatherings.
- Budget Tip: Use battery tea lights to reuse these lanterns again and again without soot.
- Styling Idea: Punch simple stars, hearts, or random constellations for a whimsical, handmade feel.
- Practical Note: Keep open flames away from foliage if using real candles; trim plants regularly.
7. Vintage Label Tin Can Flower Row
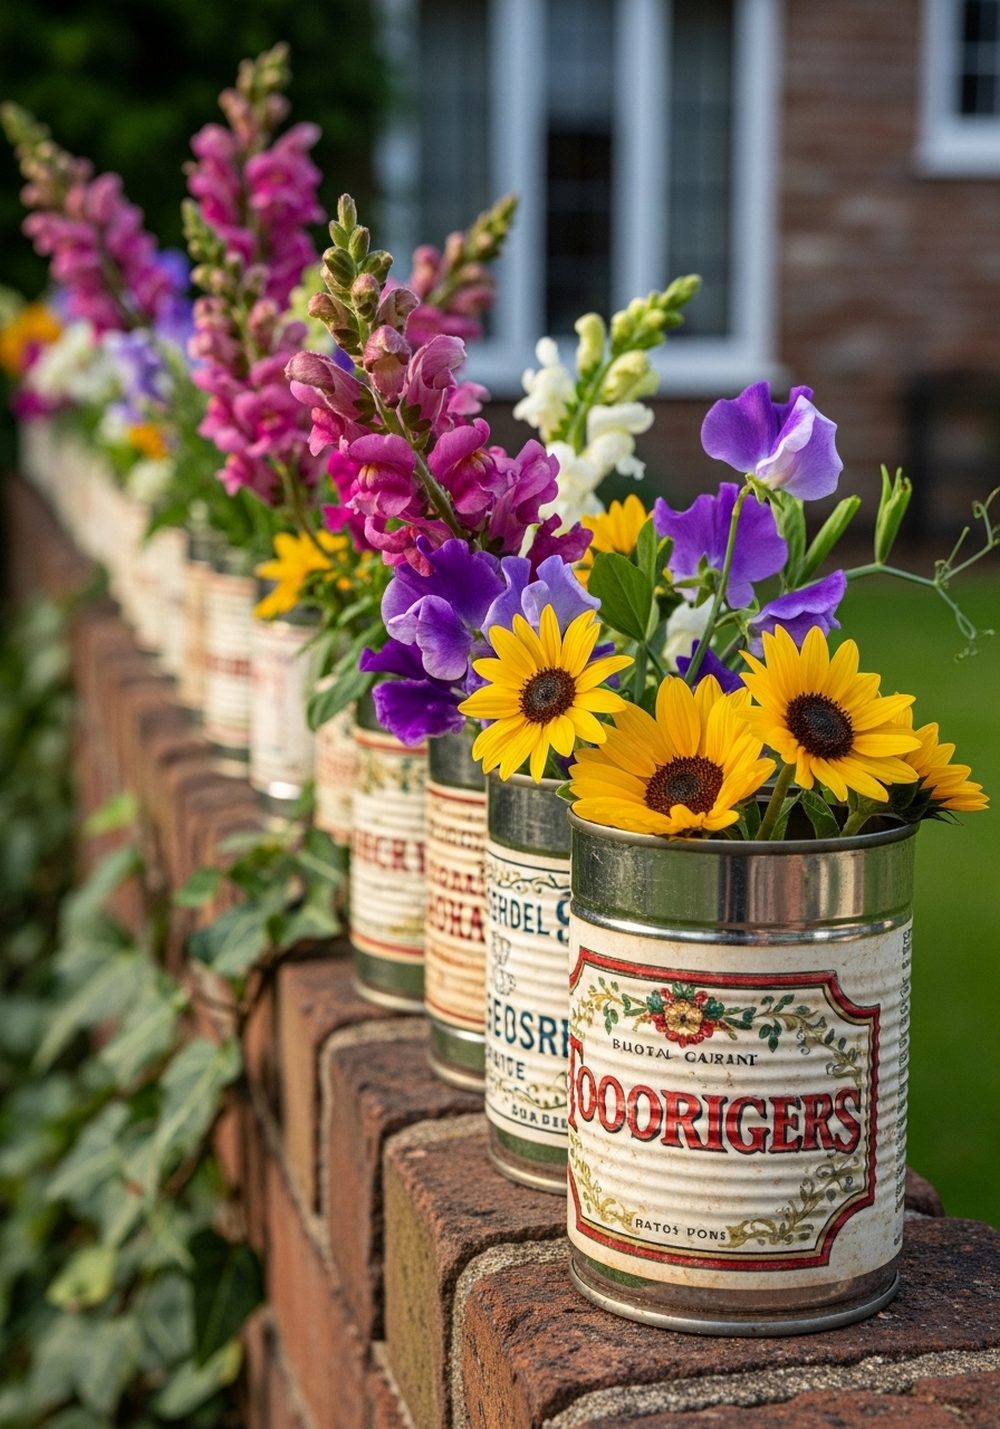
Give your planters an old-time feel by keeping or recreating vintage-style labels. Soak cans to remove modern labels, then glue on printed, aged-looking designs or carefully keep attractive originals. Fill the cans with informal cottage flowers like snapdragons, calendula, or mini sunflowers. Line them along a windowsill, wall, or narrow shelf outdoors. The mix of faded graphics, metal edges, and bright blooms looks nostalgic and charming, like something from a country market stall.
- Best For: Cottage-style gardens, farmhouse porches, or allotments.
- Budget Tip: Print labels at home on regular paper and “age” them with a tea stain.
- Styling Idea: Mix different label colors but stick to similar flower tones for balance.
- Care & Maintenance: Seal labels with a clear outdoor sealer if they’ll be exposed to rain.
8. Tiered Tin Can Tower Planter
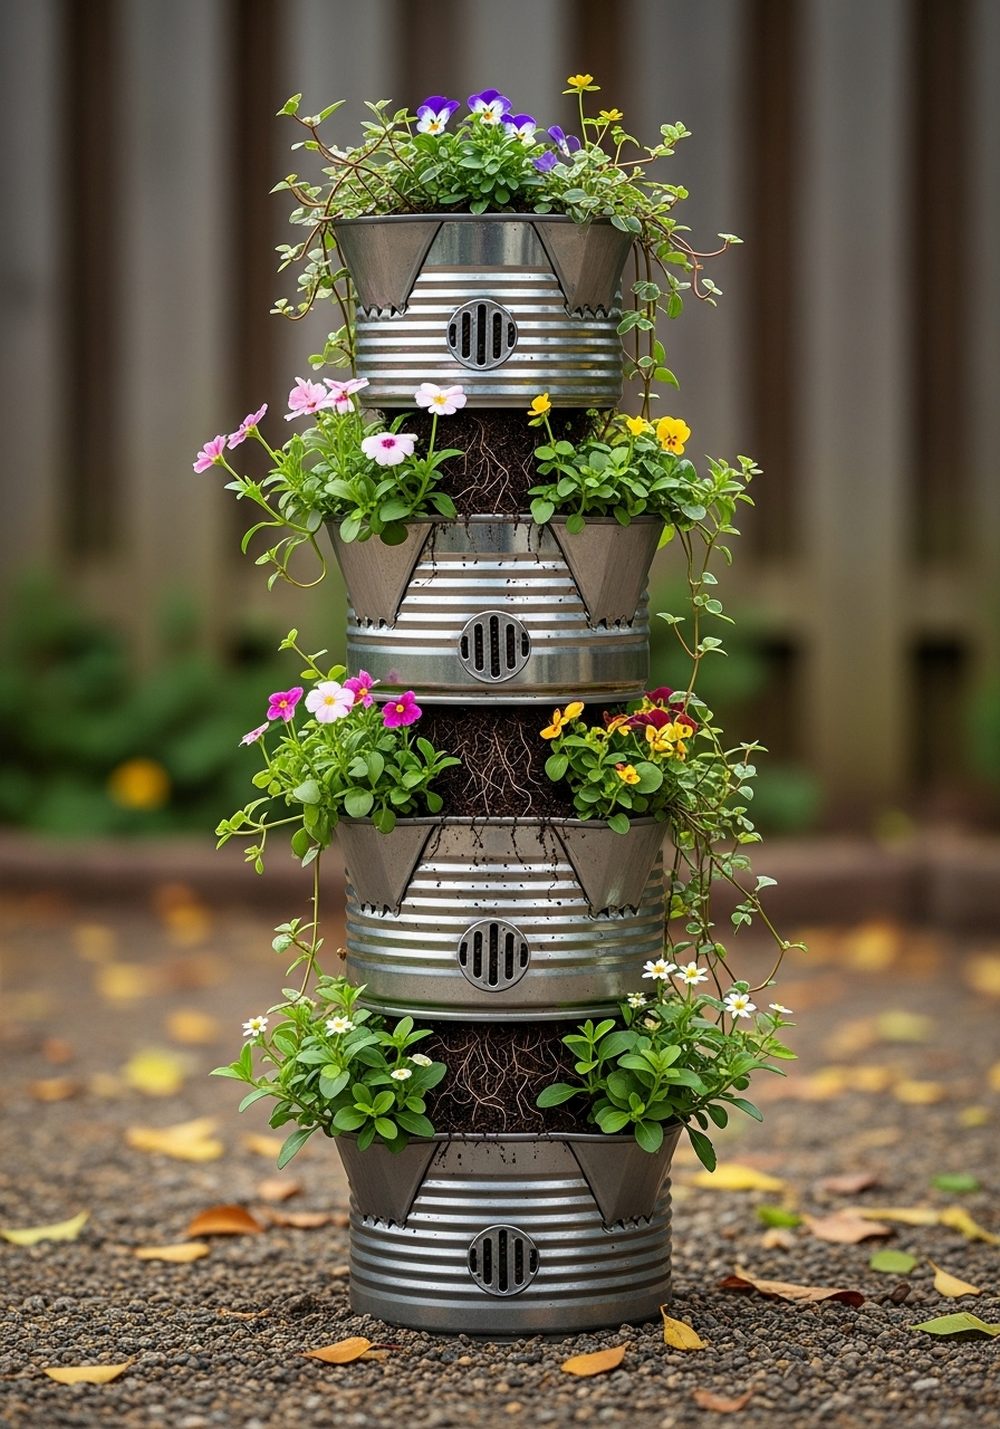
If you’re short on floor space, build a vertical tower out of tin cans. Stack and secure cans around a central pole or sturdy stake, with larger cans at the bottom and smaller ones higher up. Fill with soil and plant trailing and upright flowers so they spill over each layer. The result is a quirky, rustic column of color that draws the eye upwards and makes use of space that might otherwise be wasted.
- Best For: Small patios, narrow side yards, or as a focal point near a seating area.
- Budget Tip: Use a recycled metal rod or an old broom handle as the central support.
- Styling Idea: Alternate plain metal cans with painted ones for a playful patchwork effect.
- Practical Note: Anchor the base firmly and place the tower where it won’t be knocked over.
9. Rail-Hung Tin Can Balcony Planters

Balconies often have limited depth, so rail-hung tin cans are a clever way to add flowers without sacrificing floor space. Attach clips, hooks, or wire loops to your cans, then secure them along the balcony rail. Choose compact plants that won’t overwhelm the space, like dwarf marigolds, violas, or small trailing vines. From inside, you’ll see a band of color at eye level, and from outside, your balcony gains instant rustic charm.
- Best For: Apartment balconies and small decks.
- Budget Tip: Reuse simple hose clamps or wire to fix cans to the rail securely.
- Styling Idea: Stick to two or three can colors for a neat, coordinated look in a small space.
- Practical Note: Check building rules before attaching anything to balcony railings and ensure strong fixings.
10. Enamel-Style White Tin Can Rose Pots

Give humble tins a more refined, country enamel look with glossy white paint and a dark rim. After priming, paint the cans with bright white outdoor paint and carefully add a thin dark line around the lip. Plant miniature roses in soft pastel shades for a romantic effect. Group them on a bench, low table, or step for a simple, elegant display that still keeps the rustic charm of recycled metal and weathered wood together.
- Best For: Classic or cottage-style gardens, and anyone who likes a tidier rustic look.
- Budget Tip: Use a single tin of white exterior paint to cover many cans at once.
- Styling Idea: Pair these “enamel” cans with linen cushions, galvanized watering cans, and soft blankets.
- Care & Maintenance: Roses like deep watering and good drainage, so don’t skip the holes in the can bases.
Conclusion
Turning everyday tins into flower planters is an easy way to add rustic character, color, and charm to any outdoor space. With a little paint, twine, and imagination, your recycling bin becomes a source of beautiful decor. Start with one or two ideas that suit your space and budget, then slowly build a collection that feels personal and welcoming. Over time, these small, handmade touches can completely transform how your garden looks and feels.
FAQs
1. Do I need special tools to make tin can planters?
Not really. For most projects, you just need a hammer and nail or a simple drill for drainage holes, plus basic paint and glue. A pair of pliers can help flatten sharp edges. Everything else—like twine, labels, or hooks—can usually be found cheaply at hardware or craft shops.
2. How can I make tin can planters safe for renters and balconies?
Focus on non-permanent fixings. Use clips, hooks, or wire that wrap around railings instead of screws. Choose lightweight cans and smaller plants so nothing is too heavy. Place drip trays or saucers under indoor-adjacent cans to protect floors and always check your building’s rules before hanging anything outside.
3. Will tin can planters rust or damage quickly outdoors?
Tin cans will slowly rust over time, but that often adds to the rustic charm. To slow it down, prime and paint the cans with outdoor metal paint, especially on the outside. Avoid letting them sit in standing water and refresh paint every year or two if you prefer a cleaner look.
4. What flowers work best in small tin cans?
Choose compact or dwarf varieties that don’t need deep roots. Good options include pansies, violas, marigolds, small petunias, lobelia, and mini roses. Herbs like thyme, chives, and basil also do well. Just remember that small containers dry out faster, so check moisture more often in hot weather.
5. Are tin can planters okay for plants without harming them?
Yes, as long as you provide drainage and don’t let the cans overheat in full sun. Always drill drainage holes, add a thin layer of gravel or pebbles at the bottom, and use quality potting mix. In very hot climates, move metal planters to partial shade so roots don’t get too warm.
6. How can I decorate tin cans on a very small budget?
Keep it simple. Use leftover paint, twine from the hardware drawer, or scrap fabric strips to wrap the cans. Handwrite labels on cardboard or wooden offcuts. Start with just two or three cans and add more as you collect them. The charm comes from the handmade, mismatched look, not from expensive materials.